# Main View Overview
### Main sections
There are three different main sections on SEO Neo. The **main menu** where the user can navigate between software sections/screens. On the image below, main menu is located on the left section of the software. This can change from software settings. The **account menu**, where you can find information find important links, login/logout from your account and export Debug info to get better support. On screen center you can see **software screen**. This is where all the magic happens!
### Main menu
On the left side of the software (default settings) you can find the main menu of SEO Neo. From this menu you can navigate between all main sections. If you ever find yourself lost within a section you can always use main toolbar to go back on any main section.
Main menu (default layout setting)
You can also collapse side menu by clicking the top-right arrow button as shown on image below.
Collapse main menu button
{% hint style="info" %}
You can also change main menu position and move it to the top section from settings.\
**Settings > Visual Settings > Layout**
{% endhint %}
Main menu (top layout setting)
Example: Changing Visual Settings
### Account menu
This menu is located on the top-right of the software (account/profile icon). From this menu the user can visit SEO Neo's website, open documentation, check for an update and check his membership. From account menu you can also export [**Debug Report**](/additional-information/faqs/debug-report).
Account menu
### Return to Dashboard (SEO Neo Logo)
If you click on SEO Neo logo, you will return to main software view (dashboard). You can use this as an alternative way to navigate back to main dashboard view.
### Change Language (UI)
SEO Neo is a multilingual application and by default it's UI (user interface) language is in **English language.** Except from English, SEO Neo supports three more languages including **Spanish, French** and **Vietnamese**.
To change between different UI languages, click on the flag located on the top-right section and choose your language.
### Getting Started With SEO Neo
If you are **a beginner** in SEO Neo, it is recommended to understand some basic terms and concepts of the software. To do so, you can [**watch our Fundamentals**](/video-tutorials/fundamentals) video series from this documentation or [**visit our official Youtube Channel**](https://www.youtube.com/watch?v=E-rS94B5_MM\&list=PLalESEO7XMliindhpQ5r3-vpYoLB2jtX9). This video series will cover some basic concepts regarding: accounts, account templates, content buckets, diagrams etc.
After getting familiar with SEO Neo terms and concepts, you can read [**our beginners tutorial on how to setup your first campaign**](/tutorials/creating-your-1st-campaign).
# Dashboard
Dashboard is SEO Neo's main screen which includes: basic software **notifications**, **what's new** from latest update and total number of **campaigns, accounts and links** created.
### Notifications
Notifications inform the user about some basic settings required before the creation of any campaign.
Before creating your first campaign you will need to setup:
* At least 1 [**account bucket**](/documentation/account-buckets)
* At least 1 [**content bucket**](/documentation/content-buckets)
* At least 1 [**Captcha API**](/documentation/settings/third-party-api#captcha)
*
```
Dashboard notifications
```
The dashboard will keep you informed with some notification cards for each requirement. You will need to resolve these requirements before creating your first campaign.
To resolve each issue, you can click on each notification card "**Setup**".
After you complete the setup for each setting, the corresponding notification card will disappear.
### What's New
On What's New you can see information about all released version changes.
### Additional Information
On the lower right part of the dashboard you can find information about total number of campaign created, total number of links posted (from your completed campaigns) and information about number of account and account templates created.
# Account Buckets
### Video: Account Buckets Fundamentals
{% embed url="" %}
### What is an account bucket
An account bucket is a collection of accounts that SEO Neo creates and uses in order to run a campaign. Each account stores log-in information for each website. Each account bucket can have multiple accounts for different websites.
An account bucket is a collection of user accounts.
### How the software uses Account Buckets
When a campaign runs the software follows the following steps in order:
1. Load a website
2. Create/register an account (if there isn't any)
3. Confirm account (if required through email)
4. Log-in using the created account
5. Create new post based on campaign settings (account buckets, etc.)
{% hint style="info" %}
In step (2) we see that the software creates an account for a specific website. After the account registration SEO NEO stores account credentials (user name and password) into the account bucket.
{% endhint %}
An account bucket can store multiple accounts for multiple websites. This means that if a user created an account bucket named "*my\_account\_bucket*" this bucket can contains hundreds of accounts created after a completed campaign.
### What's the point of multiple account presets?
So what's the point of having different account presets, if an account bucket can store unlimited accounts? The answer is very simple and can be better be explained with the following example.
SEO NEO has a simple rule with account buckets. If there is an account already created for a website, SEO NEO will not try to create a new one, but it will use that account to sign-in and create a post on that account. So lets review the campaign steps again, but this time we will assume that the user has has selected an old account bucket (that has been already been used on a campaign before).
1. Load a website
2. If there is an account preset, use credentials and sign-in
3. Create new post based on campaign settings (account buckets, etc.)
> SEO NEO *has a simple rule with account buckets. If there is an account already created for a website, the software will not try to create a new one*
So now we see that SEO NEO detected that we have a previous account preset located into the account bucket and just loaded, used its credentials and signed in.
Using the same accounts on a campaign, makes SEO NEO create another post on the same blog. If you use 10 different account buckets for 10 different link groups, the software will create 10 accounts and 10 different blogs. But if you use 1 account bucket for 10 different link groups, the software will sign-in into those accounts and will create posts on those blogs already existing.
> *Using the same accounts on a campaign, makes* SEO NEO *create another post on the same blog*
### An example
The user selects an account bucket for the first time on a campaign. SEO NEO creates two blogs and a post for each blog.
Using account bucket 1st time
The user uses the same account bucket on another campaign. SEO NEO creates a new post for Blog A and a new post for Blog B.
Reusing the same account bucket
### How accounts are used
When a campaign runs it the account assigned for a specific site from selected bucket. If there is more than one active accounts (for the same site) the software will randomly choose between these accounts.
{% hint style="info" %}
If you use the same account bucket on multiple campaigns that run at the same time may brings undesired results. If you choose to do so, keep in mind that you don't know which task is using this account.
{% endhint %}
# Creating Account Buckets
Creating an account bucket is very simple:
1\) Navigate on "**Accounts**" > "**Account Buckets**"
2\) Click on "**Create**", type a name for your bucket, and you are ready to go.
{% hint style="info" %}
When you first create an account bucket, the bucket is empty of accounts. If you use this empty bucket on a campaign, SEO Neo will add registered accounts into this account bucket.
{% endhint %}
Example: create an Account Bucket
# Managing Account Buckets
### Account buckets delete
If you want to delete an account bucket, hover over the bucket from the table and click "**Delete**". This will remove the bucket and will also delete all accounts included into that bucket.
{% hint style="info" %}
Deleting an account bucket, will also delete all accounts that are stored inside this bucket.
{% endhint %}
To delete multiple account buckets:
1\) Select multiple buckets using checkboxes.
2\) Click "**Delete**" from burger menu on top-right.
### Account buckets rename
If you want to rename an account bucket, hover over the bucket from the table and click "**Rename**". When you rename a bucket that is already used inside a campaign, the bucket name will also change from these campaigns.
Hovering any any row on the table displays additional row buttons
### Clean Inactive Accounts
If you want to delete all inactive accounts for each website and keep only active accounts, you can save time by clicking on "**Clean Inactive Accounts**". This will do the cleaning automatically.
To do this, you can hover on any account bucket row, and click on "**Clean Inactive**" hover button.
# Managing accounts
### Accounts Screen Overview
On this screen you will find a table that displays all created accounts and some details for each account.
All accounts inside account bucket
Below is the list of available information for each account.
**Blog Address:** the blog address (URL) that this account is registered on.
**Username:** username of the account.
**Password:** password of the account.
**Email:** email used to register the account.
**Website:** website (domain) that this account is used.
**Active:** if an account is active, it will be used the next time you use the account bucket on your campaigns. If an account is not active, the account will not be used.
{% hint style="info" %}
When you are using an account bucket on a campaign and there is no active account for a website, a new account for this site is created automatically.
{% endhint %}
### Add account
1\) Click "**New Account**" to open account creation window.
2\) Fill all required account information.
Fill all account information like username, password, email etc.
{% hint style="info" %}
From "**Website**" you select for which website you want to use account information (**username, password, email**). Each account is linked to one website.
{% endhint %}
{% hint style="info" %}
If you disable "**Account active**" then the account will not be used on a campaign. This is useful when you want to have several accounts inside an account bucket but you only want to use certain ones on specific situations.
{% endhint %}
### Delete Account
You can hover any account (row from table) from the table and click "**Delete**" or you can select multiple accounts (using check boxes on the left) and delete all selected accounts.
Hover button "Delete" appears while you hover your mouse over a row on table
# Account Templates
### Video: Account Templates Fundamentals
{% embed url="" %}
### Introduction
An account template is a template that is used as a guideline on how SEO Neo creates new accounts.
When a new account is created (registration), SEO Neo will need information on how to register this account. This information includes:
**Email details**: (username, password, mail server, SSL etc.)
**Account creation details**: the username and password format that will be used to register the new account. This information uses [spintax format](/additional-information/glossary/spintax-format) to create different variations.
Account template is a templates on how accounts are created.
### Account Templates Window Overview
Main sections overview to manage your Account Templates
Account Templates main screen is divided into three sections.
1\) **Account templates list** : where all your account templates files are listed and stored. You can create, delete and rename your account templates from here.
2\) **Template Emails**: you can manage all emails for selected account template from here.
3\) **Template Details**: here you enter username and password for selected account template.
# Creating Account Template
Creating an account template is very easy. You just need to give a name for the account template.
* Click "**Accounts**" on main menu, to expand the menu.
* Click "**Templates**".
* Click "**Create Template**".
* Give a name to your template and click "**Create**"
### Default Account Templates
You can add as many e-mails as you want inside each account template. If you don't want to create a new account template from scratch, you can use "Default" account template. This template has only one e-mail entry which is SEO Neo Email.
Feel free to use this account template, or even edit it by adding your own emails in it.
{% hint style="info" %}
Although SEO Neo comes with its own email (that gets updated regularly) it is better to use your own emails to increase success rate.
{% endhint %}
# Managing emails
As we mentioned on the previous section, an account template is like a preset where you keep all details on which information SEO Neo will use in order to create an account. In order for the software to create an account it needs valid emails and a template to generate usernames and passwords. In this section we will explain how you can manage emails for each account template.
### Add email
You can add or import your own emails or you can even use default built-in email. Built-in emails contains several emails that our team maintains and renews often in order to keep it as "fresh" as possible. This is the free option for a user who doesn't have his own mail but using your own emails gives better results.
{% hint style="info" %}
It is preferred to use Gmails (multiple emails if possible) for better success rate.
{% endhint %}
{% hint style="warning" %}
When you add a Gmail and fill its credentials (username and password) the password you have to use is the "**App Password**". For more information on how to use App Password you can [**view this page**](https://support.google.com/accounts/answer/185833?hl=en).
{% endhint %}
To add your email:
1\) Click on "**Create**" button on email section.
2\) Fill all required email information on the pop-up window and click "**Create Email**" to save your email.
You will need to fill all required information before clicking "**Create Email**" as shown in the example below.
Example of a Gmail
{% hint style="info" %}
If you use Gmail, for password you will need to use "APP Password".
{% endhint %}
### Edit email
You can edit your email details by clicking "**Edit**". You can edit all email credentials as the user is prompted with the same window form as "create email".
{% hint style="info" %}
If you edit your account template or email when it is used by a running campaign, this will take effect when this template is used on a new campaign. Changes don't take effect in real time when a campaign runs.
{% endhint %}
### Delete email
To delete an email hover over an email and click "**Delete**" hover button, or you can select (checkbox) multiple emails and click burger button to delete multiple emails at once.
Use hover "Delete" button to delete a single email.
Select multiple emails using checkboxes and then click "Delete" from hamburger button
### Test email
You can test emails that you've added on your your template by clicking "**Test**" from hover buttons, or you can select multiple emails with checkbox and then click "**Test**" from hamburger menu.
Use hover "Test" button to test a single email.
Select multiple emails using checkboxes and then click "Test" from hamburger button
{% hint style="info" %}
Test process is testing if the email is valid (using email credentials) it cannot test if the mail is banned or best fit for your campaign.
{% endhint %}
You can also watch our video tutorial on how to use Gmails on your account templates:
{% embed url="" %}
# How to import emails
When you create an account template you can import emails that you already own or you can import emails that are included on other account templates.
### Import from other template
If you already have some emails stored on other templates and you want to import them:
1\) Click "**Import**" and select "**Import from template**"
2\) Select the template(s) (using checkbox) where you want to import emails from. Then click "**Import**" to import emails from selected template(s).
### Import from text file
1\) Click "**Import**" and select "**Import from file**".
2\) Select email format of your text file. SEO Neo will open your OS Open File dialogue from where you can navigate on your file system and select text files where you have your emails saved.
{% hint style="info" %}
You can import emails only from text files
{% endhint %}
In order for "Import from files" to work, you need to keep your emails into text files, in the following formats:
| Supported mail formats in text files |
| --------------------------------------------------------------------------------------------- |
| \ : \ : \ : \ : \ : <1 = SSL \| 2 = NO SSL> |
| \ : \ : \ : \ : <1 = SSL \| 2 = NO SSL> |
To better illustrate how above fields are related into email creation form see the example picture below:
Text format fields relation with GUI
# Email order
Email order - as the name implies - is the order the software will use from the account template while the campaign is trying to register new accounts. Example: if you have 3 mails, the software will use those 3 mails one-by-one.
{% hint style="info" %}
If you enable "**Random Email Order**", SEO Neo **will not** take account the order of the emails listed but will use a random email from the template each time needed.
{% endhint %}
# Content Buckets
### Video: Content Bucket Fundamentals
{% embed url="" %}
### Introduction
Content bucket is a collection different types of content that SEO Neo uses in order to create posts in different websites. A content bucket can include different content types including:
* Articles
* Short Descriptions
* Bios
* Rich Content (image URLs, video URLs, embedded code)
* Blog Details
* Comments
Each content bucket can include many entries and different types of content (like images, videos, text etc.)
{% hint style="info" %}
Each content bucket contains multiple articles, text bodies, titles, rich content (images, videos, embedded code) entries. This makes campaign creation easier to manage and faster to create.
{% endhint %}
### Video - Understanding Content Buckets
{% embed url="" %}
# Creating a content bucket
To create a new content bucket:
1\) Navigate to Content Bucket from main menu
\[image]
2\) Click "**New Bucket**"
3\) Enter a name for your bucket and click "**Create**"
Now you have a new content bucket. Keep in mind that this content bucket is still empty, which means there is no content inside the bucket. To use this bucket on your campaigns you will need to fill it with some content like articles, image urls etc.
# Adding content
When you create a new content bucket, it's content is empty. In order to fill it with content, you will need to edit the bucket, by clicking "**Edit**" on hover button.
There are three different ways to add content:
**1) Import**
You can import content from file(s) or other content bucket that already includes content.
**2) Generate**
You can generate content using our free built-in builders, or 3rd party APIs.
**3) Add**
You can add content manually.
Use import, Generate and Add to insert content into content bucket.
***
### Adding different content types
Each content bucket can have multiple content entries from different [**content type**](broken://pages/OmKHQZG4lxYO5JpegFS1). You can navigate on different content categories and add content on each category separately.
Navigate between content types using tabs.
In the following example we will add a new article inside our content bucket.
1\) Click "**Article**" on content type tab.
2\) Click "**Add Article**" to open article form.
3\) Insert all required text on article editor and click "**Save**". Each content type has it's own editor depending on required data. In this example we add an article so we see the full article editor.
{% hint style="info" %}
Different content types require different data entry. Refer to [**content types**](broken://pages/OmKHQZG4lxYO5JpegFS1) for more information.
{% endhint %}
***
### Article Editor
Article editor is where you can create and edit articles that which are stored inside content buckets. Other content types like short descriptions, bios etc. have only a simple text form but articles can include rich content and formatted text.
{% hint style="info" %}
Where you write article title and article body, it is preferred to use [**spintax format**](/additional-information/glossary/spintax-format), which makes you title to include different variations. If you don't use spintax format, your article will get posted as it is.
{% endhint %}
Below we can see the basic section of article editor.
#### 1) Article Title
This is where you put your article title. You can also insert default spun title by clicking "**Default Value**".
#### 2) Short Codes
Short codes are special tags that you insert inside article body. These tags sets specific positions/placements where next keyword will be placed.
{% hint style="info" %}
If the next keyword type on the campaign is not the same as short code keyword type, the short code gets ignored.
{% endhint %}
Except from keyword types, short codes can also be image, video, or embedded code.
If you don't include any short code, keywords will be places at random positions (defined from your campaign campaign settings). If you include short codes, you set specific positions inside article body where you want keywords to appear.
{% hint style="info" %}
Using "**any keyword**" will randomly select an available keyword from your campaign.
{% endhint %}
#### 3) Article HTML Body
This is where you write your article body. You can enter text and HTML code. The default value in the window is **\
\
**, because at least a paragraph is needed. Even if you delete \
tags in the article editor, SEO Neo will add it on the fly.
#### 4) Spin
You can spin your article using one of the available spinners. Spinning your article will take your article text and create a new one in [**spintax format**](/additional-information/glossary/spintax-format). This is highly recommended because it creates different variations from the same article.
To spin your article, select one of the available spinners and then click "**Spin**".
Click on menu to select a spinner.
SEO Neo includes a free spinner, but you can also use any 3rd-party supported spinner. To use a 3rd-party spinner, you will need to set your credentials (API keys etc.) from [**spinner settings**](/documentation/settings/third-party-api#spinner)**.**
Available spinners
Below is an example of a basic article text that gets "spinned" using SEO Neo's built-in free spinner. As you can see, although the original text was very small and simple, after spinning, we got many different variations.
| Original article text | Spintax format generated from free spinner |
| ----------------------------------------- | --------------------------------------------------------------------------------------------------------------------------------------------------------------------------------------------------------------------------------- |
| this is a very small text article example | this {is a very\|is an extremely\|is a really} {small\|little\|tiny\|modest\|smaller\|compact} {text\|textual content} {article\|post\|write-up\|report\|short article\|posting} {example\|instance\|illustration\|case in point} |
#### 5) Preview Article
When you want to check how your article will look like, you can see "**Article Preview**" window on the right section of the editor. This preview will also preview HTML code preview, so you can easily check your text and HTML. In order to update and preview any changes in the **Article HTML body**, you have to click on "**Update Preview**" button first.
Click "Update Review" button on the top right section to preview any changes
{% hint style="info" %}
Whenever you make any changes, click "**Update Preview**" button to update and render the preview of the article.
{% endhint %}
### Adding Short Description
Adding a short description is the same like adding an article. The difference is that short description is just plain text and a title.
Short descriptions don't have full article editor because the user is only required to add a description title and a small description (recommended 255 characters long).
### Adding Bio
Adding bio is the same like adding an article. The difference is that short description is just plain text and a title.
Bios don't have full article editor because the user is only required to add a small bio title and a small bio text (recommended 255 characters long).
***
### Adding Rich Content
As the name implies, rich content includes rich content that can be included in your articles. Articles can include **images**, **videos** and **embeded code**.
You can add rich content by clicking "**Rich Content**" and then "**Add Rich Content**". A drop-menu will appear to select what type of rich content you want to add.
Select what type of rich content you want to add from drop-menu.
After selecting rich content type, a form appears where you can enter URLs. You can enter multiple URLs (one per line) to save time.
Rich content is injected inside your article at a random position. If you want to specify a specific position within your article for your images, videos or your embedded code, you can change "**Position in Article**" option.
You can choose top, bottom and random position.
{% hint style="info" %}
It is highly recommended to include rich content on your content buckets. This increases SEO value of your posted articles, as search engines favor rich-content articles that include images, videos etc.
{% endhint %}
***
### Scraping Rich Content
If you don't any rich content URLs but you still need to find some for your content bucket, SEO Neo has a free built-in scraper.
To use the scraper:
1\) Click "**Scrape Rich Content**"
2\) Select what type of content you want to scrape "**images** or **videos**".
3\) Enter keyword you want SEO Neo to use to scrape content.
4\) Enter the number of URLs you want to scrape (maximum 20).
5\) Click "**Scrape Images/Videos**" and SEO Neo will fetch URLs for you, based on given keywords.
***
### Adding Blog Details
Blog details are include "**Blog Name**" and "**Blog Subdomain**" that will be used during blog creation.
Both blog name and blog subdomain support spintax format to include variations.
You can also click on "**Default Value**" to use built-in SEO Neo's default blog names and subdomains which come in spintax format.
You can always use "Default Value" buttons to fetch pre-defined Blog Names or Blog Sub-domains
# Import \ Export content
If you already have content on files or in other content buckets, you can use "Import" to fetch content accordingly. There are different options for importing content depending on content type.
For Articles and Bios you can import:
* From file(s)
* From a file directory
* From [**other content bucket**](#import-from-other-bucket).
For Blog Details you can **import only** from other buckets.
### Import from other bucket
If you choose to import content from other bucket, you will see a form that shows all other buckets. You can select multiple buckets and import content from from them.
Selected only "2nd bucket" to import articles from.
Keep in mind that you import only same-type content from other buckets.
Example: when you are in "**Articles**" section, you will import only articles from selected bucket.
{% hint style="info" %}
Content buckets without content inside them, they will not be displayed when you use "**Import from other buckets**".
{% endhint %}
"**Import from other buckets**" form displays information about other buckets and the amount of content it has for each content type. In the example below, we see:
* "**1st bucket**" has: 5 articles, 1 bio and 2 images.
* "**2nd bucket**" has: 8 articles and 1 bio.
### Import\Export Rich Content
Import content also works for rich content. You can import from files, folder or another bucket. Importing rich content from file(s) or a folder for rich content is used to import rich content from a previous SEO Neo export. When you export your rich content in SEO Neo, it will export .txt file entries for each individual rich content entry, so you use exported files to import them back again in SEO Neo.
{% hint style="info" %}
Rich content import (from file(s) or a folder) is used to import rich content from a previous SEO Neo export.
For example, when exporting your image URLs from a content bucket, SEO Neo will export individual text files (with href URLs) and not the image themselves (not image files).
You can keep these files in a folder and use them to import your image URLs back on another SEO Neo content bucket.
{% endhint %}
# Generate content
Except from adding content manually and importing content, SEO Neo can also help you generate content for your content buckets.
To generate content you can use SEO Neo's built-in (free) **Article Builder**, **Ezine Articles** or any [**3rd-party content source API service**](/documentation/settings/third-party-api#content-source).
To generate content:
**\[inside a content bucket]** > Click on "**Generate**"
Each content type supports different content generators. For **Articles** and **Short Descriptions** you can use all generators but on other content types you can only use Open AI or even the built-in scraper.
Below is the list of supported content generators according to content type:
Content Type
Article Builder
Article Forge
Open AI
Scrapper
Articles
true
true
true
false
Short Descriptions
true
true
true
false
Bios
false
false
true
false
Rich Content
false
false
false
true
Comments
false
false
true
false
Blog Details
false
false
false
false
***
### Using Article Builder
You can use the built-in free Article Builder to generate content based on user input. You can choose article **Category**, **Sub-Category**, **Word Count** and **Number of Article** you want to generate.
You can also choose to spin generated articles (create variations using [**spintax format**](/additional-information/glossary/spintax-format)). To spin generated content you can use the **free** **built-in spinner** or one of the supported [**3rd-party spinners**](/documentation/settings/third-party-api#spinner).
***
### Scrape Rich Content
SEO Neo comes also with rich content scrapper. The scrapper fetches URLs based on given keyword. SEO Neo can scrape **image** and **video** URLS.
Selecting what type of rich content you want to scrape
{% hint style="info" %}
Rich content is very important for content buckets that are used on campaigns with groups that support posts with rich content (example: Web 2.0 Blogs)
{% endhint %}
Watch a video below on how to add rich content and how to use SEO Neo's built-in scraper:
{% embed url="" %}
# Content Bucket Tags
After using SEO Neo for some time, you might accumulate a large number of content buckets. Managing, deleting, or selecting specific buckets for your campaigns can initially seem challenging. This is where the functionality of **content bucket tags** becomes invaluable.
### How Content Bucket Tags Work
You can create and assign different content bucket tags on yours content buckets to help you manage them more easily. For example, you could create tags based on your niche, or clients so you could find and select them easier when you create a campaign.
### Creating Content Bucket Tags
To create your custom content bucket tags, click on the tag icon on content buckets window.
Use "tag" button to open tag creation modal window
A new modal window will appear where you can create your own tags.
You can give your tags **Name** and **Color** to identify them easier later.
Choose name and color for your tags
When you finish creating you tags you can close the modal window to return on content buckets window. You can also use Search or multiple select tags to manage them using burger button.
In this example we have created three different tags with different colors for each one.
Three different tags example
***
### Assigning Content Bucket Tags
To assign a tag on your content buckets, use the **plus** "**+**" icon. Content buckets that dont have any tag assigned will be labeled as "**No Tags**".
After clicking plus icon, a new modal window will appear where you can select and assign different tags for selected content bucket. To choose your tags, use the drop-down menu.
You can select more than one tag for each of your content bucket. This is very helpful, especially when you have buckets that are included in multiple niches or sub-categories.
In case you have forgot to create a specific tags, you can use the **plus "+"** button to create more tags, without leaving this window.
When you finish selecting your tags for your bucket, click on "**Add Tags To Bucket**" to assign selected tags.
{% hint style="warning" %}
You can assign **up to five (5)** tags for each content bucket.
{% endhint %}
In this example we have set some tags for content buckets for "**real estate**" and "**cars**" niche. We have also set an addition common tag "**affiliates**" for both niches (will will use this on an example later).
***
### Using Content Bucket Tags
Now that we have assigned our tags on different content buckets, it is much easier to identify our buckets, but it is much easier to filter them.
In the example below, we use tag filter to show only "**real estate**" tags.
In the previous example we have selected "real estate" tags as a filter. This includes content buckets that also have another tag "affiliate". If we want to use filter with exact much results we can use the check box inside the filter field.
In this example we have selected "**real estate**" and "**affiliate**s" tags and we have also enabled "**exact match**". This will make SEO Neo to show only content buckets that have **both tag**s.
Using "exact match" tag filter.
### Using Tags on Campaign Creation
When you create your campaign, you can use tags to find or filter your selection for content buckets. This makes the whole content bucket selection much faster and easier.
# Diagram Editor
{% embed url="" %}
### Diagram Editor overview
As the name implies, the diagram editor, is an editor you can use to create your own strategy diagrams. Although SEO Neo comes with a number of preinstalled strategy diagrams included, If you want to [create your own](/documentation/diagram-editor/creating-a-custom-diagram) custom diagram you can do it using the diagram Diagram Editor.
Diagram editor sections overview
1. **File menu**: Create or select a diagram
2. **Diagram area**: where you create or edit your diagrams
3. **Link group list**: Drag and drop link group types into diagram to add new groups
4. **Toolbar**: Save, delete diagram. You can also give your diagram a small description.
5. **Toolbar**: Different diagram tools like: zoom-in, zoom-out, fit-view, lock diagram etc.
### What is a diagram ?
A diagram has three basic elements: **money site, link groups** and **connections**.
**Link groups** are groups of tasks that your campaign has. Tasks are separated by groups in order to differentiate types of sites.
**Connections** are lines within a diagram that connect link groups with money site or with other link groups.
**Money site** is the list of URLs your campaign is targeting.
Different parts of a diagram
When you **connect a link group with your money site**, this means that your money site URLs will take backlinks from these groups.
When you **connect a link group with another link group**, you create a flow between these groups. This means that after the first link group finishes, it gives all submitted URLs (created from posts etc.) to the other link group.
Flow between link groups. When group1 finishes, it gives its submitted URLs on group2. Then group2 gives links to group_3
Creating a "*more complex*" makes your campaign seem more "natural". Its better for your link profile to have more than 1 tiers.
# Link group types
A diagram can include **many links groups** but also many different **link group types**.
SEO Neo supports hundreds of different websites that it can post. It would be difficult to have all websites in one group type because each group type is for different website type.
For example **Web 2.0 Blogs** group type, includes all web 2.0 websites (sites that support rich content, like images, video URLs, embed coded etc.)
Another group type is **URL Shortener**, which takes links and creates short URL format for these links.
Most diagrams consist of different link groups and different
{% hint style="info" %}
There are different link group types because there are different types of tasks. For example, Web 2.0 link groups create a blog post, a PDF Upload post a PDF, a URL Shortener creates a short URL etc...
{% endhint %}
Below is the list for all supported link group types SEO Neo supports:
| Link Group Types |
| ------------------------------- |
| Web 2.0 Blogs |
| Authority Links |
| Web 2.0 Profiles |
| Social Bookmarking |
| Social Bookmarking HQ |
| Wiki |
| Cloud Blogs **(NEW)** |
| Profile Links |
| PDF Upload |
| URL Shorteners |
| Self Hosted Wordpress **(NEW)** |
| Blog Comments **(NEW)** |
Each link group types uses different content from **content buckets.** Mixing different group types together in different layers can make your link profile feel "more natural" to search engines.
# Groups relationships
SEO Neo introduces an new way of displaying diagrams. The new diagram form is more compact and its more versatile if you understand they way it works.
A group (link group) can be connected with another groups that are located below or above them. Groups below of them are called **children** and groups above them are called **parents**.
{% hint style="info" %}
A diagram a group can have **multiple children** but also **multiple parents**.
{% endhint %}
A group with multiple children is a very straightforward idea but a group with multiple parents may be confusing at first. Below we will explain how this works.
### Understanding multiple parents
A group with multiple parents is like being multiple groups. This means that if you have a group*A* connected on two parents, the result is like having two groups inside group\_A.
On the example below, on the left we see how diagram looks like and on the right side we see how diagram is really like under the hood.
On the example, **group\_4** seems like a single group, but because it has two parents, in reality its two groups (**group\_4a** *and* **group\_4b**). These two groups are **completely different** groups.
Left side: how diagram looks. Right side: how diagram is under the hood.
{% hint style="info" %}
As a rule of thumb, if a group has **N** number of parents, then this group has **N** instances under the hood.
{% endhint %}
This may seem more complex to understand as a concept but makes a diagram much more compact (you need less groups to describe a much bigger diagram).
## Sibling Groups
Sibling groups, are **merged group** **which** **share the same parent**. In our previous example **group\_4** contains **group\_4a** and **group\_4b**. These two groups are called sibling groups.
When creating your campaign using diagrams with sibling groups, you can enable "**Hide Sibling Groups**" option to make campaign creation easier. This option - when enabled - **hides sibling groups** and let user **add details for one group** while SEO Neo will use the same data for the other group.
This is a much easier and faster approach of creating a campaign that includes sibling groups.
For more information on using sibling groups [**read this section**](/documentation/features/sibling-groups).
# Creating a custom diagram
### Creating a new diagram
To create a custom diagram, click on "**Diagram Editor**" **(1)** on main menu and then click "**Create**" **(2)**.
Then give your diagram a name and click "**Create**".
### Add link groups into diagram
To place new link groups, just drag and drop groups from groups list into diagram area.
### Connecting connections between groups
To **create a link group**: drag and drop a group from link group list **(1)** into diagram area **(2)**.
To **create connection** between link groups:
1. Place mouse cursor over group handle, and while keeping the mouse button down, drag and hold.
2. You will see the connection line.
3. While keeping mouse down, place cursor over another groups handle and release mouse button. This will create a new connection between groups.
Click on group handle
Drag and drop connection
Place connection over other group, to create the connection
# Diagram Editor - Controls
### Basic Diagram Editor controls
On the lower right corner of diagram editor you can find a toolbar with some basic tools to help you when you are creating/editing your diagram.
Here is a small description of each tool functionality:
| Tool / Button | Description |
| ----------------------------------- | --------------------------------------------------------------------------------------------------------------------- |
| **Zoom in / zoom out** | diagram zoom |
| **Fit view** | automatically fits whole diagram on screen to fit whole view |
| **Lock \ Unlock diagram** | You can toggle diagram lock on/off. When you turn off lock, you cannot move any nodes or connection on diagram |
| **Align Horizontally \ Vertically** | You can select **multiple** link groups together and **align** selected groups in horizontal or vertical arrangement. |
| **Duplicate** | Duplicate selected groups including their conenctions. |
| **Delete** | deletes selected group nodes or selected connections (same as "**delete**" / "**backspace**" keys) |
### Selections
You can select select a **group** or a **connection** by clicking on them.
When you select a group, it will get highlighted as shown below.
Group node selection
When you select a connection it will get a dash-line highlight effect.
Selecting a connection
You can also select multiple groups using **Ctrl** (Windows) / **Command** (Mac) to move or delete them.
Multiple selection of groups
### Deleting groups & connections
To delete a group or a connection, select either a group or a connection and press "**delete**" or "**backspace**" on keyboard or use "**delete**" tool from toolbar.
# Diagram description
### Diagram Meta Data
A diagram description is a text created by the user to include essential information about the diagram. The text can be anything and its only intended to be used for reference.
To edit diagram meta data, click on "**Edit Meta Data**" on toolbar.
A new windows will open where you can enter a description for your diagram. You can also change your diagram name.
After entering your text, click on "**Save**" to save diagram meta data for current diagram.
# Deleting diagrams
When a user creates and saves a diagram it is stored inside SEO Neo internal data. If a user want to delete a diagram, he must do it from Diagram Editor.
To delete a a diagram:
1\) From **Diagram Editor**, select any diagram from the list.
2\) Click on "**Delete**" from toolbar.
{% hint style="info" %}
If you delete a diagram that has been used to create a campaign, your campaign will remain as it is. SEO Neo stores diagram information inside each campaign to prevent file corruption when the user deletes diagrams.
{% endhint %}
# Settings
From **Settings** screen you can change all global settings of the software. These are usually settings that don't change regularly from campaign to campaign.
These settings include: how the software submits posts, proxies to use for the campaigns, settings for cloud sites and visual settings.
There are five main sections/tabs inside **Settings**:
* [Submission](/documentation/settings/submission)
* [Proxies](/documentation/settings/proxies)
* [Third party API](/documentation/settings/third-party-api)
* [Cloud API Settings](/documentation/settings/cloud-api-settings)
* [Visual Settings](/documentation/settings/visual-settings)
# Submission
Here the user can change different settings regarding SEO Neo submission.
This menu can be found:
1\) Go to **Settings** (main side menu)
2\) Click on "**Submission**" tab
Submission settings include settings regarding how SEO Neo posting engine will behave while a campaign is running.
**HTTP Retries**: How many retries the software will do (software retries after a failed task step) on websites that work with HTTP POST method.
**Browser Retries**: How many retries the software will do (software retries after a failed task step) on websites that work with browser.
**Email verification delay**: how much time (in seconds) the software waits after registration to verify verification emails.
**HTML Timeout**: how much time (in seconds) the software waits to load HTML on a task.
***
### Use already posted content
SEO Neo by default avoids using content from content buckets that is already used on another campaign/task. If you want to force SEO Neo to use the same content in different campaigns you can use the toggle button.
***
### Advanced Logs
Advanced logs will include advance and detailed information in SEO Neo logs.
***
### Notifications: Debug Info
Enabling this option will make debug information notifications available in **Notifications** section.
By default this options is disabled, if you enable this option, then in **Notifications** area SEO Neo will also display debug notifications. This is useful on debugging on when an error/issue occurs and the user wants to use that information for opening a ticket.
# Proxies
### Adding Proxies
Here the user enter and test his proxies that SEO Neo uses on campaigns.
This menu can be found:
1\) Go to **Settings** (main side menu)
2\) Click on "**Proxies**" tab
First you need to enable "**Use Proxies**" checkbox option.
The user can add his proxies inside the text box. Proxies must be added one per line.
{% hint style="info" %}
It is wise for the user to check his proxies before saving or using them on a campaign.
{% endhint %}
### Proxies Format
Proxies usually come in two different formats:
1. \[proxy\_ip]:\[proxy\_port]
2. \[proxy\_ip]:\[proxy\_port]:\[username]:\[password]
{% hint style="warning" %}
For **Oxylabs proxies** the format is as follows:\
\
**\[proxy\_host]:\[proxy\_port]**\
\
**OR**\
\
**\[proxy\_host]:\[proxy\_port]:\[username]:\[password]**
{% endhint %}
SEO Neo supports both types. Just keep in mind to use the correct format (using colon symbol) and enter one proxy per line.
### Testing Proxies
To check user proxies, click on "**Test Proxies**" button and let SEO Neo test if proxies are working.
It is a good practise to test your proxies within SEO Neo
When using "**Test Proxies**", SEO Neo will ask you if you want non-working proxies to get removed after testing. Select "Yes" if you want non working-proxies to be removed after test.
### Recommended Proxies
Using good quality proxies is very important to achieve high success rates on your campaigns. Proxy speed **is recommended to be more than 3 Mbp\s** (especially when campaign runs heavy-content websites like Web 2.0).
{% hint style="info" %}
We **recommend** using [**ISP Proxies from Oxylabs.**](https://oxylabs.go2cloud.org/aff_c?offer_id=7\&aff_id=1400\&url_id=140)
{% endhint %}
Another thing to consider when choosing proxies, is to use proxies that are as close as possible to your region - either your computer or your server (wherever you are using SEO Neo).
When using rotating mobile proxies, you need to have "**automatic IP reset**" disabled. Most rotating mobile proxy providers, have this option enabled by default, so you need to disabled it, before using them on your campaigns.
{% hint style="info" %}
If you have "**automatic IP reset**" disabled, you need to reset your proxies manually. It is recommended to reset your proxy IP every time you run a campaign in order to get new fresh IPs.
{% endhint %}
You can also watch our video tutorial below:
{% embed url="" %}
# Third Party API
Here the user can enter all credentials and API keys from 3rd-party services that are used from SEO Neo.
Third party APIs are separated into different sections/tabs according to service type.
These are the following categories where you can find all supported 3rd party APIs:
### Captcha
Captcha section on settings
For captcha solving services. This is the most important and absolutely required 3rd party API that should be used with the software in order to achieve high success rates.
Currently supported APIs for captcha solving:
* XEvil
* Capmonster
* 2Captcha
* Image Typerz
* Anticaptcha
{% hint style="info" %}
It is highly recommended to use 2Captcha API as a captcha solving service. You can get your API from [**this link**](https://2captcha.com/?from=1577834).
{% endhint %}
### Spinner
Spinner section on settings
This service is used to create multiple variations from your articles and text bodies on your campaigns. You can always use the free built-in version of spinner, but using a 3rd party API will create better variations of your [spintax text](/additional-information/glossary/spintax-format).
Currently supported APIs for creating spintax text:
* Spin Rewriter
* Word AI
* Spinner Chief
* Espinner
### Content Source
SEO Neo supports only Article Forge and Open AI. This service is used to generated high quality articles and text bodies based on different settings and given keyword.
Open AI is a revolutionary artificial intelligence language model that can give exceptional results on writing quality articles for your campaigns.
Content source section on settings
{% hint style="info" %}
Using a content source service is recommended to create high quality articles for your campaigns. You can always create multiple variations from your fetched articles using spinners (see above section).
{% endhint %}
### Indexer
This service allows your backlinks to get indexed after your campaign gets finished. If you select a spinner when creating a campaign, the campaign will get all created "submitted URLs" and send them to selected indexing service.
Indexer section on settings
{% hint style="info" %}
Getting your backlinks indexed or crawled has a **huge impact** on your ranking results. It is **recommended** to use [**Omega Indexer**](https://www.omegaindexer.com/) as an indexer service and [**Colinkri**](https://www.colinkri.com/) to boost your indexing results further.
{% endhint %}
# Cloud API Settings
In order to use Cloud Blogs on your campaigns you will need to setup API keys for the corresponding Cloud platform.
SEO Neo currently supports these cloud platforms to generate cloud blogs:
| Amazon **(tutorial)** | Azure **(tutorial)** |
| ---------------------------- | --------------------------- |
| Digital Ocean **(tutorial)** | Google Cloud **(tutorial)** |
| Vultr **(tutorial)** | Dream Host **(tutorial)** |
| Wasabi **(tutorial)** | Back Blaze **(tutorial)** |
| Linode **(tutorial)** | Bunny **(tutorial)** |
| Oracle **(tutorial)** | IBM **(tutorial)** |
To setup each cloud platform API keys, navigate: **Settings** > **Cloud API Settings**
# Visual Settings
As the name suggests, visual settings refer to settings that effect software visually. SEO Neo allows you to change many visual aspects of the software including: main menu position, dark/white theme, color theme and even text direction.
All visual settings.
### Mode
Light or dark theme. SEO Neo's default mode is dark theme.
### Layout
Main menu bar position.
### Direction
Text direction.
1. *From left-to-right*
2. *From right-to-left*
### Presets
Color theme presets. Except from theme mode (dark or light) you can also change theme color. This effects many elements, like buttons. labels and other visual elements.
# Campaigns
For campaigns there are three different screens: **campaigns overview**, **campaign details** and **campaign creation**.
### Campaigns Overview
This is where you can view all your campaigns. From this screen you can create new campaigns, start and stop them. You can also organize your campaigns within folders.
### Campaigns Details
Campaign details screen displays all groups and all task details for a selected campaign. From this screen the user can view details for all groups and tasks, **retry** groups or tasks and **view submitted URLs.**
### Campaign Creation
From this screen the user creates a campaign. The campaign creation screen is separated into four main steps/sections:
* Diagram
* Common
* Groups
* Settings
# Campaigns Overview
If you click on "**Campaigns**" from main menu, you will be navigated to **Campaigns Overview** screen.
You can navigate to Campaigns overview from main menu
### Creating a New Campaign
To create a new campaign:
* Click on **Campaigns** from main menu
* Click on **Create Campaign** button
A pop-up will appear to give a name on your campaign. Click on **Create** button and you will be navigated to [**Campaign Creation Screen**](/documentation/campaigns/campaign-creation-screen).
### Campaign Information
When you click on a folder you can see all campaigns within the folder along with some basic information for each campaign. Campaign information includes:
**Campaign Name**: the name you give on your campaigns
**Data Started**: date you started the campaign
**Groups**: the number of link groups the campaign includes
**Tasks**: total number of tasks (websites to post)
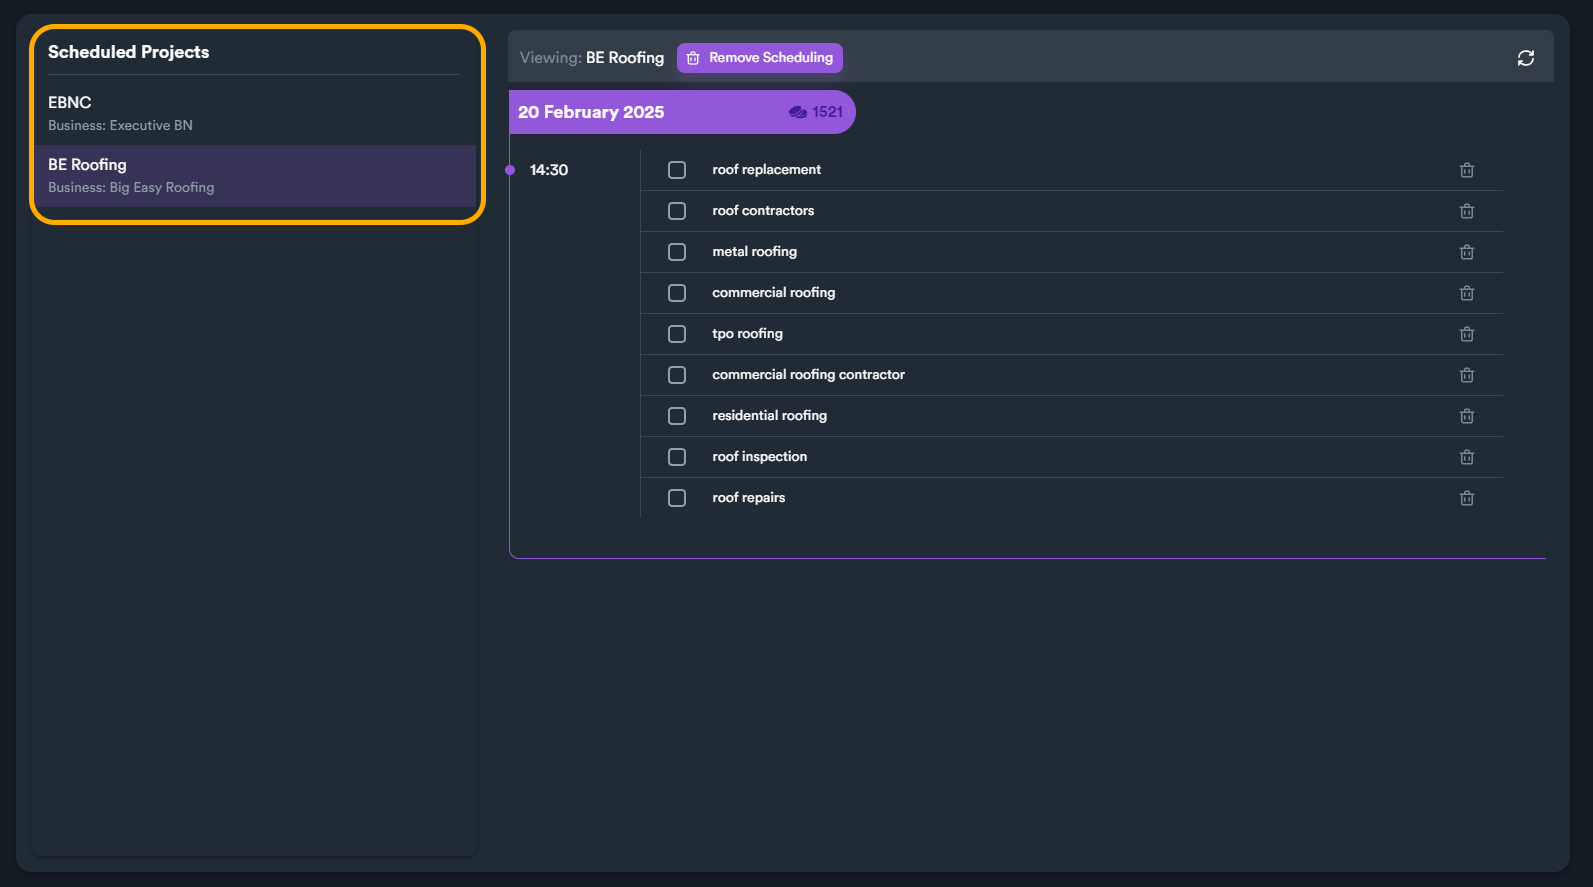
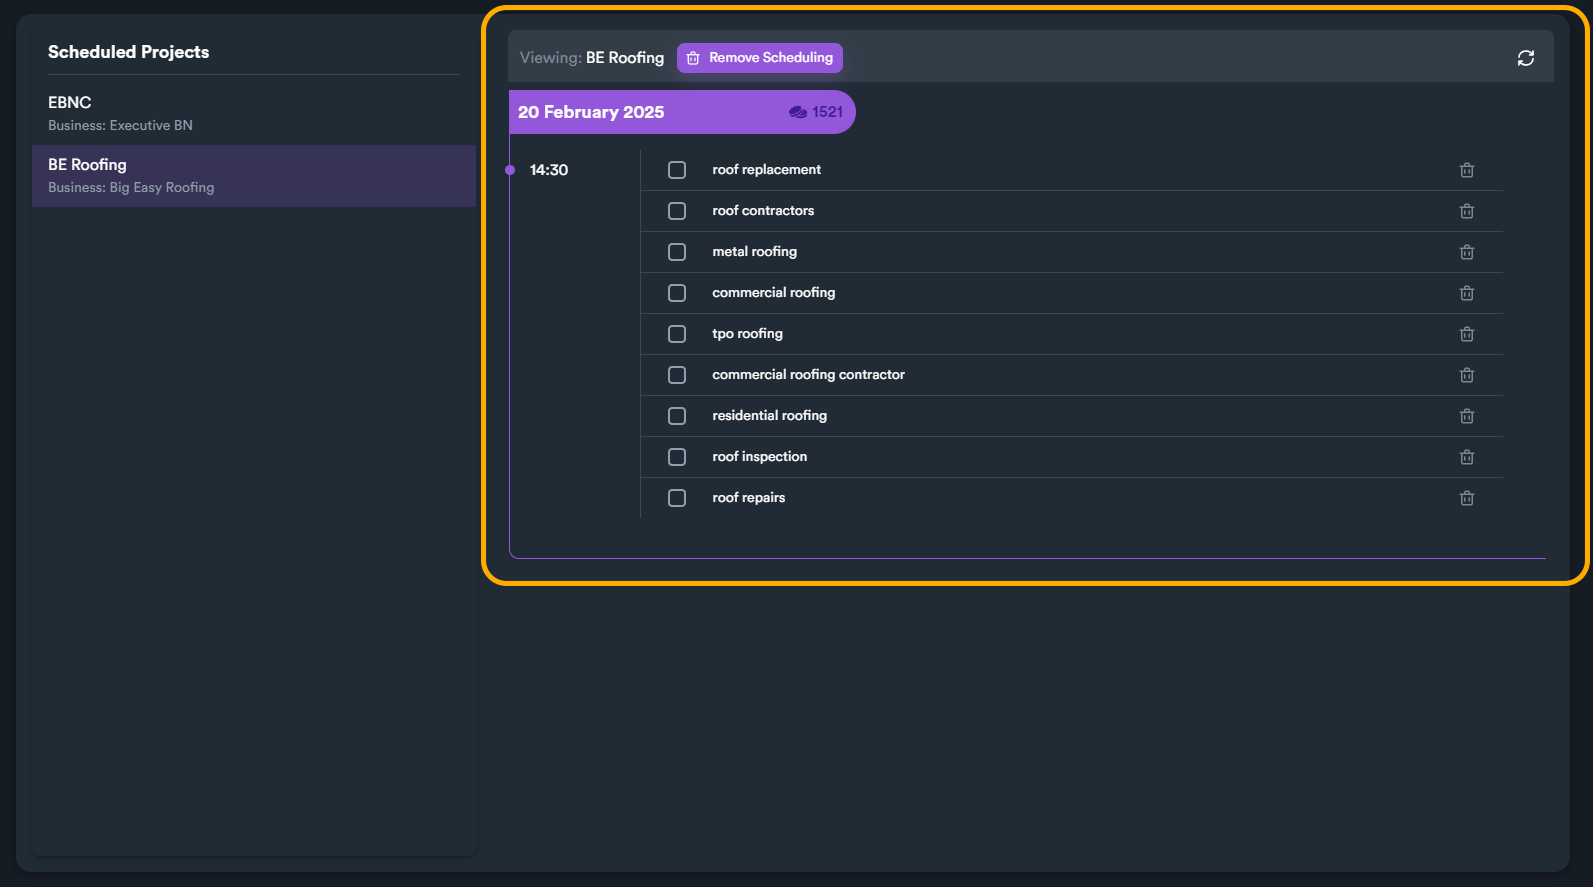
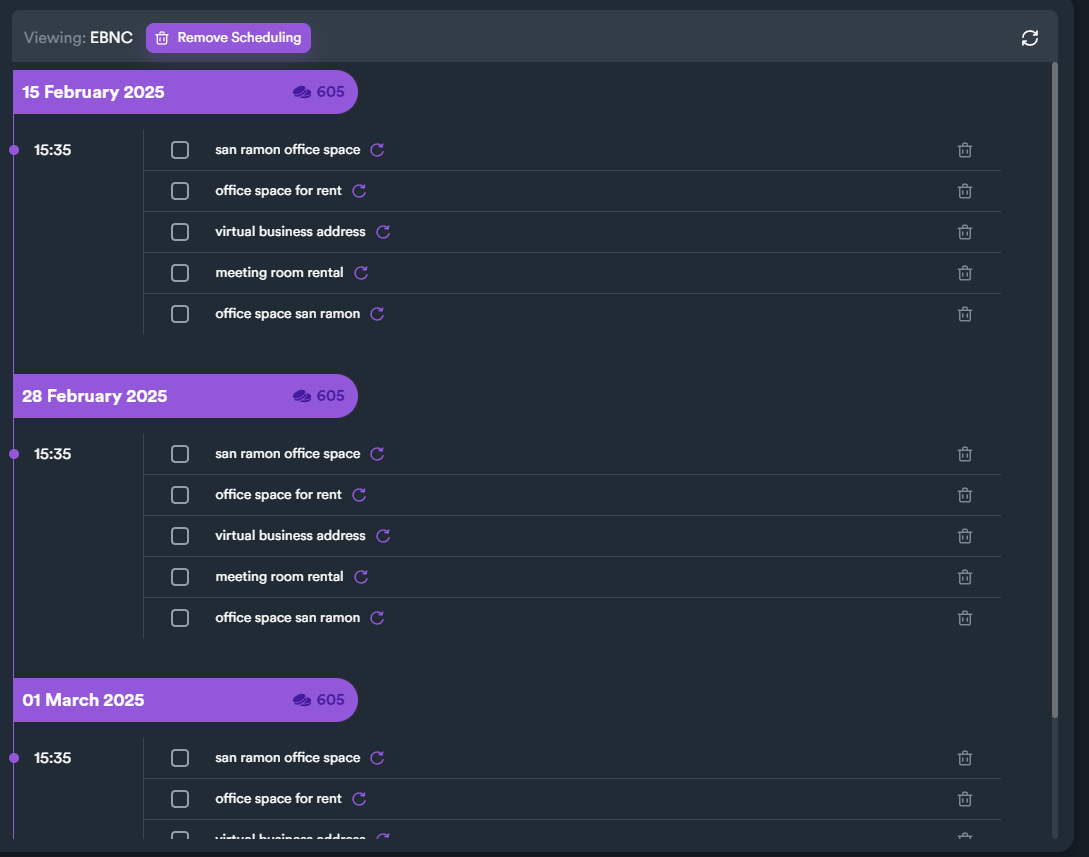
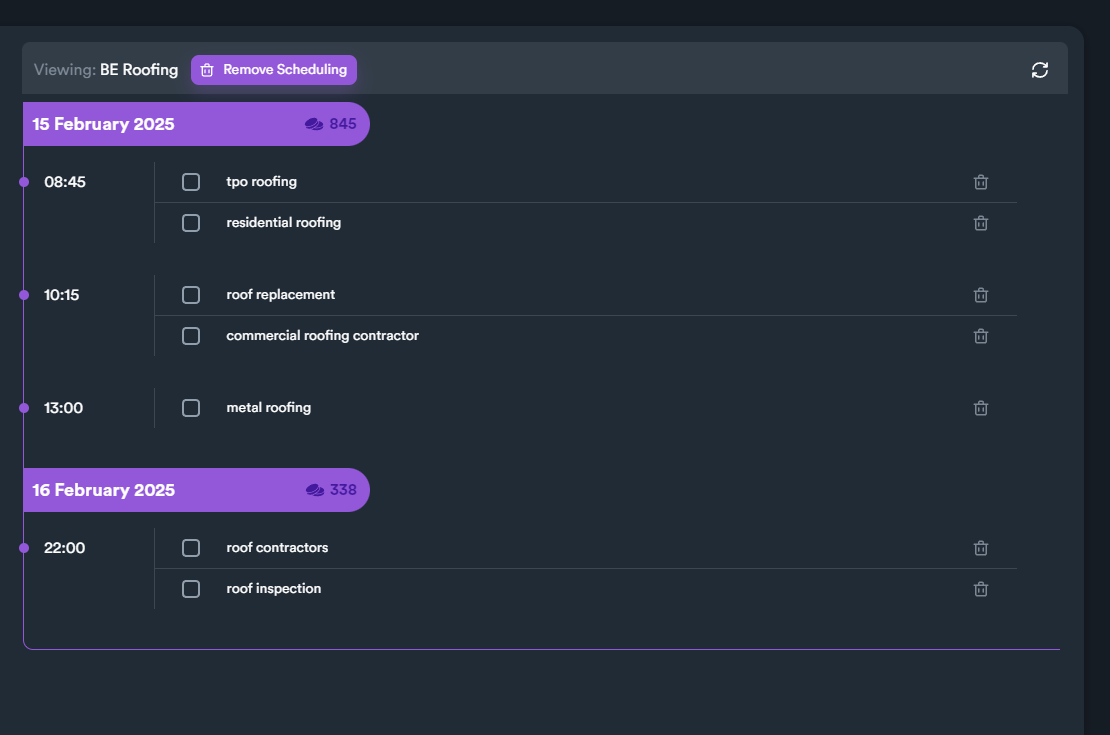
**Scheduled**: if campaign is scheduled to run on a specific date/time
**Status**: status of the campaign.
Information columns for all your campaigns
### Campaign Status
A campaign can be in different status depending on campaign state.
Campaign status depicts the state of a campaign. A campaign can be created (**idle**) or can be saved incomplete (**draft**). After the campaign creation, a campaign can be started (**started**), and then either paused (**paused**) or run until it's finished (**finished**).
Flow chart of different campaign states
{% hint style="info" %}
Keep in mind that an incomplete/**draft** campaign (a campaign with not all required data set) cannot start/run. You will first need to edit the campaign and complete all steps before running it.
{% endhint %}
On the table below you can find the different campaign statuses/states and what each mean.
| Campaign Status | Explanation |
| ---------------------------------------------- | ------------------------------------------------------------------------------------------------------------------------------------------------------------------------------------------------------------------------------------------------------------------------------------------------------------------------------------------------------------------------------------------- |
| **idle** | A new campaign that has been created and saved. |
| **draft** |
A new campaign that has been saved before completely finishing all steps.
When you create a campaign, there are some creation steps and some required fields. You can exit/save the campaign before completing everything. This created a "draft" campaign. A draft campaign is incomplete and need to be fully completed before running it.
|
| **started** |
When you start a campaign and while the campaign is running, it is in "started" status.
A started campaign can be paused.
|
| **paused** | A running campaign be paused and you can continue to run the campaign later. |
| **finished** | When all campaign tasks finish, it becomes "**finished**". |
### Organizing Campaigns Using Folders
Keeping your campaigns inside separate is a good practice. Using folders can help you manage and organize your campaigns based on your websites, clients or projects. For example you can have a folder where you keep all your campaigns for a specific client or website.
To create a new folder click on "**Create Folder**" button located on top left.
"Create Folder" button located on the top left section - from Campaigns screen
A new pop-up window will appear to give a name for your folder.
Give your campaign folder a name and then click "Create" button
Every time you create a new campaign, the campaign will be saved within the folder that has been selected. In the next image for example, you can see that if you create a new campaign it will saved within the folder "**client A**" which is currently selected.
Hover buttons appear when you hover (keep move over) a campaign
You can also move campaigns into other folders. You can either move a single campaign using hover button "**Move to Folder**".
You can also move multiple campaigns into a folder by selecting multiple campaigns and then using "**Move to Folder**" option from the burger button (on the top-right).
Below is a clip demonstrating how to create a new folder and moves your campaigns inside.
Clip - demonstrating how to create a folder and move campaigns
### Import/Export Campaigns
Import/export is a convenient way to transfer selected campaigns into other installations. You can also export your campaigns in case you want to keep a backup of them.
To export: select your campaigns using checkboxes and then use the burger button on the top right. From there you will find an option to export campaigns.
Export campaign
To import a campaign: use the "**Import**" button and select any previously exported campaign.
Import campaign
### Duplicate Campaign
Many times a user needs to create multiple campaign with minor differences or even create copies of campaigns to use them as basic templates to built a new one.
To duplicate a campaign, use "**Duplicate**" hover button that appears when you hover a campaign from the list.
Duplicate campaign
# Campaign Creation screen
This is where you create your campaigns.
Before creating your campaign you should check if you have the basic requirements. You can view our basic tutorial to understand what you need first before creating your first campaign.
**(1)** The **name** of your campaign
**(2)** The basic steps/sections when you create a campaign.
When you create a campaign, there is a lot of information and user input required. This is why, campaign creation is broken into 4 basic steps/sections.
# 1 - Diagram
This is where you choose your campaign diagram.
On the left side you will find different diagrams for you campaign. This list includes built-in SEO Neo diagrams and all diagrams you have created using [**Diagram Editor**](/documentation/diagram-editor).
When you select different diagrams you will see that "**Referring Domains**" value changes. This is value is the number of different **referring domains** that you will get backlinks from, if you select this diagram for your campaign.
{% hint style="info" %}
Based on your diagram (number of groups, type of groups and tiers) the next sections/parts will be effected.\
\
For example a diagram with a single Web 2.0 group will require less user input than a diagram with many groups and tiers.
{% endhint %}
On this screen you can also enable "**Hide siblings groups**" option.
This option makes **sibling groups** (groups that appear as a single instance, but are multiple instances of the same group type) to act **as a single group**. For example, in the image below, although you can only see one instance of Social Bookmarking, there are in fact two instances of this group. If you enable "**Hide sibling groups**" you will edit those two groups as single one, to make the whole process faster and easier. If you prefer to edit both instances, you will need to keep the toggle button disabled.
You can read more about sibling groups and how to use this powerful feature, on [**this section of our documentation**](/documentation/features/sibling-groups).
When you finish your selection click "**Next**" button to move on the next section.
# 2 - Common
On this section you can enter your target urls (money site URLs), set all keywords, select your account template and match your keywords with URLs.
In general, in this section you enter all campaign data that is common for the whole campaign.
#### **(1)** **Money Site URL Links**
Here you enter all URLs that you want your campaign to target. You can enter multiple URLs (one per line).
**(2)** **Keywords**
Here you set all keyword settings for your campaign. You can enable which keyword types you want to enable.
In the example above we have enabled two keyword types (Primary keywords and Generic keywords).
We have set 50% for **Primary keywords** and 50% for **Generic keywords**.
We have also entered 3 Primary keywords and 3 Generic keywords.
#### **(3)** **Account Template**
An account template is a requirement for a campaign. To select an account template click on drop-down menu (located on top-right) and select an account template.
{% hint style="info" %}
If you haven't created any account template you can always select SEO Neo's default template. Keep in mind that a custom account template with own Gmails provides higher success rate than Default account template.
{% endhint %}
#### **(4-1)** **Link Matching**
With Link Matching, you can match (link) selected URLs with specific keywords. With this feature you can target specific keywords on selected URLs of your campaign. This feature for example could be used on your e-shop, where you could select specific keywords on different URLs (product types).
Please [**read more information**](/documentation/features/link-matching) about Link Matching feature.
#### **(4-2)** **Import Posted Links**
If you want to use URLs generated from previous campaigns for your money sites, you can use Import Posted Links.
After clicking the button, a new pop-up will appear where you can select different options to import URLs from previous campaigns. These options act like a filter to help you import only URLs based on your criteria.
The first option is **Select Campaign**, where you set the campaign you want to import URLs from. The next two (**Select Tier**) and (**Select Campaign Groups**) are filters. You can set it to **All,** to import all URLs or you can give specific tiers and link group types you want to import.
For example you can import only Tier 1, Web 2.0 Blogs URLs from selected campaign.
# 3 - Groups
On this section of campaign creation you set all details (content, number of links, account bucket etc) for each link group separately.
On the left side of the screen **(1)** you can select different filter options to show/hide link groups.
On the right side of the screen **(2)** you set each group settings.
### Group Filters
Group filter help you filter group types according to different criteria. This helps the screen to remain "clear" and less overwhelming.
There are three different filter types:
* **Per Tier View** : filters groups according to their tier level (more info on [**diagram tiers**](/additional-information/glossary/tiers))
* **Per Group Type View**: filters groups according to link group type (more info on [**group types**](/documentation/diagram-editor/link-group-types))
* **Groups With Validation Errors**: show only groups with errors while the user sets group data.
To better understand each group filters, we will show you the selected diagram used on this example:
Diagram used on the example to demostrate group filters
# 4 - Settings
Settings is the last step on campaign creation. In this step you set campaign settings (settings that effect only current campaign).
There are four main sections on settings:
### **(1) Captcha Services**
You set which captcha service you want to use for your campaign. You can select **Primary** and **Secondary Captcha** service. The Secondary Captcha service is optional and will be used whenever the first (primary) captcha service fails to solve.
### **(2) Threads**
This settings is similar to SEO Neo global [**Settings**](/documentation/settings). You can set the number of concurrent browsers you want the campaign to use at the same time and also set how many HTTP connection threads you want for your campaign.
{% hint style="info" %}
Keep in mind that **HTTP connections** is **more lightweight** on resources that browsers. On some websites SEO Neo uses HTTP and on other (for example Web 2.0 Blogs) it uses browsers.
{% endhint %}
### **(3) Posts Drip Feed**
This settings sets how you want SEO Neo to create campaign posts. You can select on of three options.
**Instant Post**
SEO Neo will run all tasks and start posting when you run the campaign. This is the default and its used when you want to get tasks to start and finish as soon as possible.
**Posts Per Day**
Using this option, you can set how many posts you want per day and SEO Neo will automatically calculate and "break-down" posts within the days.
**Days to Run**
Another option to drip feed your posts is to give SEO Neo "how many days to run" your campaign. It will then separate posts based on days given.
{% hint style="info" %}
**Drip feed** makes your campaign posts to be evaluated as more "natural" and "organic" for search engines. This setting is an important factor when you create your SEO strategy for your campaign.
{% endhint %}
### **(4) Campaign Schedule**
You can check "**Schedule Campaign Start**" checkbox option and set a specific date and time for your campaign to run.
{% hint style="info" %}
If you want to you schedule for your campaign, don't close SEO Neo, as it will not be able to auto start your scheduled campaigns.
{% endhint %}
# Cloud Blogs
### What is a Cloud Blog
SEO Neo offers a huge variety of backlinks from different sources. Except from high-domain authority websites, SEO Neo also supports cloud-based properties like Cloud Blogs. This gives the ability the user to include [**cloud-staking strategies**](/additional-information/glossary/cloud-staking) to boost his rankings.
You can generate cloud blogs and then use those blogs on your campaigns along with any other group types that SEO Neo.
### How it works
When you generate a cloud blog, SEO Neo stores blog files locally. After blog generation you can easily upload the blog on preferred cloud service within SEO Neo. SEO Neo supports 12 different cloud services including Azure, Google Cloud, IBM and others.
Before using cloud blog features it is recommended to setup **cloud API settings**. For a quick guide on how to setup each cloud service, you can [**read this section**](/documentation/cloud-blogs/cloud-blogs-settings) of the documentation.
There are four different parts when using cloud blogs:
* [**Setup cloud service**](/documentation/cloud-blogs/cloud-blogs-settings) you want to use.
* [**Generate cloud blog**](/documentation/cloud-blogs/cloud-blogs-generator) (using Cloud Blog Generator).
* [**Upload generated cloud blogs**](/documentation/cloud-blogs/uploading-cloud-blogs) to service.
* [**Use your cloud blogs**](/documentation/cloud-blogs/using-cloud-blogs-on-campaigns) within SEO Neo campaigns.
# Cloud Blogs Settings
To use Cloud Blogs you will need first to setup each cloud blog service credentials.
To do so, navigate:
**Settings** > **Cloud API Settings** tab
From this menu you can setup each Cloud API service separately. For each service you need to give a friendly name (which is used just as an identifier) and credentials to connect to the service.
Each service has different credentials. For example on the image below we can see that Amazon requires: **Key** and **Secret key**, but Azure requires only **Connection string**.
In order to learn how to obtain required credentials, you can read some quick guides for each cloud service on the next pages.
### Multiple API Settings
You can save multiple credential settings for each cloud service. You can manage each setting separately using the edit and delete buttons from the list.
Azure example with multiple credential instances.
# Amazon - setup
### Amazon Cloud API Settings
Required credentials:
* Key
* Secret Key
### How to obtain credentials
Login in to your Amazon account.
Open **Security Credentials**
Access Keys > **Create Access Key**
Grab **Access key** and **Secret Access key**
# Digital Ocean - setup
### Digital Ocean API Settings
Required credentials:
* Key
* Secret Key
### How to obtain credentials
Login in to your Digital Ocean account.
Navigate: **API** > **Spaces Keys** tab > **Generate New Key** button
Grab **Key** and **Secret Key**
# Vultr - setup
### Vultr API Settings
Required credentials:
* Key
* Secret Key
### How to obtain credentials
Login in to your Vultr account.
Navigate: **Products** > **Objects** > **Add Object Storage**
Select location and label and click "**Add**"
Click on Manage Object Storage to grab your **Key** and **Secret Key**.
**Access Key** is the corresponding **Key** on SEO Neo.
# Wasabi - setup
### Wasabi API Settings
Required credentials:
* Key
* Secret Key
{% hint style="warning" %}
For **newly created** accounts, **any buckets created after March 13, 2023** cannot be enabled for public access by the user via the console or CLI. If, however, you have use cases that require public bucket access you may contact Wasabi support to request to enable the feature.
{% endhint %}
### How to obtain credentials
Login in to your Wasabi account.
Navigate: **Access Keys** > Click **"CREATE NEW ACCESS KEY"** button
Select "**Root User**" and click "**Create**"
Grab your **Key** and **Secret Key**.
# Linode - setup
### Linode API Settings
Required credentials:
* Key
* Secret Key
### How to obtain credentials
Login in to your Linode account.
Navigate: **Object Storage** > "**Access Keys"** tab > Click **"Create Access Key"** button
Grab your **Key** and **Secret Key**.
# Oracle - setup (under construction)
### Oracle API Settings
Required credentials:
* Key
* Namespace
* Secret Key
* Region
### How to set "Key"
For you secret key go at your profile tab-> My Profile -> Customer secret keys and generate a new secret key, which you copy(before closing the tab) and place it in SEO Neo's "secret key" field.
### How to set "Secret key"
After the generation of your key, hover above "Access Key" field and copy your respective API key, which you should place in SEO Neo's "key" field.
### How to set "Namespace"
For the namespace you have to go your profile tab-> Tenacy and there you can find an "Object storage namespace" field.
### How to set "Region"
For the region you just have to click on your account's regions, click on manage region and copy the "Region Identifier".
# Azure - setup
### Azure API Settings
Required credentials:
* Connection string
### How to obtain credentials
Login in to your Azure account.
The next step is to create a storage account. Select **Storage accounts** from services (you can also type on search bar "**storage accounts**" to find it)
From **Storage accounts** screen, click on "**Create**", to create a new storage account.
On **Basics** tab, you can set the basic settings for the storage account.
#### Project details:
Select a subscription and a Resource group. You can click on "**Create new**" to create a new resource and give it a name that you prefer. In the example below we used "SEONeo".
#### Instance details:
Give a **Storage account name**, and select region.
On Performance, set the first option "**Standard**".
On Redundancy select "**Geo-redundant storage (GRS)**" and check the option below "**Make read access to data available in the event of regional unavailability**".
Click next until you finish the setup of your storage account.
To get your credentials, from Home, open your storage (it will have the **Storage account** name you gave on the previous step).
From the menu select "**Access keys**".
From this screen you will find **Connection string** which is what you need for your credentials on SEO Neo.
### **Important : Enabling Allow Blob Anonymous Access**
Also make sure to change the "**Allow Blob Anonymous Access**" setting to "**Enabled**" for your Azure storage account.
# Bunny - setup
### Bunny API Settings
Required credentials: Bunny requires only an API Key (Secret Key)
### How to obtain credentials
Login in to your Bunny account.
Navigate: **Account** > **Account Settings** to find your Secret Key
# Google Cloud - setup
### Google Cloud API Settings
Required credentials:
* Service account key (JSON File)
### How to obtain credentials (JSON file)
Login in to your Google Cloud account.
Navigate: **Cloud Storage** > **Buckets**
Create a new project and set **Project Name** and **Location**. Click "**Create**".
Navigate: **Buckets** > **Create Bucket**
Give a name for your bucket and click "**Continue**" button.
Continue by setting the next options based on your preference. On the step "**Choose how to control access objects**", on **Access control** set "**Fine-grained**" and continue.
The option "**Enforce public access prevention on this bucket**" must be unchecked (disabled).
{% hint style="info" %}
The option "**Enforce access prevention on this bucket**" must be **unchecked/disabled** as shown on the image below. If you have this enabled, it **will not work** for SEO Neo.
{% endhint %}
Make sure "Enforce public access prevention on this bucket" option is unchecked.
Then navigate to **APIs & Services** > **Enabled APIs and Services**
Click on "**ENABLE APIS AND SERVICES**"
Select "**Cloud Storage API**" which is the service we will use for our cloud blogs.
Click "**Enable**" button to enable the service.
From "**APIs & Services**" > click on "**Credentials**" submenu.
On **Credentials** menu, click "**CREATE CREDENTIALS**" and then "**Service Account**" option.
You will be navigated to "**Service Account**" menu. Give a **Service account name** and **Service account ID** and click "**CREATE AND CONTINUE**" button to continue on next step.
On the next step, you set **Role** to "**Owner**" and click "**DONE**" button.
On the next screen you will see your service accounts. Click on your created service account.
Go to "**KEYS**" menu, click on "**ADD KEY**" and then "**Create new key**" option.
On the pop-up menu you will see option on creating your private key. Choose "**JSON**" option and click "**CREATE**" button.
Save the JSON file on your system. Use this JSON file to setup Google Cloud service.
# Dream Host - setup
### Dream Host API Settings
Required credentials:
* Key
* Secret Key
### How to obtain credentials
Login in to your Dream Host account.
From main menu navigate: **Cloud Services** > **DreamObjects**. Click "**Create New User**" button.
Set name for user and click "**Add User**".
From the next screen you can get the **Key** and **Secret key** needed for SEO Neo.
# Back Blaze - setup
### Back Blaze API Settings
Required credentials:
* Friendly name
* Key ID
* Application Key
### How to obtain credentials
Login in to your Back Blaze account.
From your **Account**, go to **App Keys** from main menu (side menu on left). Click "**Add a New Application Key**" button.
Set "**Allow access to Bucket(s)**" to "**All**".
Set "**Read and Write**" for **Type of Access** and then click **"Create New Key"** button.
Get you **keyID** and **application key** as shown below.
# IBM - setup
### IBM API Settings
Required credentials:
* Key
* Secret key
### How to obtain credentials
Login in to your IBM account.
After you login, navigate to to "**Catalog**".
From Catalog select "**Object Storage**". You can also type "**Object Storage**" on search bar to find it easier.
From Cloud Storage menu, click on "**Service credentials**" tab.
Click "**New Credential**" button.
From the pop-up menu set the options as shown below and click "**Add**" button.
* **Role:** Manager: Manager
* **Select Service ID:** Auto Generated
* **Include HMAC Credential:** Enabled
From the next screen you can find the credentials SEO Neo requires.
| SEO Neo equivalent | IBM |
| ------------------ | --------------------- |
| Key | "access\_key\_id" |
| Secret key | "secret\_access\_key" |
# Cloud Blogs Generator
### What's Cloud Blogs Generator
Cloud Blogs Generator (as the name implies) is a powerful feature of SEO Neo that allows the user to generate and upload cloud blogs without the need to leave the software. The generator allows advance customization of the appearance, format and content of blogs.
When you have your blog generated and uploaded, you can use these cloud assets from SEO Neo campaigns to update it's content using campaigns.
### Overview
To open Cloud Blogs Generator just click on "**Cloud Blogs**" from the main menu.
From this screen you can create/manage folders and create blogs inside folders. Managing folders and blog files is the same as [**managing account buckets**](/documentation/account-buckets/managing-account-buckets) and [**account templates**](/documentation/account-buckets/managing-accounts).
On the left side you can view and manage all folders and on the right side you can see all created Cloud Blogs inside selected folder.
### Using Cloud Blogs Generator
### Blog Information
The first required blog information is **Blog Name** and **Language**.
**Blog Name**: is the name for the user to identify the blog but also the title of the blog.
**Language**: Currently it is only used to set the language for html code. It's only there for search engine crawlers. In the near future SEO Neo will also support translating the blog.
### Blog Template
Choose a blog template that come built-in with SEO Neo. All templates support the same content but each template has different blog structure and appearance.
### Logo
You can set the logo for your blog either by giving a URL of a valid image, or by uploading your own image file from your system.
To use image URL select the first option ("**Add new logo from URL**") from checkboxes.
Add logo by giving a valid image URL
To upload your own image from a file, select the second option and then click on the circle to open file dialog. After selecting your image file, you will see a preview of your logo.
{% hint style="info" %}
Your logo image must be **.jpeg**, **.jpg**, **.png** or **.gif** type. Maximum size for file is 5 MB
{% endhint %}
### Cover Image
To change blog's cover image, you can use the same options and process as changing logo. You can either user a valid image URL or upload your own image from file.
### Blog Sections
You can customize what sections will be available for your blog, including menu, sitemap, footer, social links etc.
If you have **Social links** enabled, you will have to enter your social media URL links on each separate field.
You can set **Contact** and **About us** sections for you blog using advance built-in editors. From the editors, you can set formatted text, spin text using spinners or even translate the text.
### Author Information
You can set Author information including **Author name** and **Author bio** which can be set from separate fields. You can enter spintax text to include multiple variations.
You can generate names in spintax format or get a default author bio which is also in spintax format to include multiple variations.
### Generating Cloud Blog
To generate your blog, finish the setup of your blog details and click "**Generate Blog**" button on the bottom right. This will generate all blog files based on your setup. These files are generated and stored locally on your system.
If you make any additional changes, the "**Generate Blog**" button, will change into "**Regenerate Blog**". This will generate the blog files again.
### Uploading Your Blog
After you blog generation is finished, you can click on "**Upload**" button on the bottom right corner to upload your blog. If a blog is not uploaded a label "**Not uploaded**" will be shown on your cloud blogs list as shown on the image below.
On the next section we will see how you can upload your generated blog on cloud services.
# Uploading Cloud Blogs
When you click "**Upload**" button a pop-up menu appears showing all available cloud services that you [**have setup**](/documentation/cloud-blogs/cloud-blogs-settings).
You can select one or multiple services you want to upload your blogs by using the checkboxes from the right side.
### Upload Settings
When you select (check) a cloud service, the menu expands to show settings for selected service. Upload settings are different from service to service. For example on Azure you only have to select **Bucket** and **Directory** but on Bunny you also have to select **Pull zone.**
{% hint style="info" %}
For best compatibility, we recommend that you avoid using dots (.) in bucket names, except for buckets that are used only for static website hosting.
If you include dots in a bucket's name, you can't use virtual-host-style addressing over HTTPS, unless you perform your own certificate validation. This is because the security certificates used for virtual hosting of buckets don't work for buckets with dots in their names.
{% endhint %}
{% hint style="info" %}
Different services have different ways to manage uploaded assets.
{% endhint %}
When you select the cloud service(s) you want to upload your blogs, just click on "**Upload Blog**" button.
# Using Cloud Blogs on campaigns
When you want to use your cloud blogs on your campaigns, you will need to choose or create a diagram that contains at least one **Cloud Blogs** group type.
Below is a diagram that will not work if you want to use Cloud Blogs on your next campaign:
Below is a diagram that will work if you want to use Cloud Blogs on your next campaign:
# Self Hosted Wordpress
Self Hosted Wordpress is a powerful SEO Neo feature that allows you to post on your own self-hosted Wordpress websites.
After creating your own Self Hosted Wordpress (SHW) you can add your account(s) (domain and credentials) on SEO Neo and use these accounts to post as you do with a regular campaign.
Keep in mind that in order to use this feature you need the following:
* At least one self hosted wordpress account.
* To add your account inside SEO Neo (Accounts > Templates).
* A diagram that includes at least a single Self Hosted Wordpress group.
For more details on how to fully utilize this extremely powerful feature, read the next sections.
### Video Tutorial on How to Use Self-Hosted Wordpress
{% embed url="" %}
# Setup Account(s)
Before using Self-hosted Wordpress you will need to setup your account.
To do so, navigate to: **Accounts > "Self Hosted Wordpress"**.
From there you can add multiple accounts and organize them into folders.
To create an account, click "**Add Self Hosted Wordpress**" button.
A new pop-up window will appear where you will need to enter your **Domain**, your **Username** and **Password**.
When you finish click on "**Create**" button to create your account. You can also use hover over your created account and use the **test domain** button (a heart icon) to test your account credentials.
Use "test domain" function from hover buttons to check your credentials
***
## Which Password to use for your Self-hosted Wordpress Account ?
When you add a new **Self Hosted Wordpress** you need to enter domain, username and **password**. Although domain and username is standard for your Wordpress, this is not the case for the password.
There are two different scenarios / passwords you can use:
1. **Application Password** (generated within your Wordpress user account) - **recommended**
2. Your **account** password (which requires a plug-in) - **not** **recommended**.
### Using Application Password
To create an Application Password, from your Wordpress navigate: **Users > Profile.**
Write a name on "**New Application Password Name**" field.
Click on "**Add New Application Password**" button.
A new password has been generated. Copy that password and use it when you add a new Wordpress account on Self Hosted Wordpress.
***
### Your Account Password
If you want, you can also use your default Wordpress account password, without the need to create a new application password, but this method is not recommended.
If you want to use your account password, you will need to install **JSON Basic Authentication** **plug-in** for this method to work.
Download **JSON Basic Authentication** **plug-in** from the following link:
{% embed url="" %}
After downloading the plug-in, install it on your Wordpress site.
When you install the plug-in you need to activate it. Go to "**Installed Plugins**" where you will see all installed plugins. From there, locate "**JSON Basic Authentication**" plug-in and click "**Activate**".
You are now ready to use your own account password.
***
### Import/Export Self-Hosted WordPress Accounts
You can export your SHW (Self-Hosted WordPress) account using action menu button, after selecting at least one account from the list. You can also multiple-select and export your accounts in bulk.
Import SHW accounts generates a file that can be used to import your accounts back to SEO Neo again. If you want to import multiple SHW accounts, you can use this text template below.
Open the template file and replace values (**username, password** and **endpoint** URL address).
{% file src="/files/Z9bRxVFGZQBc9ofwocwi" %}
Self-Hosted WordPress accounts template file
{% endfile %}
The file format is simple and its to alter values with a regular text editor.
Self-Hosted WordPress accounts template file - example
{% hint style="info" %}
Keep in mind to keep structure of the file the same, otherwise it will not work when you will try to import it back to SEO Neo. You can replace "**username**", "**password**" and "**endPoint URL address**".\
\
When adding multiple accounts, keep the format and don't forget to add the comma "," character between account entries. The comma separator character should be on the last entry (check example image above).
{% endhint %}
# Using Self Hosted Wordpress
In order to use **Self Hosted Wordpress** feature you need to have a diagram that includes at least one Self Hosted Wordpress group. After that you can create a campaign as normal.
When you create your campaign and select the Self Hosted WordPress group you will see different options that we will explain below.
On the top of the group settings you will find options that are common with other group types, like: **Links per Article, Indexer, Copy Group settings** and **Sites to Post**. These options work the same way as they do in other groups **except from Sites to Post** and options for **Internal Links**. If you want to know more about using Internal Links, [**read our next section**](/documentation/self-hosted-wordpress/using-internal-linking). These options use OpenAI integration (you need OpenAI API) to generate internal links for your WordPress posts.
**Sites to post** on a Self Hosted WordPress group, lets you select which WordPress sites you want to post. These sites are WordPress sites that the user has created. We have explained how you set your WordPress sites accounts [**on the previous section**](/documentation/self-hosted-wordpress/setup-account-s).
When you click on **Sites to Post** a new window will appear with all the Self Hosted WordPress accounts you have set. In our example we will see only one account / WordPress site that we have set earlier.
This list of accounts may include a big number of accounts, so we have included a **search bar (1)** and also a **folder filter (2)** - where you select only the specific folders you want to display accounts from.
Use the checkbox to select which accounts / WordPress sites you want to post.
You need to select at least one account using checkbox
##
## Categories and Tags
The next section is about your WordPress **Categories** and **Tags** that re used when you create a post.
Click on "**Get Categories And Tags**" button to fetch all categories and tags that are used on your account.
You can also enter new categories and tags on the corresponding fields. You need to press "**enter**" after each **category** or **tag**.
## Using Featured Images
Except from rich content like images, WordPress posts may also include featured images. To manage and select featured images, click on "**Manage Featured Images**" button.
You can drag and drop image files on the left side of the menu.
From this form you can upload and manage your featured images. To upload an image click on "**Drop or Select file**" or drag and drop image file on that area. You can select multiple image files if you want and then click "**Upload Files**" button.
Except from uploading images from files, you can also enter image URLs for featured image. Use the text box on the right section to enter image URLs (enter one image URL per line).
# Using Internal Linking
[**Internal Linking**](/documentation/features/internal-linking) feature can be used on campaigns that include Self Hosted WordPress link groups. To use this feature, you will first need to have access to OpenAI API.
{% hint style="info" %}
**OpenAI API is required** to use Internal Links feature. If you need more help on how to use **OpenAI API key**, [**read this section**](/documentation/features/openai-for-content-buckets#generating-openai-secret-key-api-key).
{% endhint %}
## How Internal Links Work
SEO Neo uses your content from your content buckets and OpenAI to adjust your content/articles to include internal links. To do so, SEO Neo takes the content from your content bucket, it uses OpenAI integration to analyze the context of your content, and then adjusts the content to include internal links based on given user options.
Internal Links - Process
You can set internal link options from Self Hosted WordPress group options.
Internal Links options on Self Hosted WordPress group
In order to enable internal links, you need to set "**Internal Links**" number **greater than zero (0)**. SEO Neo has this option to zero by default, meaning that internal links is disabled. Changing this options effects the number of internal links you want to create on your articles.
The second option for internal links, is "**Internal Links Relevance**". This option effects how SEO Neo will create internal links.
Here are the different **Internal Links Relevance** options:
#### Random
SEO Neo creates internal links using any available post from your WordPress website.
#### Categories
Using this option will ensure that internal links will be from posts exclusively from selected group **category**.
#### Tags
Selecting this option, you ensure the internal links will be from posts exclusive to selected group **tags**.
You can select only one of three different options on how SEO Neo will create (relate) internal links.
## OpenAI and Interal Links
As we mentioned earlier, SEO Neo uses OpenAI integration in order to identify the context of your content. Keep in mind, that depending on **number of internal links** and the **size of your content** you will be charged OpenAI tokens accordingly.
# Wizards
{% embed url="" %}
**Wizards** is a suite of powerful built-in tools designed to help users leverage the capabilities of SEO Neo in a more intuitive, step-by-step manner. When you select a **Wizard**, SEO Neo will guide you through each step to simplify and expedite the completion of complex tasks.
You can access Wizards list by clicking "**Wizards**" button from main menu.
From this screen you can select a wizard from the list on the left side. For each wizard there is a detailed description on the right side including: wizard category (**Strategy** or **Utility**), **purpose** and **description**, **site age** and other useful information for selected wizard.
## Wizard Types
Each wizard can belong to one of two types: **Strategy** or **Utility**.
A **strategy-type wizard** guides the user through a step-by-step process to create a comprehensive SEO strategy by employing various SEO Neo campaign types and keyword strategies. Think of a strategy as a recipe that combines different campaigns, interlinking them to form a complex SEO strategy that would be challenging and time-consuming to construct manually.
A **utility-type wizard**, while similar to a strategy-type, primarily aims to **simplify** redundant and time-consuming SEO Neo operations rather than create complex SEO strategies. For instance, the "**Cloud Content Poster**" utility wizard assists users in posting to their cloud blogs. The user simply selects their cloud blog, inputs the content, adjusts any additional settings, and the wizard automatically generates a custom campaign for this task.
### Editing Wizard-Generated Campaigns
When you create campaign(s) using a wizard, you can edit some parts of wizard strategy using quick edit. To access **wizard-generated campaigns quick edit**, use hover buttons on your campaign list.
Each *wizard-generated campaign* has it's own settings that you can change through quick edit. For example a campaign generated from **Zero to Hero** wizard has the following options that you can change in quick edit window:
Quick-edit - Zero to Hero generated campaign
***
## Wizards List
Here is a table with currently available Wizards. SEO Neo team works hard to develop and integrate new wizards on next updates.
A very powerful wizard that builds high-authority wiki backlink networks for local SEO and YouTube video marketing. It uses a proven, pre-built diagram to automatically create, interlink, and point wiki pages to your money site URLs or videos.
This wizard creates a ready-to-run SEO Neo strategy built to accelerate search visibility using a diversified mix of high-authority backlinks. It combines cloud blog posts, quality social bookmarking, and trusted authority links to create a natural, balanced backlink profile that supports faster ranking movement.
The Hades Wizard is a trust-focused SEO Neo strategy designed to strengthen domain authority and ranking stability through a diversified, credibility-driven backlink profile. It combines cloud blogs, Web 2.0 properties, wiki links, and authority placements to generate strong trust signals that search engines associate with reliability and expertise.
# Wizard: Domain Authority Stacking
### **About** Domain Authority Stacking **Strategy**
This one of the most important SEO strategies of the [**pillowing technique**](/additional-information/glossary/pillowing-techniques). This strategy is very effective for new websites to *warmup* your *link profile* with plain URLs and to create *depth of content* to your Web 2.0's PBN.
### How to Use Domain Authority Stacking
To run this wizard navigate:
**Main menu > Wizards**
From Wizards screen select "**Domain Authority Stacking**" wizard and click on "**Initialize**" button to launch it.
### Using Domain Authority Stacking Wizard
This Wizard is broken into two steps:
1. Strategy Settings
2. Posting Settings
***
### Domain Authority Stacking: Strategy Settings
### Campaign Folder
In this option you select where you want the wizard to store generated campaign. The default option is "**Auto generate**" which generates a new folder automatically.
If you want the wizard to store the new campaign into a specific folder you can select "**Select a Folder**" radio button and use the drop-down menu to select a specific folder.
***
### Account Templates
Select which account template you want to use.
For more information about account templates [**read this section**](https://docs.seoneo.io/documentation/wizards-under-construction/rd100#account-templates) of the documentation or [**watch this video**](https://www.youtube.com/watch?v=q-Yxap82F5U).
***
### Account Buckets
Select which account bucket you want to use. You can let SEO Neo generate an account bucket automatically (**Auto generate**) or select an existing account bucket (**Select Account Buckets**).
For more information about accounts buckets [**read this section**](https://docs.seoneo.io/documentation/wizards-under-construction/rd100#account-buckets) of the documentation or [**watch this video**](https://www.youtube.com/watch?v=E-rS94B5_MM).
***
### Content Bucket
Select a content bucket that includes content **relevant** to your money site's niche.
{% hint style="info" %}
Make sure you have created **all content types** inside your content bucket including: **Articles, Short Descriptions, Bios, Rich Content and Blog Details**. Your cloud blog posts will utilize all content types when applicable.
It is **recommended** to select a content bucket that includes **rich content** (image & video URLS etc.)
If you want to learn more on creating content buckets you [**can read this section of the documentation**](https://docs.seoneo.io/documentation/wizards-under-construction/cloud-content-poster#content-buckets).
You can also [**watch this video**](https://www.youtube.com/watch?v=t1bJeJR3Wpg) that explains how content buckets work.
{% endhint %}
***
### Money Sites
Enter all available URLs from your money site.
***
### Domain Authority Stacking: Posting Settings
### **Captcha Services**
You set which captcha service you want to use for generated wizard campaign/campaigns. You can select **Primary** and **Secondary Captcha** service. The Secondary Captcha service is optional and will be used whenever the first (primary) captcha service fails to solve.
{% hint style="info" %}
It is highly recommended to use 2Captcha API as a captcha solving service. You can get your API from [**this link**](https://2captcha.com/?from=1577834).
{% endhint %}
### **Threads**
Here you can change how many threads will be used for generated wizard campaign/campaigns. On some sites SEO Neo uses HTTP requests to create posts, and other sites use browser. You can change threads usage independently for each method.
### Indexer
This is the same option that you can find also in other SEO Neo sections (for example when you create a new campaign). You can select an indexer to use for your cloud blogs posts.
{% hint style="info" %}
It is **recommended** to use [**Omega Indexer**](https://www.omegaindexer.com/) or [**Colinkri**](https://www.colinkri.com/) if you want better results with indexing your cloud blog posts.
If you need more information on how to setup an indexer [**read this section**](https://docs.seoneo.io/quick-start/creating-your-1st-campaign/before-creating-your-campaign/basic-settings#indexers) of our documentation.
{% endhint %}
When you finish click on "**Generate**" button and your are done!
# Wizard: RD100
### **About RD100 Strategy**
**RD100** is a **strategy** wizard that help you setup a powerful SEO strategy. With this strategy you can pass a huge amount of Authority from your Tier 1's directly to your money site URLs.
{% hint style="info" %}
You can **use RD100** strategy to boost **press release URLs, guest post URLs, PBN links, authority links, citations** and **social media URLs**.
{% endhint %}
Below is a video about this strategy and how you can create from scratch using SEO Neo. To view the video, click on the thumbnail below.
{% embed url="" %}
***
### Why Use RD100 Wizard
Although you can create a campaign in SEO Neo that utilizes this strategy (using available RD100 diagram) the campaign will fit the needs of only one URL. When you select RD100 diagram from available diagrams it is indicated that its **suitable for one URL**.
{% hint style="info" %}
**Neo - RD100(1URL)** is suitable for a campaign with one money site URL. With RD100 wizard you can create more advance RD strategy with multiple money site URLs.
{% endhint %}
This wizard creates a more advanced setup of the strategy by generating multiple campaigns based on given money sites. With this wizard you make sure that each URL of your money site will get a huge amount of authority.
***
### How to use RD100 Wizard
To run this wizard navigate:
**Main menu > Wizards**
From Wizards screen select "**RD100**" wizard and click on "**Initialize**" button to launch it.
### Using RD100 Wizard
This Wizard is broken into two steps:
1. Strategy Settings
2. Posting Settings
***
### Domain Authority Stacking: Strategy Settings
### Campaign Folder
In this option you select where you want the wizard to store generated campaign. The default option is "**Auto generate**" which generates a new folder automatically.
If you want the wizard to store the new campaign into a specific folder you can select "**Select a Folder**" radio button and use the drop-down menu to select a specific folder.
### Keyword Language
With this option you select the language of your keywords.
### Account Templates
Select which account template you want to use.
For more information about account templates [**read this section**](#account-templates) of the documentation or [**watch this video**](https://www.youtube.com/watch?v=q-Yxap82F5U).
### Account Buckets
Select which account bucket you want to use. You can let SEO Neo generate an account bucket automatically (**Auto generate**) or select an existing account bucket (**Select Account Buckets**).
For more information about accounts buckets [**read this section**](#account-buckets) of the documentation or [**watch this video**](https://www.youtube.com/watch?v=E-rS94B5_MM).
### Content Bucket
Select a content bucket that includes content **relevant** to your money site's niche.
{% hint style="info" %}
Make sure you have created **all content types** inside your content bucket including: **Articles, Short Descriptions, Bios, Rich Content and Blog Details**. Your cloud blog posts will utilize all content types when applicable.
It is **recommended** to select a content bucket that includes **rich content** (image & video URLS etc.)
If you want to learn more on creating content buckets you [**can read this section of the documentation**](https://docs.seoneo.io/documentation/wizards-under-construction/cloud-content-poster#content-buckets).
You can also [**watch this video**](https://www.youtube.com/watch?v=t1bJeJR3Wpg) that explains how content buckets work.
{% endhint %}
### Money Sites
Enter all available URLs from your money site. It is recommended to use different URLs from your money site including:
* Press release
* Guest post
* PBN links
* Authority links
* Citations
* Social media
When you generate this strategy, this wizard will generate a campaign per money site URL.
{% hint style="info" %}
Please keep in mind that there is a **limit** of **100 Money Site** URLs.
{% endhint %}
### Primary Keywords
Enter keywords related to your Money Site's URLs niche.
{% hint style="info" %}
Enter your **best targeted keywords**. These keywords will be used in various ways within this strategy.
{% endhint %}
***
### Domain Authority Stacking: Post Settings
### **Captcha Services**
You set which captcha service you want to use for generated wizard campaign/campaigns. You can select **Primary** and **Secondary Captcha** service. The Secondary Captcha service is optional and will be used whenever the first (primary) captcha service fails to solve.
{% hint style="info" %}
It is highly recommended to use 2Captcha API as a captcha solving service. You can get your API from [**this link**](https://2captcha.com/?from=1577834).
{% endhint %}
### **Threads**
Here you can change how many threads will be used for generated wizard campaign/campaigns. On some sites SEO Neo uses HTTP requests to create posts, and other sites use browser. You can change threads usage independently for each method.
### Indexer
This is the same option that you can find also in other SEO Neo sections (for example when you create a new campaign). You can select an indexer to use for your cloud blogs posts.
{% hint style="info" %}
It is **recommended** to use [**Omega Indexer**](https://www.omegaindexer.com/) or [**Colinkri**](https://www.colinkri.com/) if you want better results with indexing your cloud blog posts.
If you need more information on how to setup an indexer [**read this section**](https://docs.seoneo.io/quick-start/creating-your-1st-campaign/before-creating-your-campaign/basic-settings#indexers) of our documentation.
{% endhint %}
When you finish click on "**Generate**" button and your are done!
# Wizard: Cloud Content Poster
Cloud Content Poster is a streamlined **utility wizard** designed to help you quickly create posts on your cloud blogs. It eliminates the need for setting up time-consuming campaigns, allowing you to effortlessly publish content on your uploaded cloud blogs.
To run this wizard navigate:
**Main menu > Wizards**
From Wizards screen select "**Cloud Content Poster**" wizard and click on "**Initialize**" button to launch it.
***
### How to Use Cloud Content Poster
This Wizard is broken into two steps:
1\) General Settings
2\) Post Settings
Let's go and set each available option on this wizard.
***
### Step 1 - General Settings
### Campaign Folder
In this option you select where you want the wizard to store generated campaign. The default option is "**Auto generate**" which generates a new folder automatically.
If you want the wizard to store the new campaign into a specific folder you can select "**Select a Folder**" radio button and use the drop-down menu to select a specific folder.
Example of selecting a specific folder for generated Wizard campaign
### Name Prefix
**Name prefix** gives a prefix on generated campaign name to help you identify it later. Name prefix is optional but it is recommended if you want to keep your campaigns better organized.
### Indexer
This is the same option that you can find also in other SEO Neo sections (for example when you create a new campaign). You can select an indexer to use for your cloud blogs posts.
{% hint style="info" %}
It is **recommended** to use [**Omega Indexer**](https://www.omegaindexer.com/) or [**Colinkri**](https://www.colinkri.com/) if you want better results with indexing your cloud blog posts.
If you need more information on how to setup an indexer [**read this section**](/tutorials/creating-your-1st-campaign/before-creating-your-campaign/basic-settings#indexers) of our documentation.
{% endhint %}
### Select Cloud Blog
In this section you select which cloud blog you want to use to create your posts. You can filter-out your already generated cloud blogs by folder (using the left drop-down menu and selecting a folder).
{% hint style="info" %}
If you want to create posts on a cloud blog, a cloud blog **must be already uploaded**. For more information on how to generate and upload cloud blogs, [**read this section of the documentation**](/documentation/cloud-blogs/cloud-blogs-generator).
{% endhint %}
### Cloud Poster Schedule
This option is optional but is very useful. You can check "**Schedule Cloud Poster**" option and select a date and time (by clicking on the box on the right side).
When you finish with General Settings click on "**Next**" button to navigate to the second step of the wizard.
***
### Step 2 - Post Settings
This step includes all the options to define your posts on your cloud blog (the one you selected on the previous step).
### Content Buckets
To create posts on your cloud blog **you need to select a content bucket**. Select a content bucket that includes content that you want to post on your cloud blog. This means that your content bucket you select must include at least one article.
{% hint style="info" %}
Make sure you have created **all content types** inside your content bucket including:\
**Articles, Short Descriptions, Bios, Rich Content and Blog Details**. Your cloud blog posts will utilize all content types when applicable.
It is **recommended** to select a content bucket that includes **rich content** (image & video URLS etc.)
If you want to learn more on creating content buckets you [**can read this section of the documentation**](#content-buckets).
You can also [**watch this video**](https://www.youtube.com/watch?v=t1bJeJR3Wpg) that explains how content buckets work.
{% endhint %}
### Total Posts & Posts Per Day
This section is very important as it defines the number of posts and how many posts you want SEO Neo to post on your cloud blog per day.
{% hint style="info" %}
On "**Number of Posts**" you can select a **maximum** of **1000** total posts
{% endhint %}
Each cloud blog post will use a different article from your content bucket. The number of total posts will also determine the number of articles you need to include in your content bucket.
{% hint style="info" %}
**Example:**
If you need to create 30 posts on your cloud blog, you will need at least 30 articles in your content bucket you've selected.
{% endhint %}
To help you with your content you will need inside your content bucket, you can click on "**Show Contents**" eye icon. After clicking this icon, SEO Neo will display basic information on what it is included inside selected content bucket.
You can hover each icon on the expanded section to display a tooltip indicating each content type.
In our example below, we have selected **Number of Posts = 1**. The first icon in "Show Contents" indicates that our selected content bucket includes one article. This setup is fine, as wee need only one article.
The first content type (Articles) is marked as required.
Now let's try to increase the number of **total posts** to 10 to see what will happen.
As we can see, SEO Neo raised an alert. This is because we have selected **10 total posts** but our content bucket only includes **1 article**.
{% hint style="info" %}
As a rule of thumb, if you have **N total posts**, you should have at least **N articles** inside your content bucket.
{% endhint %}
The next option in this section is **Posts per Day**. As the name suggests this sets the number of posts your want SEO Neo to post on your blog per day. You can set a **maximum** of **100 posts per day**.
Set the number of posts per day
### Category
From this option you can select on which category (from your cloud blog) you want to create your posts. The default option is "Uncategorized" you but select a specific category your want to create your post into.
To fetch all categories from your selected cloud blog click on "**Get Available Categories**" label. This will fetch all categories you have created on selected cloud blog.
{% hint style="info" %}
Keep in mind that you can select **one category** at the same time.
{% endhint %}
### Internal Links
**Internal Links** sets the number of internal links you want to be created for your posts. Internal links are hyperlinks that connect one page on a website to another page within the same domain.
For more information on internal links you can read [**this section of our documentation**](/documentation/features/internal-linking).
### Rich Content
**Rich Content** sets the number of Images, Videos and Embeds you want to include in your posts. Keep in mind that you need to include rich content inside your content bucket to utilize them.
{% hint style="info" %}
It is **recommended** to include **as many rich content entries** (in your content bucket) as possible to avoid duplicate rich content usage and make your post as unique as possible.
{% endhint %}
When you finish selecting all your options, click on "**Generate**" button. SEO Neo will take all your wizard options and it will generate a campaign based on selected options.
{% hint style="info" %}
Keep in mind that **Wizards create a special type of campaign** that **cannot be edited** as a normal campaign.
{% endhint %}
# Wizard: Self-Hosted WordPress Poster
Self-Hosted WordPress Poster is a **utility wizard** designed to help you quickly create posts on your self-hosted WordPress websites. It eliminates the need for setting up time-consuming campaigns, allowing you to effortlessly publish content on your websites.
To run this wizard navigate:
**Main menu > Wizards**
From Wizards screen select "**Self-Hosted WordPress Poster**" wizard and click on "**Initialize**" button to launch it.
***
### How to Use Self-Hosted Wordpress Poster
This Wizard is broken into two steps:
1\) General Settings
2\) Post Settings
Let's go and set each available option on this wizard.
***
### Step 1 - General Settings
### Campaign Folder
In this option you select where you want the wizard to store generated campaign. The default option is "**Auto generate**" which generates a new folder automatically.
If you want the wizard to store the new campaign into a specific folder you can select "**Select a Folder**" radio button and use the drop-down menu to select a specific folder.
### Name Prefix
**Name prefix** gives a prefix on generated campaign name to help you identify it later. Name prefix is optional but it is recommended if you want to keep your campaigns better organized.
### Indexer
This is the same option that you can find also in other SEO Neo sections (for example when you create a new campaign). You can select an indexer to use for your Self-Hosted WordPress posts.
{% hint style="info" %}
It is **recommended** to use [**Omega Indexer**](https://www.omegaindexer.com/) or [**Colinkri**](https://www.colinkri.com/) if you want better results with indexing your posts.
If you need more information on how to setup an indexer [**read this section**](https://docs.seoneo.io/quick-start/creating-your-1st-campaign/before-creating-your-campaign/basic-settings#indexers) of our documentation.
{% endhint %}
### Select Self-Hosted WordPress
In this section you select which self-hosted WordPress you want to use to create your posts. You can filter-out your self-hosted WordPress websites by folder (using the left drop-down menu and selecting a folder).
{% hint style="info" %}
For more information on how to setup your self-hosted WordPress account into SEO Neo [**read this section**](/documentation/self-hosted-wordpress) of the documentation.
{% endhint %}
### Self-Hosted WordPress Poster Schedule
This option is optional but is very useful. You can check "**Schedule Self-Hosted WordPress Poster**" option and select a date and time (by clicking on the box on the right side).
When you finish with General Settings click on "**Next**" button to navigate to the second step of the wizard.
***
### Step 2 - Post Settings
This step includes all the options to define your posts on your WordPress website (the one you selected on the previous step).
### Post Settings
**Posts per Day**: as the name suggests, defines the number of posts SEO Neo to perform per day. There is a limitation of *100 maximum posts* per day.
**Internal Links:** sets the number of internal links you want to be created for your posts. Internal links are hyperlinks that connect one page on a website to another page within the same domain.
{% hint style="info" %}
Keep in mind that you need **OpenAI** **API key** to use **Internal Links** feature.
{% endhint %}
For more information on internal links you can read [**this section of our documentation**](https://docs.seoneo.io/documentation/features/internal-linking).
**Internal Links Relevance:** Self-Hosted WordPress has an additional setting for internal links. With this option you can set how internal links are generated. There are three different options:
| Option | Info |
| -------------- | ---------------------------------------------------------------------------------- |
| **random** | random selection between (categories and tags) |
| **categories** | internal links are generated from posts exclusive to the selected group categories |
| **tags** | internal links are generated from posts exclusive to the selected group tags. |
### Understanding Category Groups
This wizard helps you create posts on your self-hosted WordPress website. To help you with this task we created category groups. A category group is a group of posts settings that apply on different categories of your WordPress website. This means that you can create different posts with different settings on different categories.
{% hint style="info" %}
Keep in mind that you need **at least one category group**. Your website categories can be included **in only one** category group.
{% endhint %}
**Example:**
Let's assume we have three categories on our website: A, B, C
We can create a category group that posts on **A, B** and another category group that posts on **C**.
Creating a category group that posts on **A, B** and another category group that posts on **B,C** is not valid. This is because the second group includes a category (**B**) that is **already included** in first group.
Examples of category groups
### Creating Category Groups
To create a new category group, click on "**Add Category Group**" button.
A new window will appear where you can select on which categories on your website you want to post.
You can select multiple categories to post by using checkbox on the left.
You can also add a new category and click on "**Add**" button.
The category will be added on the list where you can select it or remove it using the little "**x**" button.
When you finish selecting categories, click on "**Generate Category Group**" button. The category will be generated.
You can use the "**trash**" button to remove generated categories or the "**down arrow**" to expand the category and change it's settings.
From the expanded view, you can set **content bucket**, **total** number of **posts**, **tags** and **featured images** for your posts.
When you finish with your settings you can add another category group. Just keep in mind that **you cannot** **select the same category** that have been used on a different group.
When you finish with all your category groups, click on "**Generate**" button and your are done! A new wizard campaign is created that will create all your posts based on all provided information in the Wizard.
# Wizard: Zero to Hero
# Wizard: GBP Blast
### GBP Blast Introduction
GBP Blast is a powerful wizard that allows you to take action and boost your local SEO rankings. Using an already existing project. This means that **you need to create and run a project in GBP module** before using this wizard. Using an existing project, GBP Blast wizard gets all required information to create an advance campaign strategy that results in boosting your local SEO rankings.
When you run this wizard, you will be asked to select a GBP project and a keyword (from your generated heatmaps).
### How to use "GBP Blast" Wizard
To run this wizard navigate: **Main menu > Wizards**
From Wizards screen select "**GBP Blast**" wizard and click on "**Initialize**" button to launch it.
On the first step of the wizard you select a **project** and a **keyword** from that project. Select your GBP project from the top drop-down menu:
Then select the **keyword** within that project.
For each keyword you select you also get some useful information including metrics, last heatmap (map on the right) and date created.
After your selection, click on **"Next"** button to proceed to Campaign settings.
***
### Campaign settings
Select Campaign Folder:
Select Account Template:
Select **content bucket** and enter your **primary keywords**.
### Import GBP Keywords
For primary keywords, you can import keywords from a GBP project or a **GBP keyword bucket** using the import button.
If you use **Import from GBP Project**, you will only need to select an existing project to import your keywords.
If you select **Import from GBP keyword bucket**, a new window will open to let you select your bucket and which keyword list you want
When you finish your selection click on **"Import Keyword List"** button to import keywords in Primary keywords.
# Wizard: GBP Sniper
### GBP Sniper Introduction
GBP Sniper is a powerful wizard that generates advance SEO strategy campaigns for local SEO. This strategy creates authority both on GBP and the overall brand.
{% hint style="info" %}
**Important:** When you run the wizard for the first time SEO Neo will use the **GBP cid URL**. The second time you run the wizard, you will be prompt to use the **GBP place id URL** (instead of **cid**).
{% endhint %}
### How to use "GBP Sniper" Wizard
To run this wizard navigate:
**Main menu > Wizards**
From Wizards screen select "**GBP Sniper**" wizard and click on "**Initialize**" button to launch it.
***
### 1 - Campaign Settings
This wizard contains 2 steps: **(1) Campaign Settings** and **(2) GBP Moneysites and Keywords**.
On 1st step there are two sections that ypu can expand and collapse by clicking on the arrow buttons on the right side.
Select your campaign folder
Next there is an option to add two additional link groups (Cloud Blogs and Self-Hosted WordPress) intro the strategy. If you enable any of these yours, the wizard will add them dynamically and will utilize them. These two additional groups are optional and you can enable/add both, one of them or both of them.
To enable any of these additional groups, click on toggle button. If you enable any group, you will need to select an account (a cloud blog or a self-hosted WordPress of your own).
{% hint style="info" %}
To **use these additional link groups** you need to already have set a self-hosted WordPress account or in case of cloud blogs, you need to have created a cloud blog.
For more information about **Cloud Blogs** and **Self-Hosted WordPress** link groups, read the related documentation sections:
* [**Cloud Blogs**](/documentation/cloud-blogs)
* [**Self-Hosted WordPress**](/documentation/self-hosted-wordpress)
{% endhint %}
The next option is **Account Template**. You can select your account template from the drop-down menu.
Next, select your **Account Bucket**. You can select an existing account bucket or let SEO Neo generate a new one based on wizard's strategy.
The select the content bucket that will be used for posting content. Your content bucket should include the following content types:
* Articles
* Descriptions
* Bios
* Comments
If you want to use rich content (it's recommended), then keep in mind to include rich content inside your selected content bucket.
{% hint style="info" %}
You can always create a new (**empty**) content bucket by clicking the "**plus-symbol**" icon. Keep in mind that it is **very important to fill** that empty content bucket with content after you generate the strategy campaign. You need to fill it **before running the campaign**, otherwise the bucket **will remain empty** and no content will be able to be used by SEO Neo.
{% endhint %}
{% hint style="info" %}
For more information on how to create content buckets and add different content types inside them, [**read this section**](/documentation/content-buckets) of the documentation.
{% endhint %}
***
### Posting Options
To navigate to the second section of the wizard, click on the arrow on the right side to expand the section.
In this section you can change different post settings. These settings are similar to any other posting settings within SEO Neo. These settings include: selecting Captcha Services, Threads and an Indexer.
{% hint style="info" %}
For **indexing** service we highly recommend using [**Omega Indexer**](https://www.omegaindexer.com/) which has very high indexing success rate.
{% endhint %}
When you are ready with posting options, click on "**Next**" button to go to the second part of the wizard.
***
### 2 - GBP Moneysites and Keywords
Select a GBP project
Add your business website URLs. You can add multiple URLs (one per line).
{% hint style="info" %}
We recommend adding **About Us** and **Contact Us** URLs from your website.
{% endhint %}
Then fill the GBP URLs from your Google Business Profile. These URLs include:
* GBP cid URL
* GBP Reviews URL
* GBP About us URL
* GBP Post URL
When you select the project inside the wizard the first two URLs (**GBP cid, GBP Reviews**) are scrapped and fetched automatically (if available). The rest two (**GBP About us URL, GBP Post URL**) should be filled manually by the user.
Some URLs are automatically filled by the wizard, based on selected project
{% hint style="info" %}
After using the wizard for the first time and filling **GBP About us** and **GBP Post URL**, the wizard will automatically fetch those URLs if you run it again in the future.
{% endhint %}
Next fill your social media URLs (use one URL per line). The **more social media platforms** you include in this section the greater the reach and impact.
The last thing you need to enter is your primary keywords. You can also import keywords from another GBP project or a GBP Keyword Bucket.
{% hint style="info" %}
For more information on **importing** keywords from **GBP project** or **GBP Keyword Bucket** [**read this section**](/documentation/wizards/wizard-gbp-blast#import-gbp-keywords) of the documentation.
{% endhint %}
After filling your primary keywords, click on "**Generate**" button and the wizard will generate an advance strategy campaign based on your selected options on previous steps.
# Wizard: Wiki Stacking
### Wiki Stacking Introduction
### How to use "Wiki Stacking" Wizard
To run this wizard navigate:
**Main menu > Wizards**
From Wizards screen select "Wiki Stacking" wizard and click on "**Initialize**" button to launch it.
# Wizard: Fast Rank
### Fast Rank Introduction
### How to use "Fast Rank" Wizard
To run this wizard navigate:
**Main menu > Wizards**
From Wizards screen select "Fast Rank" wizard and click on "**Initialize**" button to launch it.
# Wizard: Hades
### Hades Introduction
### How to use "Hades" Wizard
To run this wizard navigate:
**Main menu > Wizards**
From Wizards screen select "Hades" wizard and click on "**Initialize**" button to launch it.
# Features
# Link Matching
Link matching is a very powerful feature that makes campaign keywords target specific URLs from your money site URLs.
If your campaign doesn't have link matching set for the campaign, then SEO Neo will use available keywords **randomly** for random URLs (from money site).
Without Link Matching - random keywords selected for money site URLs
Using link matching, allows you to select which keywords will target specific money site URLs.
Using Link Matching - specific keywords for specific money site URLs
This powerful feature gives great flexibility and control on your campaigns.
# Article Builder
SEO Neo has a built-in free **Article Builder** which includes thousands of different articles in different categories.
Article builder comes preloaded with thousands of articles in different categories and sub-categories. For example, you can have fetch articles for "**Finance**" category and select sub-category for "**Insurance**", "**Leasing**", "**Loans**" etc.
{% hint style="info" %}
Article categories gives the user the flexibility to add niche-relevant content on their buckets according to his campaign needs.
**SEO advice**: it is highly recommended to keep your campaign content niche-relevant for better SEO results. If for example your target website (money site) is a webpage about "car rentals" and your keywords for example are "car rentals", then your content must be relevant (articles and content about cars).
{% endhint %}
You can even select the number of words (Word Count) to generate articles within a specific word count range (available options: **500**, **750**, **1000** words).
To generate articles, just select different options and then click "**Generate**" button.
{% hint style="info" %}
Time for generating articles may differ when using different settings. For example if you select a big number of articles with spin and translation it may take longer time.
{% endhint %}
# OpenAI for Content Buckets
Search engines prioritizes high quality original content. That's why using high-quality content is key from an SEO perspective.
Although SEO Neo comes with [**a free built-in article builder**](/documentation/features/article-builder), using the power of AI is the way-to-go to create high quality and niche-relevant articles for your campaigns. And when we are talking about AI, one thing comes in everyone's mind... **OpenAI** !
{% hint style="info" %}
Using **high quality articles** can dramatically boost ranking results of your campaigns.
{% endhint %}
SEO Neo has integration with OpenAI that allows you to generate extremely powerful articles for your campaigns. In order to use OpenAI you first will need to generate an API key.
### Generating OpenAI secret key (API Key)
Navigate to OpenAI website and click on "API" section.
Open account menu. You can find it on the top-right section and click on "**View API Keys**".
From the next screen, click on "**Create new secret key**" button.
A new pop-up will appear. Give your key a **Name** and click on "**Create secret key**" button.
Your secret key will be generated. Copy your **secret key** (because you will need it to setup OpenAI on SEO Neo) and click "**Done**".
### Setting OpenAI secret key (API key) on SEO Neo
To set your API key, from SEO Neo navigate:
**Settings > Third Party API > Content Source**
Paste your OpenAI generated **secret key** that you copied earlier on "**OpenAI**" field.
{% hint style="info" %}
Don't forget to save your settings by clicking "**Save Changes**" button.
{% endhint %}
Now you are ready to use OpenAI for your content on content buckets.
Watch our [**Tips and Tricks video**](https://youtu.be/cVdeYw-PIuk) on how to use OpenAI for your content buckets below:
{% embed url="" %}
# Sibling Groups
On first step on campaign creation (**Diagram** selection screen) you will find the option "**Hide sibling groups**" with a toggle button. Although this toggle button seems small, it is indeed a very powerful feature of SEO Neo. So what this button/option really do?
## Understanding Siblings
SEO Neo offers an intuitive diagram system, where group instances are related with the number of parents links. This means that a link group that have two different parents (on the image above **Social Bookmarking** has two **PDF Upload parents**) is not a single instance but two different instances.
This diagram system although might seem a little bit confusing to understand, it makes the creation of huge and complex diagrams much faster and easier.
## Its All About Parents
Let's examine the diagram again to understand how links between groups effect the real number of instances.
In the diagram below, Social Bookmarking group has two different parent. It is linked with two different PDF Upload groups. Although you can only see one Social Bookmarking on the diagram, there are two different instances. This is because Social Bookmarking group is linked with two different parents.
If we could see how SEO Neo functions under the hood, we would see that there are two different Social Bookmarking instances. Something like the image below:
## Hide Sibling Groups
"**Hide sibling groups**" option as the name suggests, hides sibling groups when you create your campaign. This makes campaign creation much faster and easier.
SEO Neo keeps "**Hide sibling groups**" toggle button disabled by default. When this button is disabled, sibling groups will not be hidden when you create your campaign and you will have to edit each individual group. If on the other hand, you enable this option, you will edit sibling groups as if they were only one. All settings and content from one group will also be used on sibling groups.
Let's see how this option effects campaign creation. We will first create a campaign using the diagram above, and we will keep the default option (**Hide sibling groups** disabled).
When we reach **Groups** section on campaign creation, we see that there are two different Social Bookmarking instances.
If we go back and enable "**Hide sibling groups**" and try again, we will see that these two instances got "**merged**" into a single instance.
With this option enabled, you can set all group settings only once, and they will be applied on for all sibling groups.
This powerful option/feature gives you the flexibility to decide when you need to set each individual sibling or edit them as if they were a single instance.
# Generate Account Buckets
From **update version 1.5.0** we have added "**Generate Account Buckets**" feature. Say goodbye to the tedious task of manually creating and assigning account buckets. 🛠️ SEO Neo's new feature makes your process smoother and faster.
This quality of life update can save you hours, especially with huge and complex campaigns where you have to create and assign account buckets to each link group.
## Why Generate Account Buckets Automatically
When you create your campaign, on **step 3 (Groups)** you need to assign Account Buckets for each link group.
Assigning an account bucket for each link group
Some times this may be an issue because you need to create them before creating your campaigns. Even if you have pre-calculated the number of account buckets before creating your campaign, it is time consuming to assign them one-by-one to each group (especially on huge campaigns with dozens or link groups).
With this feature SEO Neo can **generate automatically** and assign account buckets for all your campaign's link groups.
## How to Use
To use this feature, click on "**Generate Account Buckets**" button located on Groups step inside campaign creation.
Generate Account Buckets button
A new pop-up window will appear with different options for generating your new account buckets.
The first group of options is about account bucket name generation. You can give a **prefix** on generated names, or can can even enable "**Include group type**" and "**Include tier**" to also include group type and tier level (number) on generated account bucket names.
Options about name prefix
The second group of options is about account buckets folder. You can either let SEO Neo to generate a new folder for your new buckets, or choose a specific folder (**Generate Folder**) where you want new presets to be stored (**Select Existing Folder**).
Folder options for new account buckets
## Example
We have given the following options for generating new account buckets:
* **Name prefix:** "demo"
* **Include group type:** disabled
* **Include tier:** disabled
* **Folder option:** Generate Folder
With these options, SEO Neo **will generate 6 Account Buckets** using prefix "demo".
Generated account buckets using prefix "demo"
SEO Neo generated **six (6)** account buckets. The reason being, is selected diagram. SEO Neo analyzes selected diagram and generates accounts buckets accordingly.
Diagram selected for current example campaign
Another thing to notice here, is that SEO Neo, generated a new folder to keep all new account buckets inside. Generated folder name format is:\
**\ \_ \**
SEO Neo generated new account buckets folder
### Using "Generate Account Buckets" with Sibling Groups
When your campaign contains sibling groups (please [**this section for more information**](/documentation/features/sibling-groups) on **sibling groups**) if you will need to enable "**hide sibling groups**" option if you want SEO Neo to generate a single account bucket for each sibling group.
Hide sibling groups option
In the example above, if you have "**hide sibling groups**" disabled, SEO Neo will generate **four (4)** new account buckets. If on the the other hand you have this option enabled, SEO Neo will generate **three (3)** new account buckets (this is because sibling groups usually share the same account bucket).
{% hint style="info" %}
"**Hide sibling groups**" effects how to setup your campaign link groups but also how SEO Neo features function. **Generate Account Buckets** is affected from this option. As a rule of thumb - when you have "hide sibling groups" enabled - SEO Neo will **count a sibling group as a single one**.
{% endhint %}
# Internal Linking
## What is Internal Linking?
Internal links are hyperlinks that connect one page on a website to another page within the same domain.
Internal links help users navigate a website, guiding them from one page to another. This improves website structure and hierarchy by linking related content. Good internal linking can encourage visitors to spend more time on a site by exploring other pages.
An **example** of internal links can be found on the bottom of this documentation section. There is a link that navigates the user on a specific (relevant) section of the documentation, on how to use internal links on SEO Neo.
But what about SEO value of internal links?
## Why Internal Links are Important for SEO?
Internal links are crucial in SEO for several reasons:
#### Indexing of Web Pages
Internal links assist search engines in indexing your site. When search engines crawl a site, they follow links to find and index pages. A well-linked site is easier to crawl and gets its pages indexed more quickly.
#### Content Value and Context
By linking to related content, you can provide additional context and value to your users. This can also signal to search engines what the page is about, aiding in more accurate and relevant indexing.
#### Page Authority and Ranking
Search engines use links to discover new content and to help determine the value of a page. Internal links pass 'link equity' or 'link juice' between pages. Pages with more internal links pointing to them are often seen as more important and can rank higher in search engine results.
## How to Use Internal Links in SEO Neo?
SEO Neo includes a very powerful feature (from **version 1.5.2** and later) that gives the user the option to create internal links for his WordPress websites.
When you create a campaign that includes **Cloud Blog** or **Self Hosted Wordpress** link groups (in your diagram) you can set the **number** and type (**Internal Links Relevance**). When you run your campaign, SEO Neo will create internal links for your (Self Hosted WordPress) website posts **using OpenAI** integration.
{% hint style="info" %}
Keep in mind that in order to use Internal Links feature on SEO Neo, you will need OpenAI API. You can find more info on **how to set your OpenAI API key** [**here**](/documentation/features/openai-for-content-buckets#setting-openai-secret-key-api-key-on-seo-neo).
{% endhint %}
For more information on how to use this feature on SEO Neo, you can read: [**Self Hosted Wordpress - Internal Linking**](/documentation/self-hosted-wordpress/using-internal-linking)
# Campaign Linking
{% embed url="" %}
**Campaign linking** is a feature that allows you to automate campaigns and schedule them to start when another another campaign finishes. This advance scheduling mechanism, helps you speed up your process of automating multiple campaigns and create long drip-feed strategies.
### Understanding Campaign Linking - Terms
In the image below we see a basic campaign linking example, to explain some terms.
Link Chain - terms diagram
* When there are multiple campaign linked together, the whole link schematic is called **"link chain"**.
* When two campaigns are linked together, the top-tier campaign is called **"parent"** and the lower-tier is called a **"child"**. In the image above, campaign **A** is the **parent** of campaign **B** and campaign **B** is the parent of campaign **C**.
* The first campaign in the chain is called **"root parent"**.
{% hint style="info" %}
Each campaign in the chain **can only be linked with one parent** and **one child**. A campaign **cannot have** multiple parents or multiple children.
{% endhint %}
### Understanding Campaign Linking - Flow
Below is a real example of linked campaigns created inside SEO Neo:
Each campaign can be linked with another campaign. In this example **Campaign A** is linked with **Campaign B** and **campaign B** is linked with **Campaign C**. Campaign A is called "**root parent**" as it is the master (first) parent of the whole link chain.
When you create a link chain you set the order you want the campaign to start. When the first campaign in the chain completes (stops running), it starts the second campaign in the chain. The process continues until all campaigns in the chain completes.
### How to Link Campaigns
To link a campaign with another campaign, you can select the campaign to link with in "Settings" step when you create or edit a campaign.
You can find "**Link Campaign**" in **Posting Options**. From there you can select Instant post, Posts per day, Days to run or **Link Campaign**.
Select Link Campaign and then select a parent campaign for you current campaign using the drop-down menu on the right.
Link campaign in Posting options
In this example we are editing **Campaign C** and we want to link it with **Campaign B**. Inside **Campaign C**, we select **Campaign B** (the parent) to create our link.
{% hint style="info" %}
You can **only** select campaigns that are **not currently running** and **don't have any other child**. Example: you can't link another campaign with **Campaign B**, because **Campaign B** is already linked with **Campaign A** and **Campaign C**. However you could link a new campaign with **Campaign C**.
{% endhint %}
### Using Quick Edit to Link Campaigns
Another way to link campaigns, is to use **Quick Edit**. This way you can links your campaigns faster without navigating all campaign creation steps 1-4.
In this example we have 3 campaigns: **Campaign A** and **Campaign B** which are already linked together. Let's assume we want to create a link chain:\
**Campaign A** <- **Campaign B** <- **Campaign C**
We need to link **Campaign C** with **Campaign B.** We can use "**Quick Edit**" from hover buttons to quickly edit **Campaign C**.
Selected "**Link campaign**", select the parent campaign you want to link current campaign with (select parent campaign). In this case we've selected **Campaign B**. Click '**Save**" to save your changes.
Now **Campaign C** is linked with **Campaign B** and we have finished our link chain.
On our example we have created a chain with three campaigns: **Campaign A**, **Campaign B** and **Campaign C**. When you start the first campaign in the campaign the order of campaign running will be as follows:\
**Campaign A** -> **Campaign B** -> **Campaign C**.
### Breaking Chain
At any time you can use **Edit** or **Quick Edit** to remove a campaign from a chain. Keep in mind that when you unlink a campaign from a chain, it gets unlinked from the parent and the child (if there is any).
In the following example we have five campaigns that are linked together: **A, B, C, D, E**
If we unlink campaign C it will get unlinked from it's parent (B) and it's child (D).
So this will result in:
After unlinking we will have campaign C as a standalone (unlinked) and two chains:
* A-B
* D-E
{% hint style="info" %}
When you **unlink** a campaign, you unlink it from it's **parent** **and** it's **child**.
{% endhint %}
# Keywords Strategy
When you setup your campaign, you will also need to setup your **keyword percentages**. Keyword percentages define each keyword type that will be used on your whole campaign.
SEO Neo supports these types of keywords:
* Primary Keywords
* Generic Keywords
* Branded keywords
* Partial Match Keywords
* Plain URL
* Domain as Anchor
* Text URL
Example of keyword percentages
On each campaign you can use (enable/disable) any keyword type you want and set each percentage value for each keyword type.
The **sum of all keyword** percentages should be **exactly 100%**. On our example above, we have enabled all seven keyword types and we have set each keyword percentage accordingly to sum 100%
Keyword type
Keyword percentage %
Primary Keywords
20
Generic Keywords
20
Branded Keywords
20
Partial Match keywords
10
Plain URL
10
Domain as Anchor
10
Text URL
10
Total (sum)
100
### What is Keyword Strategy feature
Defining keyword types and keyword percentage is a crucial part of your campaign strategy. Although keyword percentage values is very important, sometimes you need to set these values fast. This is where **Keyword Strategy** feature comes into play.
SEO Neo comes with pre-built/pre-set keyword percentage values that cam be used on your campaigns based on your needs. To access Keyword Strategy feature, click on "**Keyword Strategy**" button.
A new window will open where you can define your strategy based on your website's age and your SEO workflow you will use.
Keyword strategy window
**Website Age**: as the name suggests, you select your site age. There are three options for **new website** (0-12 months), **middle website** (12-24 months) and **established website** (more than 24 months) old.
**Campaign Workflow**: this defines at which point in time we are placed against a 12 months campaign workflow.
{% hint style="info" %}
**Example**: we have a website that we run campaigns and take different actions. We are on the 5th month of our SEO campaign for this website. In this case, we would choose **5-6** value.
{% endhint %}
keyword strategy - campaign workflow
# GBP
**GBP (Google Business Profile)** module is a powerful SEO Neo module that allows you to track rankings for your Google Business Profile using heatmaps. Except from tracking, you can also run campaigns from Wizard using already created projects from GBP.
GBP module has three different sections:
* [**Projects**](/documentation/gbp/projects)
* [**GBP Keyword Buckets**](/documentation/gbp/gbp-keyword-buckets)
* [**Grid Templat**](/documentation/gbp/grid-templates)[**es**](/documentation/gbp/grid-templates)
In order to create heatmaps with GBP module you need to **use credits**. For more information about credits system, please [**read this section of the documentation**](/documentation/credit-system).
You can also watch **SEO Off-Page Mastery: Episode 3** that covers GBP module in a webinar by clicking below:
{% embed url="" %}
# Projects
### Creating a new GBP Project
To create a new GBP project, first navigate to **GBP > Projects** from main modules menu and then follow the same method you use to create a new campaign.
GBP module: Projects
To create a new project, click on "**Create New Project**" button.
GBP Projects screen
{% hint style="info" %}
You can also use **Tags** to organize your GBP projects (as with **Content Bucket Tags**). For more information on tags, [**read this section**](/documentation/content-buckets/content-bucket-tags) of the documentation.
{% endhint %}
After clicking "**Create New Project**" button a new window will load where you can enter all your project details.
New GBP project window
***
### New Project Details
On **Project friendly name** you give your project a name.
Giving GBP project a name
### Business Finder
This is how you can enter your GBP business profile. There are three different ways to locate/enter your business on your project.
* **Find with Google maps:**\
This is the easiest and fastest way to find/locate your business. Write down your business name (as in Google maps) and select it from the auto-suggest list.
* **Find with Place ID:**\
You can use your place ID (within your Google business profile).
* **Select from History:**\
If you have already created a previous project for your business with SEO Neo, you can select this option and find it from the list.
### Move center
You can move center by entering coordinates (latitude and longitude coordinates). To preview your coordinates on preview map, click on the button on the right side.
You can create only one project for each business profile. Within each project you can have different keywords and different heatmaps. This way SEO Neo can track your business rankings on different keywords and generate detailed analytics for your business.
If you try to create another project for an existing business profile, you will get the following error message:
In case you really need to create multiple projects for the same business profile, you can use **Move center.** Move center is useful when you want to create a project for a business that already exists on another project.
{% hint style="info" %}
For **multiple projects** for the **same business profile**, use Move center to Coordinates.
{% endhint %}
When you finish with your project details, click on "**Create project**" button. This will create a new and empty project for you. Within each project you can create different heatmaps to track your business.
On the next section we will see how we can [**create heatmaps**](/documentation/gbp/projects/projects-creating-heatmaps).
# Projects: Creating Heatmaps
### Creating a new Heatmap
After creating a new project, the project will be empty and it will not have any heatmaps.
To create a new heatmap got your project, click on "**Create Heatmaps**" button.
When you create a heatmap, a new window view will open. This view has two different sections. The first section is about **keywords** and the second one is about the **grid settings**.
Create heatmap - keywords section
Create heatmap - grid settings section
### Grid Specifications
If you have created grid templates, you can use "**Import grid template**" button to import your grid specification settings.
{% hint style="info" %}
Using grid templates can save you time, as you can create and save different grid template settings that can be used in your projects. Click [**here to read more**](/documentation/gbp/grid-templates) about grid templates.
{% endhint %}
In our example will will load a previously-created grid template. When you click on "**Import grid template**" a pop-up window will open with all grid templates. Select the desired grid template and click on "**Import Grid Template**" button to fetch grid settings.
Import grid template window
All grid settings from the template will be loaded.
### Keywords
On keywords field you type your keywords for your generated heatmaps. You can enter multiple keywords using **Enter** or **comma** (,).
As with grid templates, you can use **GBP keyword buckets** to import keywords.
{% hint style="info" %}
Using **GBP Keyword Buckets** can save you time, as you can create keyword buckets with keyword lists that can be used in your projects. Click [**here to read more**](/documentation/gbp/gbp-keyword-buckets) about GBP Keyword Buckets.
{% endhint %}
Click on "**Import keywords from bucket**" button. A new window will open that will let you select folder and a bucket.
When you select the bucket, all keywords lists inside that bucket will show. Select a **keyword list** to import keywords from. When you click on each keyword list, it will expand to show you all included keywords in the list. Select the list and click "**Import Keyword List**" button.
After that all keywords from list are imported inside the keywords field.
When you are finished, click on "**Run Heatmap**" button to run the first heatmap for this project. A pop-up message will show informing you about the keywords and the number of credits that will be spent for this heatmap.
After clicking "**Run Heatmaps**" button, SEO Neo will start the process to fetch and process all information for the heatmap.
# Projects: Basic Results
Now that have created your heatmap for a project we will cover how you can view different details and metrics for your heatmaps.
For an overview of your project results, you can navigate back to projects section. You can either click on "**Projects**" from main module menu, or on the breadcrumb button on the top section.
Navigating back to Projects section
From here you can view all your projects with some basic information for each project. In our example here we have created several projects with different heatmaps for each project.
{% hint style="info" %}
If you are a new user you may have a different view, but after creating some projects and running several heatmaps you will get similar views and options.
{% endhint %}
Projects information
In projects view you can also use an overview of your project heatmaps and keywords using the **Project Carousel**. Click on "**Project Carousel**" hover button (while hovering on a project).
Project Carousel hover button
### Project Carousel
Project Carousel shows you all heatmaps and metrics for all keywords of the project in one view. On the top left section you can see the **Project** name and the **Business name**.
On the left there is a list with all project's keywords. In the following example there is only one keyword "injury attorney". Clicking on the keyword will load all heatmaps.
To view different heatmaps for select keyword click on heatmap thumbnails (located under heatmap)
Clicking on any heatmap will load basic information and metrics including its creation **dat**e, **3 PACK**, **4-10 RANK** and **11-20 RANK**.
**Project Carousel** is a very useful feature that allows you to get an overview for all heatmaps for all keywords within a project.
For more details regarding each keyword and it's heatmap click on "**View Heatmaps**" hover button button, while hovering on a project.
From there we can get detailed results, metrics, comparison tables and export results in .pdf files. For more information [**read the next section**](/documentation/gbp/projects/projects-heatmap-results).
# Projects: Heatmap Results
### Generated Heatmaps - Status
While SEO Neo generates heatmap data for each keyword for the project there will be a blue dot. This is a status indicator, showing that these heatmaps are under processing.
When the heatmap generation process, a green border will indicate which heatmaps are **new** (not opened).
On opened/viewed heatmaps the green border along with the "**new**" label is removed.
***
### Heatmap Details
On heatmaps screen you can find different information about each heatmap. Keep in mind that for each keyword you have selected when you created the project, SEO Neo will generate a different heatmap. This gives the user the flexibility to track each keyword for each project seperately.
Along with basic information about each keyword/heatmap, SEO Neo will also display the last 2 generated heatmaps.
To expand the view for each keyword and view all heatmaps, click on the arrow button on the left side.
When you expand the keyword view, you can view details for all previously generated heatmaps for current keyword.
{% hint style="info" %}
It is **recommended** to run a heatmap for each keyword at least one per week when you take actions for your GBP in order to track your ranking changes/results.
{% endhint %}
Understanding different metrics about your heatmap is crucial. Here is a short explanation of different terms regarding heatmaps:
Term
Info
Visibility
This is a metric that shows the overall visibility of your BGP in whole heatmap. It is calculated from the average of all rankings from all points of the heatmap.
3 PACK
Percentage of pins within the map that this keyword ranks for the first three positions (in search results).
4 - 10
Percentage of pins within the map that this keyword ranks for positions 4 - 10 (in search results).
11 - 20
Percentage of pins within the map that this keyword ranks for positions 11 - 20 (in search results).
### Keyword Heatmap Analytics
For further analytics for a selected keyword, click on "**Generate Analytics**" button. This will expand the view further showing you some rankings metrics for selected keyword.
"Generate Analytics" button
On the left side there is a placement pie chart. This pie chart shows number of placements for the keyword (in percentage value). For example, in the image below the keyword has:
* **21.5%** in positions 1 to 3
* **78.5%** in positions 4 to 6
{% hint style="info" %}
Each value (which represents position in reach results) on pie chart is color-code. You can always refer to the legend with different colors under the pie chart. You can also hover on each pie chart section and a tools tip will inform you about the corresponding position.
{% endhint %}
Placement pie chart
On the right side you can find a line chart that show the progress of the visibility metric based on creation date (time).
***
### Project Results Carousel
Another view with your heatmap results is the **Carousel View** accessed through the project window. Using the "**Carousel**" hover button (while hovering over your project)
The **Carousel View** gives you heatmap details and information regarding the whole project. In a single view you can access all keywords and different heatmaps for each keyword.
Carousel view window has three different sections. On the left side you can switch between different project's keywords.
Left section: navigate between keywords
Within each keyword you can navigate between all available heatmaps (generated across different dates).
Lower-right section: navigate between heatmaps
# Projects: Heatmap Controls
Heatmap Projects have a number of different tools and functions that can be accessed through hover buttons (by hovering a project on the project list).
Heatmap projects - hover buttons
## Hover Tools / Functions
#### Rerun heatmap
Creates (runs) a new heatmap for current keyword
#### Get directional links
This is a powerful SEO Neo feature that gives you access to fetched directional links and copies them to clipboard.
#### Compare heatmaps
This feature allows you to compare different heatmaps (same keyword, different time generated).
When you click on "**compare heatmaps**" a new window opens that allows you to select up to three heatmaps. After selecting the heatmaps, click on "**Compare Heatmaps**" button to proceed.
A new window appears showing a comparison table. This table includes (up to three) colums with metrics and graphs for each heatmap. Using this feature you can easily find out your heatmap ranking progress in a single and simple view.
#### View Latest Heatmap
This will open a detailed heatmap view of the last generated (by date) heatmap.
#### Heatmap Carousel
This feature allows you to have all your heatmaps (within the project) in a single (carousel) view.
You can change between different heatmaps by clicking on the them on the heatmaps list on the left section. When you click on any heatmap you will see different metrics for selected heatmap and of course the heatmap itself.
# GBP Keyword Buckets
### Keyword Buckets & Keyword Lists
Keyword buckets are similar to other buckets found in SEO Neo, but instead of containing accounts or content, they include **keyword lists**. Each keyword list is a collection of keywords. Keyword lists and keyword buckets are used in GBP to generate heatmaps or create campaigns using Wizards (applicable to GBP wizards).
### Why Buckets and Lists?
**Keyword buckets** are simply containers that can include different **keyword lists**. These buckets simplify the management of various keyword lists. You can create different folders, with each folder containing distinct buckets, and each bucket can hold different lists. This organization makes it easier for users to manage and categorize their keywords based on project, client, niche, or even geographical area.
To better understand the structure, refer to the image below that showcases the tiers and structure.
{% hint style="info" %}
Although this scheme of buckets and lists may seem confusing at first, it offers great flexibility when it comes to managing keywords for your GBP projects.
{% endhint %}
***
### Creating GBP Keyword Buckets
To create a new GBP keyword bucket, click on "GBP keyword Buckets" from the main modules menu.
From this menu you can see and manage all your GBP keyword buckets. To create a new bucket, click on "**Create GBP Keyword Bucket**" button and give a name for your bucket.
After clicking giving a name and clicking "Create" button, you will be automatically navigated within the created and empty keyword bucket.
This is where you can create your keyword lists.
***
### Creating Keyword Lists
To create your keyword list, click on "**Create Keyword List**" button.
A new pop-up window will appear where you can give a name for your list and enter all your keywords. To save your list, click on "**Save**" button.
After saving your keyword list, you can view and manage your lists using hover buttons (hover a keyword list to see hover buttons).
To view and edit keywords within a list, click on "**Edit keywords**" hover button.
The same applies for your keyword buckets. To view keyword lists within each bucket, use "**View Lists**" hover button to open the bucket and view all keyword lists inside.
You can also multiple select your keyword lists or even your keyword buckets to delete them.
{% hint style="info" %}
GBP Keyword Buckets system is a flexible way to organize your GBP keywords. Use keyword buckets and keyword lists to organize your keywords the way it fits your needs. For example, you could use different buckets for different clients and then use keyword lists for niches, or product types.
{% endhint %}
# Grid Templates
### What is a Grid Template?
Grid templates are designed to store information about a GBP grid. Using grid templates can save a significant amount of time by allowing users to input grid information once and reuse it across different heatmaps.
Whenever a user wants to create a heatmap, the following information is needed:
* Grid size
* Distance between points
* Distance unit type (meters, miles)
* Zoom level
* Google domain
* Language
In order to save time, you can set your grid template once and use it across your heatmaps whenever needed.
{% hint style="info" %}
Create your grid templates and use them when you create a heatmap to save time.
{% endhint %}
***
### Creating a Grid Template
To create a grid template, click on **GBP > Grid Templates**
A new window will appear with all grid information that is required. On the left side of the window is all grid grid information and on the right side you can preview the map (based on grid settings).
### Title & Description
Give you grid template a title and a description (these are friendly names and are used by the user to identify different grids).
### Grid Size
Grid size defines the size of the heatmap. Selecting 9x9 grid size will create a grid (heatmap) that will include 9x9 points on map. This means that there will be 81 different points on your heatmap when you create it using this grid template.
There is also an indication of how many credits are required for each heatmap based on your grid size.
{% hint style="info" %}
Think of grid size as a "resolution" of your grid/heatmap. *A higher value gives a better resolution for your projects but this also costs more credits.*
{% endhint %}
To better illustrate grid size, here are some examples of different grid sizes and how they look on a map. The first one has a size of 5x5 and the second one has size 9x9.
A 5x5 grid size template
A 9x9 grid size template
### Distance Between Points
This value allows you to change the distance between each points in the grid. By changing this value you can cover larger areas with the same amount of points (defined by previous value "**grid size**").
You can also change the unit of distance between **meters** and **miles**.
Below is an example of different distance sizes using the **same 7x7** grid size. The first one is set to **200 meters**, the second one is set to **1000 meters** and the last one is set to **5 kilometers**.
Grid Size: 7x7 - Distance Between Points: 200 meters
Grid Size: 7x7 - Distance Between Points: 1000 meters
Grid Size: 7x7 - Distance Between Points: 5 km (5000 meters)
### Zoom Level
Zoom level changes the amount of zoom within the map. The value ranges from **8z-18z** (z is for zoom level and it's the official Google maps unit of zoom). You can also set it to auto.
Using button on the right side you can preview the selected zoom amount/value.
You can drag over the map to preview your grid settings and explore the area. You can also use Google map's tool buttons which are hidden by default by switching the "**Show map controls**" toggle button.
If you by any change you get lost within the map (while exploring the area or while trying different zoom levels) click on "**fit grid and reset**" button. This will automatically zoom and fit your grid within the map review area.
After setting your values, click on "**Create Grid Template**" to save your template.
You can now use your grid template when you create your GBP project heatmaps.
# Heatmap - Online Report: Share Your Project
With **Share Project**, you can publish your project heatmaps to our secure online servers and share them with your clients. You can also customize the online **GBP report** with a **custom logo** to match your client’s branding.
To share your project, navigate to:\
**GBP > Projects**
On the **Projects** screen, hover over the selected project and click the **Share Project** button.
A pop-up window will appear where you can choose whether to include a custom logo in the shared report. In this example, we selected **Upload from file** (image file).\\
Once the online report is generated, you’ll see a message containing the **public report URLs**.
{% hint style="info" %}
**Tip:** The generated URL is public—anyone with the link can view the report.
{% endhint %}
You can copy and paste the link into your browser, or click **Open in Browser** to open it in your system’s default browser.
***
#### The Shared Project URL
When you open the URL in your browser the you will view a detailed online report of your GBP project heatmaps. The view is broken into the keywords list (all GBP project keywords, in our example we have only one). You can select different keywords from your project and the report will change the view of all generated heatmaps for selected keyword.
On the top half of the screen you see all details for selected heatmap with metrics like visibility and raking scores.
# Heatmap Scheduling - Setup
### What is Heatmap Scheduling
Heatmap scheduling allows you to plan and automate your heatmap checks in advance. This feature is especially useful when you need to schedule heatmaps ahead of time, set them up while you're not actively using SEO Neo, or align them with the business hours of specific [**GBP (Google Business Profile)**](/documentation/gbp) locations.
You can schedule individual heatmaps run checks or entire heatmap projects. The last one will schedule all keyword heatmaps of selected project.
***
### Access Heatmap Scheduling Window
To schedule an entire project, from main modules menu navigate:
* **GBP** > **Projects** > "**Schedule all heatmaps**" hover **button**.
To schedule individual heatmaps navigate:
* **GBP** > **Project** > click on "**View heatmaps**" to open a project.
From project view, you can either use hover button "**schedule heatmap**" to open schedule menu for selected keyword heatmap.
You can also select and schedule multiple keyword heatmaps, using the checkbox to select multiple heatmaps and then use "**Create/Replace Scheduling**" action **button**.
***
### Types of Scheduling
There are two types of heatmap scheduling:
* Schedule Once
* Schedule Repeat
With schedule once you set date(s) and a common time using a calendar to schedule future heatmap checks. You can set single or multiple dates for scheduling.
{% hint style="info" %}
If you use schedule once option, once SEO Neo runs the heatmap on selected date, heatmap will not run again in the future. If you want to run recurring heatmap checks, use **Schedule Repeat** option.
{% endhint %}
With schedule repeat, you schedule heatmap checks, based on days of weeks or month that are recurring. This means that if for example you set a repeat check for Monday, the heatmap check will run on every Monday, every week.
***
### Schedule Once
With this options you can set a number of different days that you want to schedule your heatmap checks in advance.
You can select multiple dates from the calendar widget.
Then select a time from below (selected time will be common for all dates selected).
You can view all selected dates on the right side of the window. You can also remove any date from the right side by double-clicking on any date.
To remove all scheduled dates, click on "Clear" button on the top right section.
When you finish, click on "**Schedule Heatmaps**" button.
***
### Schedule Repeat
Schedule repeat allows you to schedule days of the week or days of the month that will be repeated again after they run. SEO Neo will repeat these schedule runs indefinitely every week or every month until they get deleted. We will see how we can edit or remove a schedule later on.
Schedule repeat has two sub-options:
* Schedule by days of week: you select which days of the week heatmap checks will run.
* Schedule days of months: you select dates for every month.
To select days of week, select the first option, and click the days (circles). In the example below, we have selected to run heatmap checks every **Monday** and **Friday**.
To select days of month, use the second option. From there you can select different days of the month from the calendar widget.
Because months have different number of days, there are also day modifiers. these let you select last days of a month automatically without having to worry about the number of days each month has. By enabling these options you can set SEO Neo to run your checks on last day of the month, or one, or even two days before the last day of the month.
In the example above, we have selected to run checks every 1st and 15th on every month, but also on the last day of the month. This means that a month like February which has 28 days, will also run check on the 28th day. On a month like January will run check on 31st.
***
### Scheduled Heatmaps
Scheduled heatmaps or scheduled projects (all included heatmaps) will be indicated with an icon.
***
### Schedule Editing
You can edit an existing schedule for a heatmap by using the hover button. This will open the schedule window with your currently selected values that you can alter.
If you use schedule edit for an entire project, it will create a completely new schedule and it will not show current scheduling (due to the fact that a project can have different schedule settings foe each heatmap).
You can also select multiple heatmaps within a project and schedule them, using the action buttons.
To view all you scheduled heatmaps, use [**Heatmap Scheduling View**](/documentation/gbp/heatmap-scheduling-view).
# Heatmap Scheduling - View
Scheduling View lets you see all your scheduled heatmaps, and even remove scheduling from them in a single and convenient view.
To access scheduling view, from GBP Projects, click on the "calendar" button.
A new view will open, where you can see all your schedules. To view scheduled heatmaps, click on the left section to navigate between different projects.
{% hint style="info" %}
SEO Neo will only show projects on the list that have at least one scheduled heatmap.
{% endhint %}
After selecting the project, you will see all scheduled heatmaps on the right side.
On the right side SEO Neo will display all scheduled heatmaps within the project separated by days. and time.
Schedule Example 1
Schedule Example 2
On each day group, you can also see how many credits will be consumed for all heatmaps (for the entire day).
Credits shown for each scheduled day
**Repeated schedules** will be shows with a recurring arrow icon to distinguish them from **single schedules**.
***
### Deleting Schedules
To delete individual heatmap schedules, you can use the "bin" icon on the right side of each heatmap.
You can also use multiple selection (using the checkbox and the action button) to delete scheduling from selected heatmaps.
{% hint style="info" %}
Deleting a schedule from a heatmap or a project **WILL NOT** delete the heatmap or the project itself - just the scheduling from the heatmap/project.
{% endhint %}
To remove all scheduled heatmaps from a an entire project, you can use the "**Remove Scheduling**" button.
When you try to delete a repeated-type schedule, SEO Neo will throw a message and ask you how you want to be handle the delete process. You can choose to delete only current dates (which will break the repeated process) or delete the entire repeat chain (which will remove the entire schedule from selected heatmap).
# Credit System
Credits are used to as a pay-on-demand way to use some SEO Neo features that are server-based. Currently credits are used for running new heatmaps on [**GBP module**](/documentation/gbp) but in the near feature it will be used on other features.
### Why the Credit system?
Some new SEO Neo features are **server based**. In order not to effect the price for all users (even for those that don't want to use a server-based feature) we have introduced **credits** system. This gives the flexibility to pay for a feature when you want to use it.
### Available Credits
You can view your available credits on the top section of SEO Neo.
To refresh your credit balance click on the "**refresh**" button, located on right.
### How to buy Credits?
You can click on credits balance area to top-up your credits. This will navigate you to your account where you can buy different credit packages according to your needs.
# Creating your 1st campaign
In this tutorial we will see how we can create a simple campaign.
Before creating your campaign it is recommended to write on a text file which URLs you want your campaign to target (**Money Site URL Links**) and **keywords** that you want to use for your campaign.
In order to create and run a campaign there are some prerequisites. Your campaign needs content ([**content buckets**](/documentation/content-buckets)), accounts ([**account templates**](/documentation/account-templates) and [**account buckets**](/documentation/account-buckets)) and some [**third-party API services**](/documentation/settings/third-party-api) (captcha solving services, proxies etc).
So if this is the first time you create a campaign, this tutorial will guide you though all basic steps.
If you already have set all prerequisites then skip "Before creating your campaign" section and navigate to "[**Campaign creation**](/tutorials/creating-your-1st-campaign/creating-your-campaign)".
# Before creating your campaign
### Basic prerequisites to create your 1st campaign
1\) **Basic settings**: setup your proxies and any 3rd party API you want to use
2\) **Creating Content Bucket**: create a content bucket with content (articles, descriptions, bios, images and video URLs)
3\) **Creating Account Bucket**: where all created accounts will get stored when you run your campaign.
4\) **Creating Account Template**: setting your account emails and account templates. You can omit this step if you use SEO Neo's default account template.
5\) **Creating a diagram**: You can omit this step if you use SEO Neo's pre-created diagrams.
6\) **Creating campaign**: in this step we will use created buckets, accounts and diagram from previous steps.
# Basic settings
Before creating your first campaign its is important to set some [**basic settings**](/documentation/settings). These settings include proxies and basic API's that SEO Neo requires in order to run a campaign properly.
### 1. Set your proxies
Proxies quality effect your campaign success rate so it is very important to choose high quality proxies for your SEO Neo campaigns.
To set your proxies navigate:
**Main menu > Settings > Proxies**
Copy the list of your proxies from your service provider and paste them into Proxies text box. You can add multiple proxies (one per line).
{% hint style="warning" %}
You should use good quality proxies which have **at least 3 Mbps speed**. Proxies highly effect your campaign success rate. We recommend using ISP proxies from [Oxylabs](https://isp.oxylabs.io/).
{% endhint %}
{% hint style="info" %}
You can check your proxies before using them on your campaign to make sure they are set and working as desired. To test your proxies, click on "**Test**" button and wait until the software finishes testing process.
{% endhint %}
{% hint style="info" %}
**Proxies format**
When you enter your proxies inside NEO you should use one of these formats:
1. \[proxy\_ip]:\[proxy\_port]
2. \[proxy\_ip]:\[proxy\_port]:\[username]:\[password]
\
If you had this proxy:\
proxy\_ip: isp.oxylabs.io:8001\
username: Example\_Username\
password: Example\_Password
Then you would enter your proxy like this: isp.oxylabs.io:8001:Example\_Username:Example\_Password
{% endhint %}
***
### 2. Set Captcha API Key
Grab your API key credentials from your Captcha solver service and use these credentials into Captcha service settings.
To do so, navigate:
**Settings** > **Third Party API** > **Captcha**.
{% hint style="info" %}
It is **extremely important** to have set a Captcha solver in order for SEO Neo to use any website that requires captcha.
{% endhint %}
###
### 3. Other Settings
If you have subscription to 3rd party services like content creators (**Article Forge, OpenAI**) , spinners (**Spin Rewriter, Word AI, Spinner Chief, Espinner**) or any indexer service (**Omega Indexer, Colinkri, Speedlinks, Index Inject**) it is now the best time to set these settings.
### Open AI
One of the most important 3rd party API is **Open AI.** This is the best source to generate articles for your campaigns. If you have Open AI you can even omit the use of article spinners, because you could generate hundreds or thousand of articles for your content buckets.
### Indexers
It is also recommended to use an indexer, in order for you campaigns to have a greater impact on search engines. Simply put: If you have an indexer, then when your campaign finishes, SEO Neo will send these links to Indexing service, to make Search Engines know that your links are there.
{% hint style="info" %}
To improve your campaign results it is ultra-high recommended to also use an indexer service. Using an indexer doesn't effect how your campaigns run, but it effects how search engines favor your created backlinks from your campaigns.
It is recommended to use [**Omega Indexer**](https://www.omegaindexer.com/) or [**Colinkri**](https://www.colinkri.com/) crawler for your campaigns.
{% endhint %}
For more details refer to [**Settings**](/documentation/settings) section of this documentation.
# Create Account Bucket
Before creating your campaign, you must also create an account bucket. Account buckets work as folders that keep all generated accounts (from your campaigns).
You should have at least one account bucket to be used for your campaign.
Account buckets are used to keep all generated accounts organized, so you are advised to give account buckets a name that you can later remember.
For more details on how to create an account bucket [**read this section**](/documentation/account-buckets/creating-account-buckets).
# Create Account Template
Creating an account template is also a requirement before running your campaigns. Account template creation is a very simple process (refer [**to this section of the documentation**](/documentation/account-templates/creating-account-template) for more details on how to create an account template).
For better success rate use Gmails for your account templates. Create your account template and add at least one Gmail.
Gmail Variations
SEO Neo creates variations from your Gmail name. If you have for example a Gmail "****" then SEO Neo could use these variations:\
\
\
\
... etc
{% hint style="info" %}
It is best to use Gmails that have a long username in characters. This gives SEO Neo to use more variations when using the email to create accounts.\
\
Example:\
**** <- is a short email\
**** <- this is long username and can create many variations
{% endhint %}
For more details refer to [**Account T**](/documentation/account-templates)[**emplates**](/documentation/account-templates) section of this documentation.
# Create Content Bucket
Create at least one content bucket and fill it with as much content as you can for your campaign. It is best to organize your content buckets based on niche of content, or even based on your campaign type or client name.
Let's say for example, that we wanted to create a campaign for a webpage with "car sales" niche. We would need to create a content bucket with content related to "car sales".
Our content bucket should have enough content for all content types including:
* Articles
* Short Descriptions
* Bios
* Rich Content (Images, Videos)
* Blog Details
The more content a bucket includes the better it will perform, especially on demanding campaigns with many groups.
We will first create a content bucket with name "car sales".
Our new content bucket currently has no content inside. There is only 1 Bio entry (with default value spintax).
Then we will open and edit our content bucket to populate it with content. To edit our bucket, click on hover button "**Edit**".
### Adding articles
Although it is better recommended to use articles from high quality sources (for example **Open AI**) in this tutorial will will only use free sources.
We will generate a 10 articles, using "**Article Builder**":
Click "**Generate**" > "**Article Builder**"
For our "car sales" campaign we want articles with relevant content, so we use the following settings:
We used SEO Neo's free built-in spinner to create some variations based on these articles.
{% hint style="info" %}
Although Free Spinner creates decent results, it is recommended to use premium third party spinners like "Word AI".
{% endhint %}
As you can see from image below, our content bucket now has 10 articles.
We will continue our tutorial by generating content (related to cars, car sales etc) for other content types.
### Adding Short Descriptions
For Short Descriptions we will follow the same process as we did with Articles. We will use **Generate > Article Builder** to generate some short descriptions.
Short Descriptions section is empty
10 entries generate for Short Descriptions using Article Builder
### Adding Bios & Blog Details
Bios section has one entry by default. We will leave this as it is. The same applies for Blog Details. SEO Neo has good default entries that can generate multiple variations for Bios and and Blog Details.
### Adding Image and Video URLs
To add image and video URLs, navigate to "**Rich Content**" tab and click "**Scrape Rich Content**".
We will ask SEO Neo to scrape 20 images, using keyword "car sales":
We will repeat the same, this time for video URLs:
\
Our content bucket has enough content to be used on a small campaign. For bigger campaigns with more link groups, you can create bigger content buckets with additional content.
For more information on how to create a content bucket [**refer to this section**](/documentation/content-buckets/creating-a-content-bucket) of the documentation.
# Create a diagram
Although you can use any included SEO Neo diagram, for this tutorial we will create a basic diagram to understand the basic concepts.
Lets create our diagram and name it "first tutorial".
Click "**Diagram Editor"** > Click "**Create**".
For diagram name type "first tutorial". and click "**Create**".
What we want for this tutorial is a diagram that includes a good number of rich content - high quality backlinks.
{% hint style="info" %}
The most rich-content link group for SEO Neo (except from Cloud assets) is Web 2.0 Blogs. For every link group we will add into the diagram, SEO Neo will create blogs for sites like Wordpress.com, Tumblr, Weebly etc.
{% endhint %}
On the left side of Diagram Editor you can see all available link group types.
For this tutorial we want to create **3** x **Web 2.0 Blogs** link groups. To do so, click on "Web 2.0 Blogs" and **drag over** the empty diagram. Repeat this 2 more times.
You can click and drag any group to move it. **Click and drag** all three created **Web 2.0 Blog** groups to align and fit them into the diagram.
You can click and drag any group to move it around the diagram
Now it is time to create some connections between our link groups and money site. Connecting a group with money site means that this group will use "**Money Site URLs**" (user gives these URLs when creating the campaign) as links inside blog posts.
To connect a group with Moneysite or to another group, hover over any or 2 available group dots. When you hover with your mouse, you will notice that mouse cursor changes.
Hover over any of two white dots on any group to start creating a connection
Then **click and drag** (and **hold down**) your mouse. As you move your mouse you will see a connection line. To create a connection with **Moneysite**, simple drag your mouse over **Moneysite** connection white dot.
Repeat the same process for the rest of the groups to create connection for all three groups with **Moneysite**.
## Adding child groups
The diagram we have created has only 3 link groups connected to moneysite. Of course we can leave the diagram as it is, but for better SEO results, a diagram should have a more complex structure with more tiers (currently our diagram tier level is 1).
{% hint style="info" %}
Combining different link group types, and using multiple tier levels result in a more "natural" link-building campaign, which means better SEO results.
{% endhint %}
To improve our diagram just a little bit, we will add some child groups under Web 2.0 Blogs. For this tutorial we will just add some URL Shorteners under each Web 2.0 Blogs groups.
When the campaign runs, links generated from one tier will be used into the other tier as targeted links.
Let's save the diagram
For more details on how to use Diagram Editor, refer to [**Diagram Editor**](/documentation/diagram-editor) section of this documentation.
# Creating campaign folder
### Create your campaign folder
Click "**Campaigns**" on main menu > "**Create Folder**"
Give your campaign folder a name and then click "**Create**". In this tutorial we will give our folder the name "my first campaigns".
{% hint style="info" %}
It is recommended to keep your campaigns organized by using campaign folders for your or your projects.
{% endhint %}
# Creating your campaign
## Creating Campaign
To create a campaign inside our folder, click "**Create Campaign**".
Give your campaign a name and click "**Create**".
After clicking "**Create**" button, SEO Neo will take you into campaign creation form, were we will use all required assets that we created on previous steps.
SEO Neo breaks campaign creation into four (4) basic steps/sections to make campaign creation easier. In the next sections we will guide you through all steps.
# 1 - Diagram
This is the first step and where you select which diagram you will use for your campaign. Selecting different diagrams effect how some of the next steps (Common, Groups).
For this quick start tutorial we will use the diagram we have created, named "first tutorial".
You can find all available diagram on the left side of the form. Click "first tutorial" and click "**Next**".
Select already created diagrams for the left side of the screen
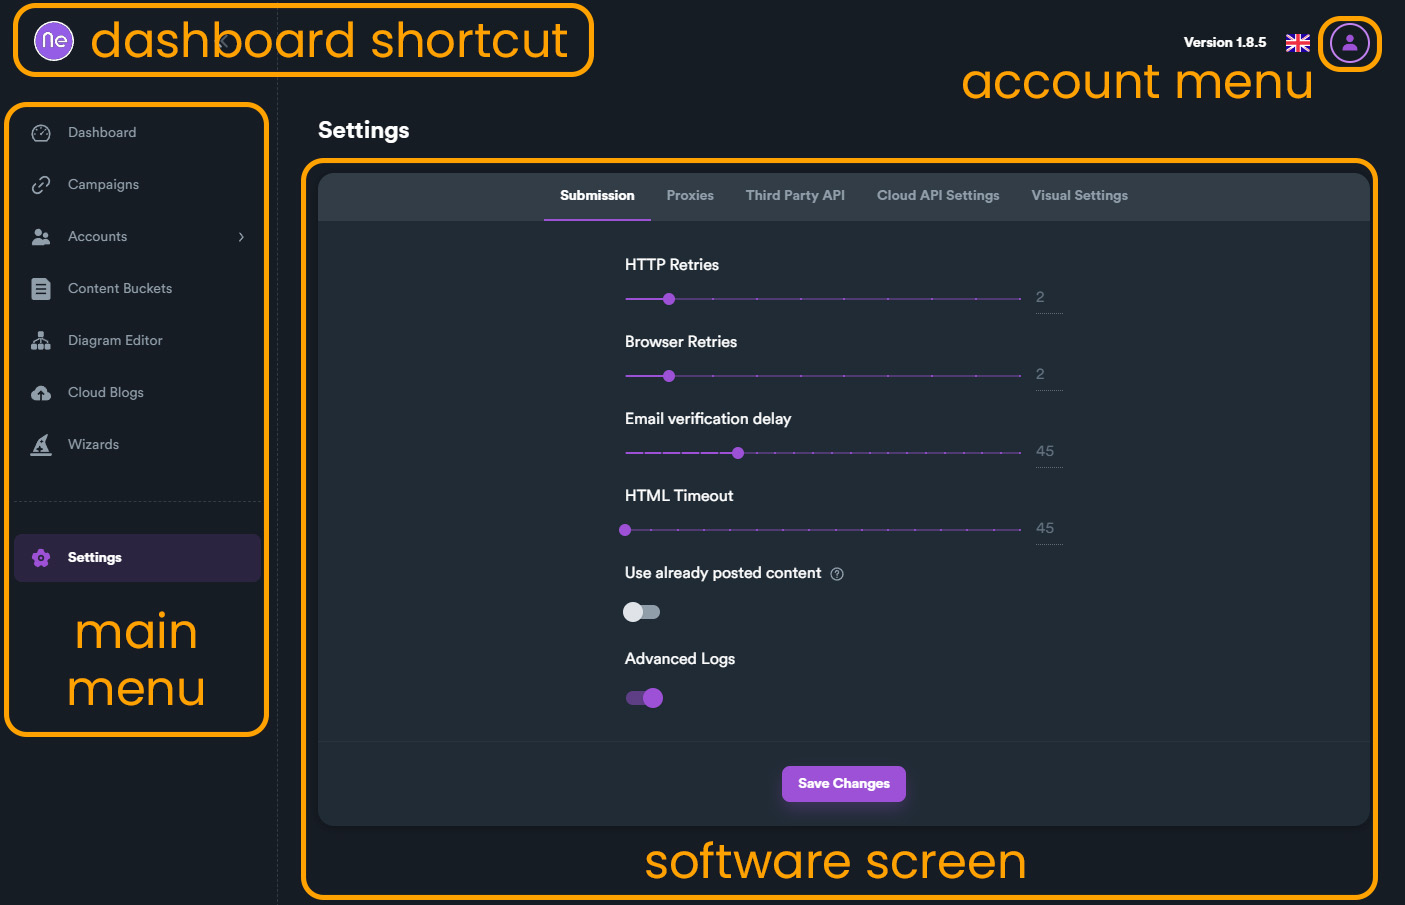

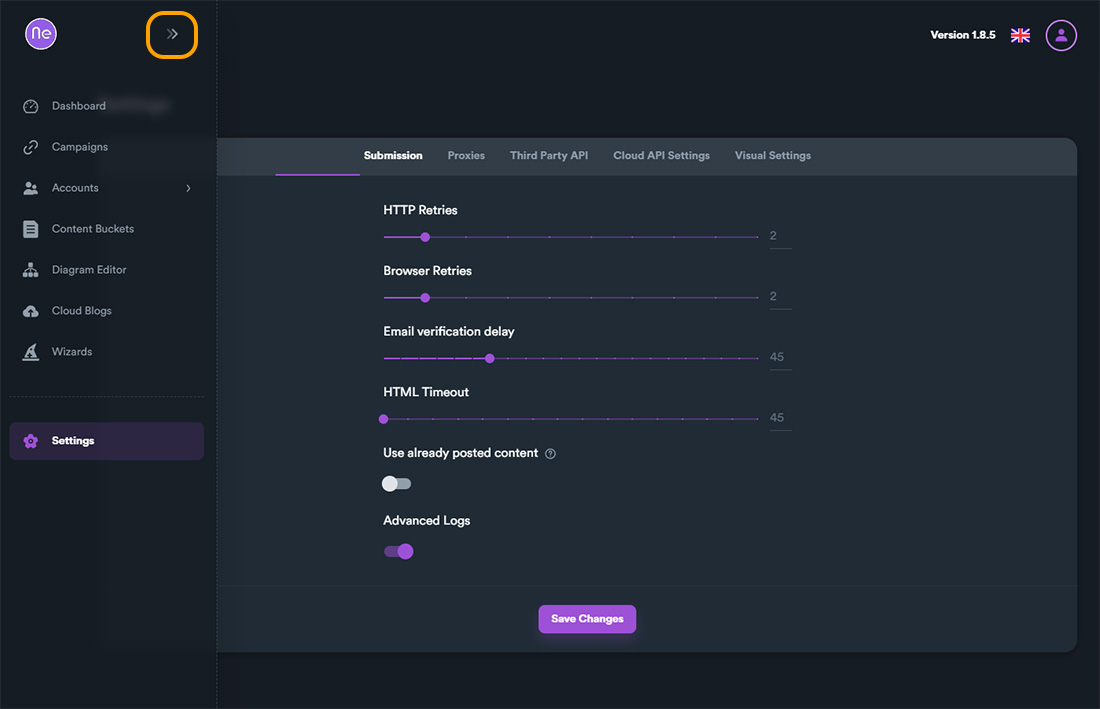
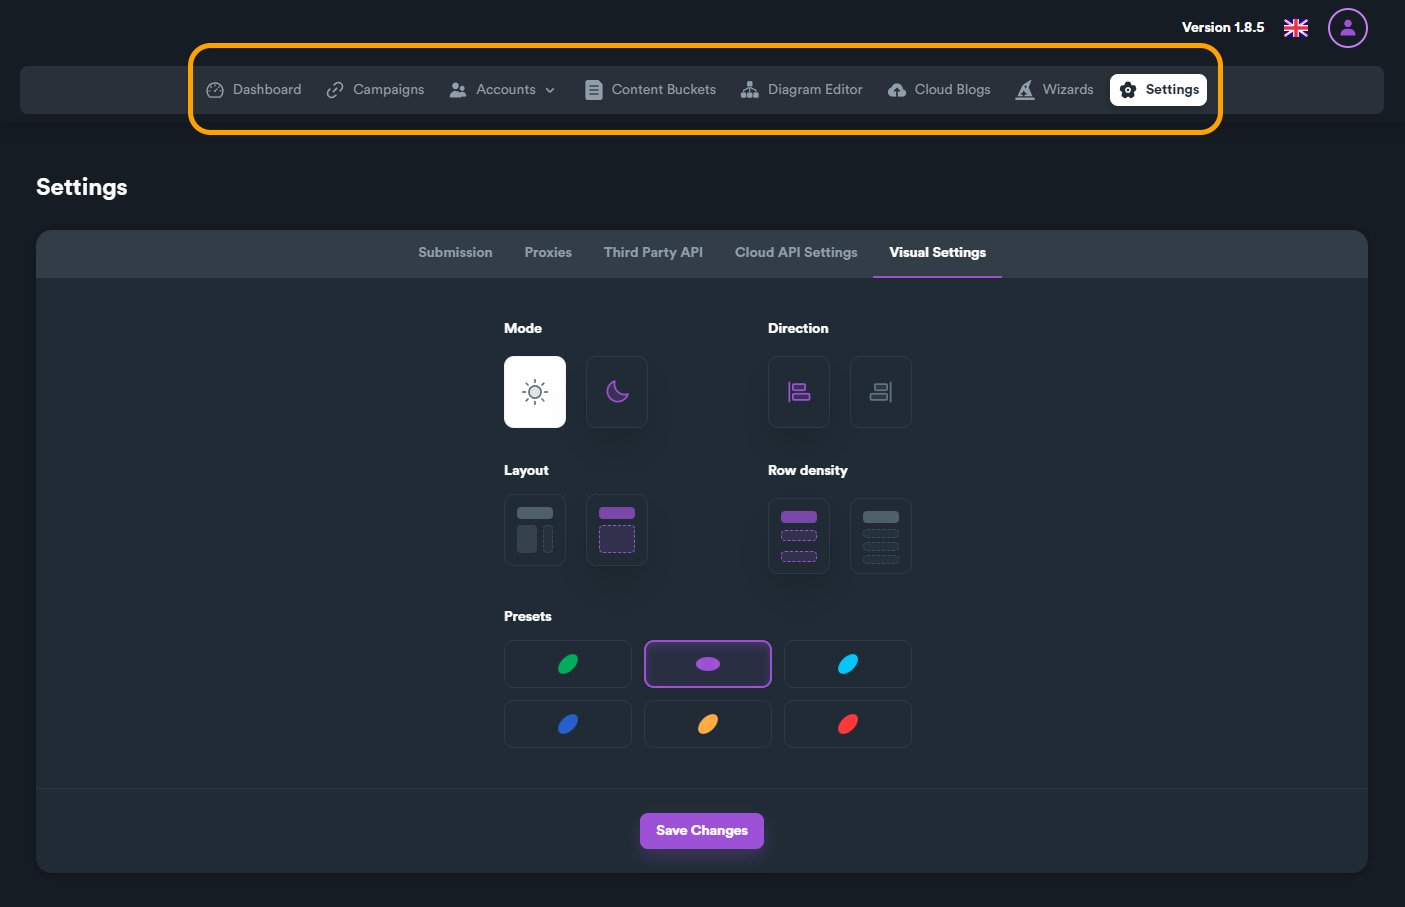
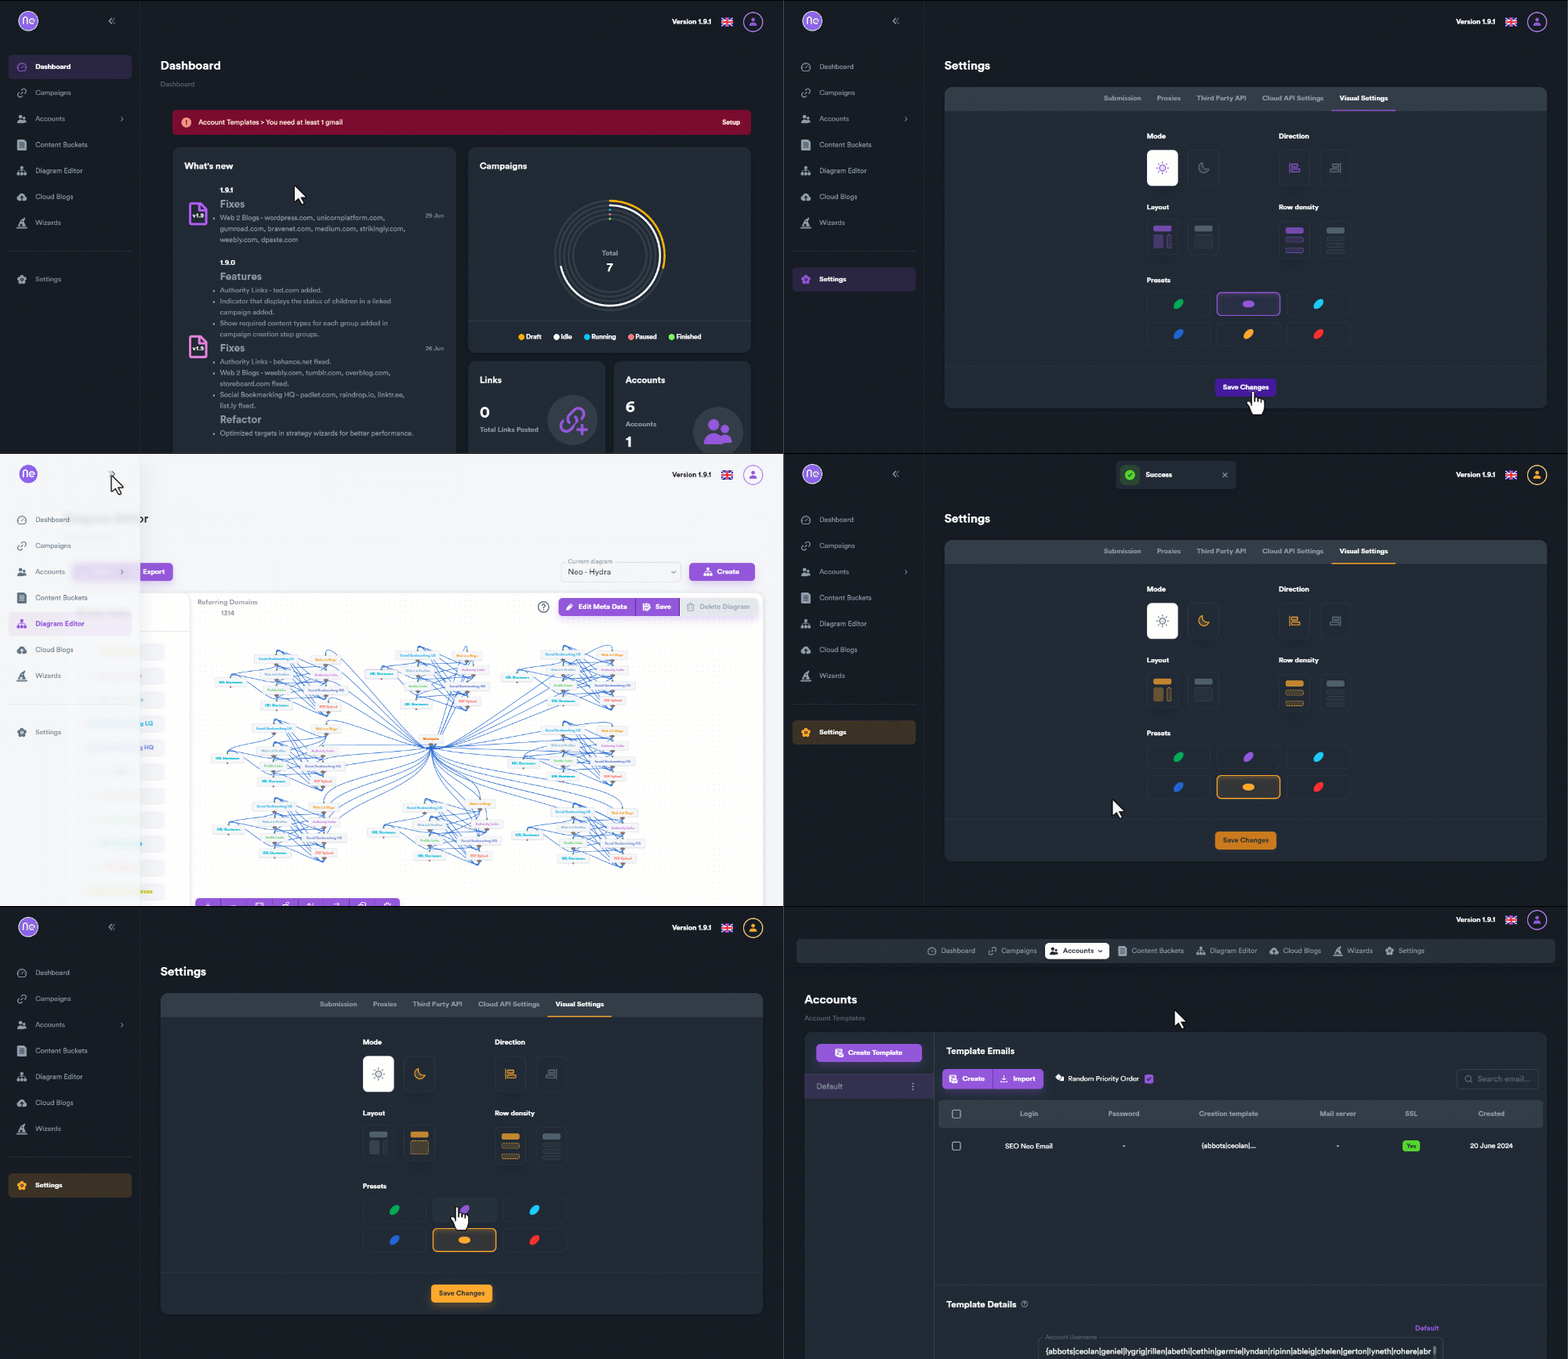
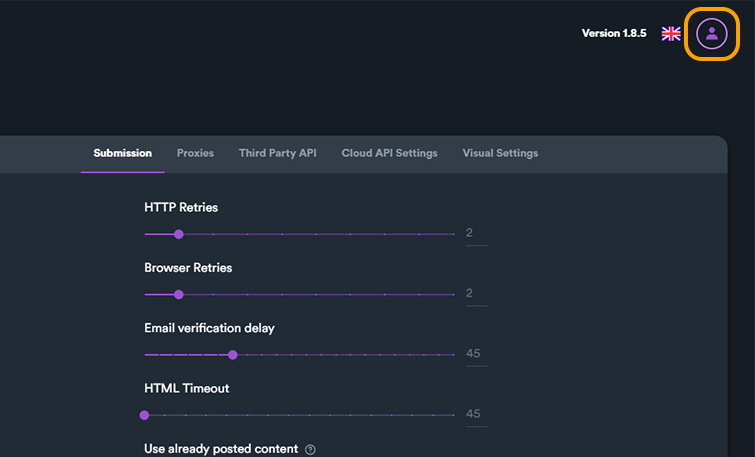

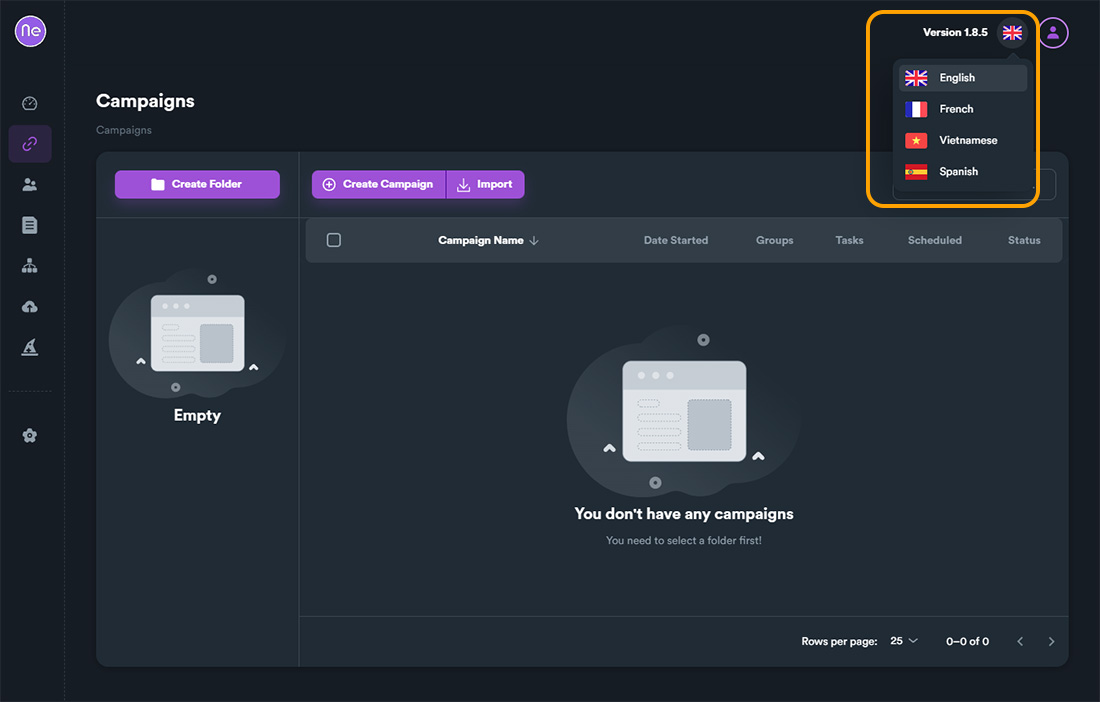
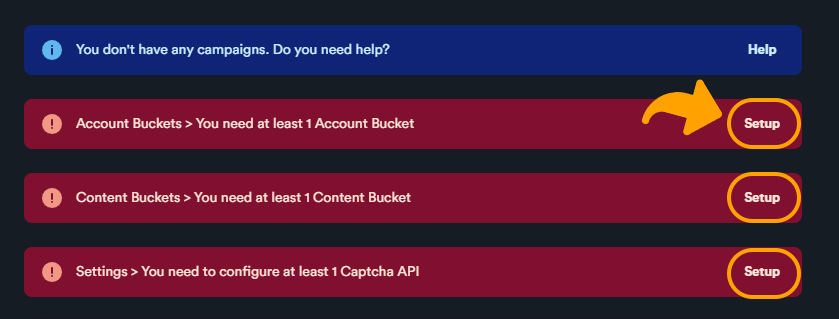
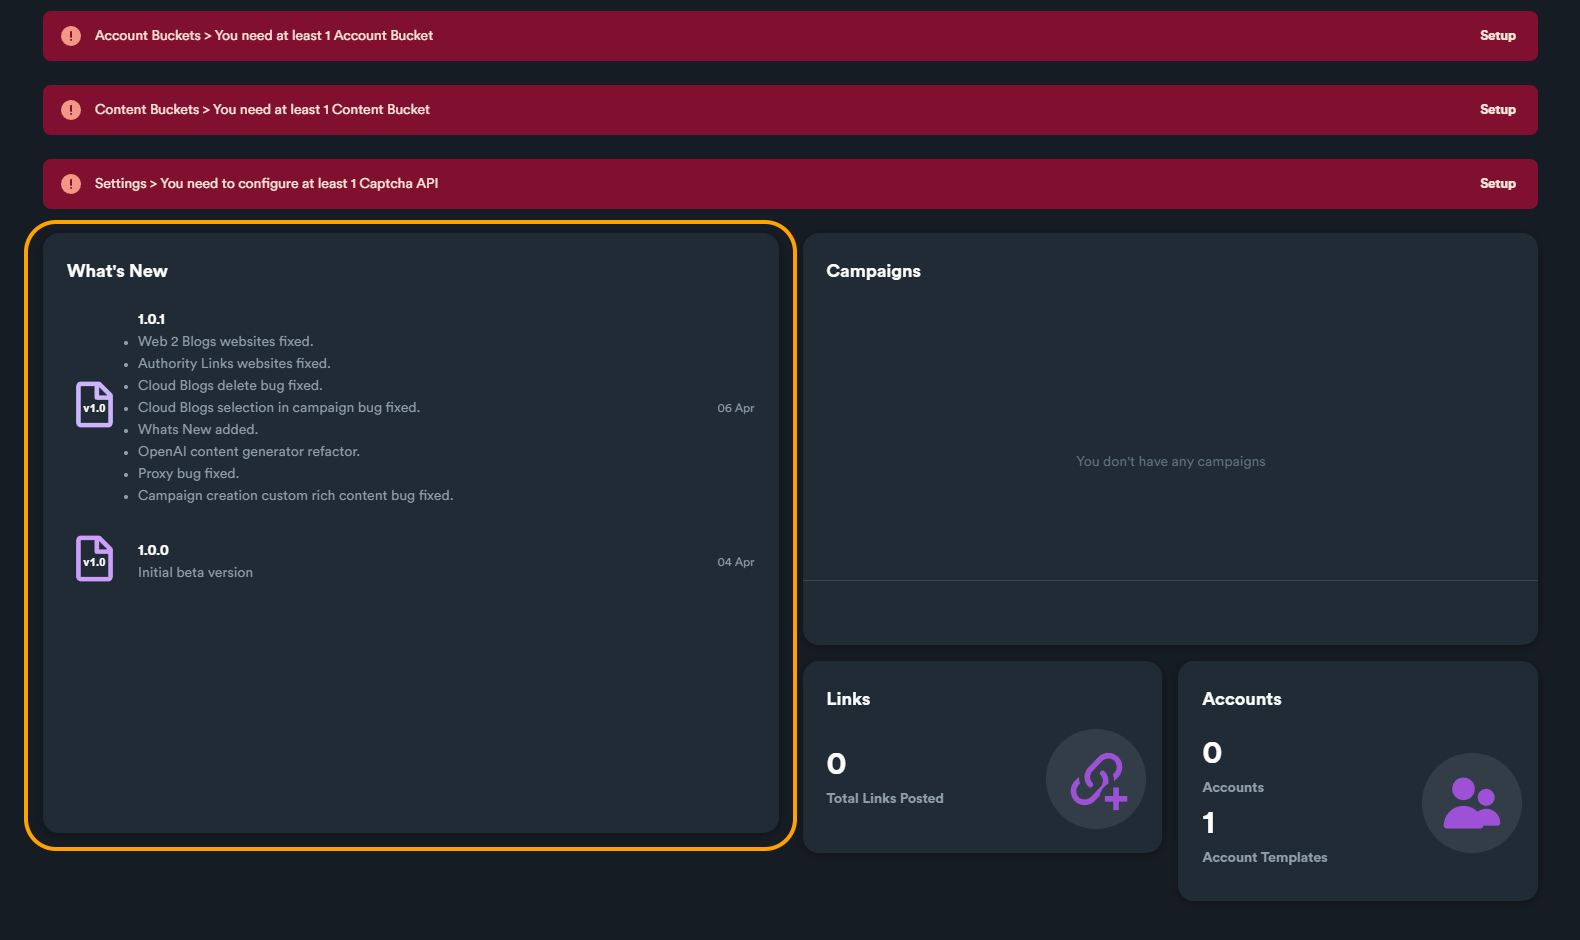
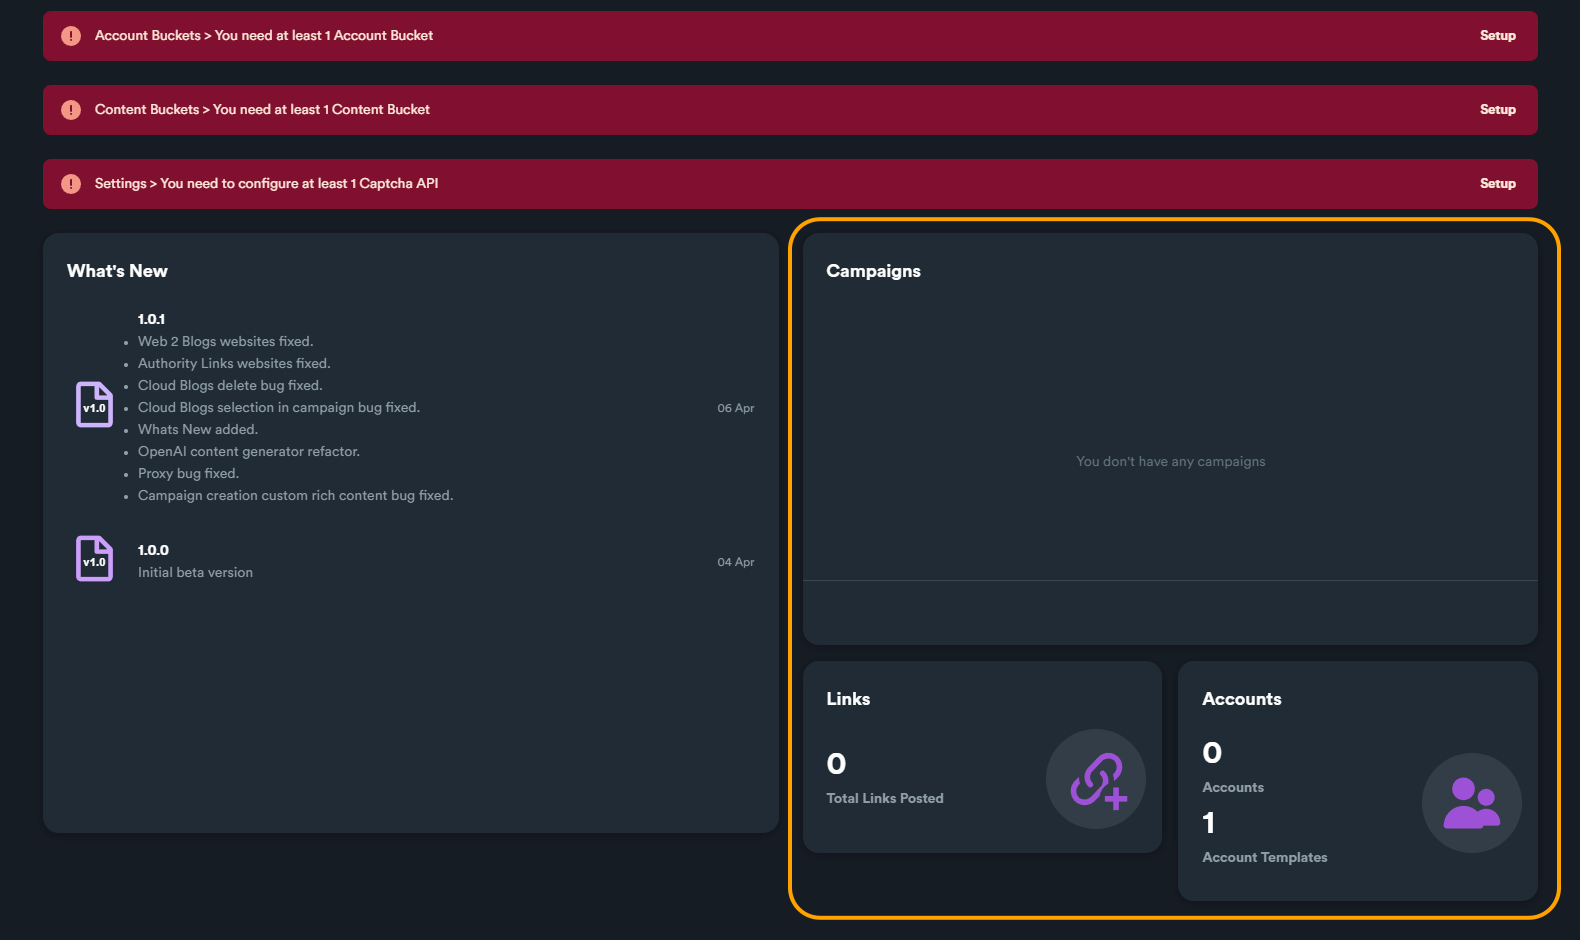
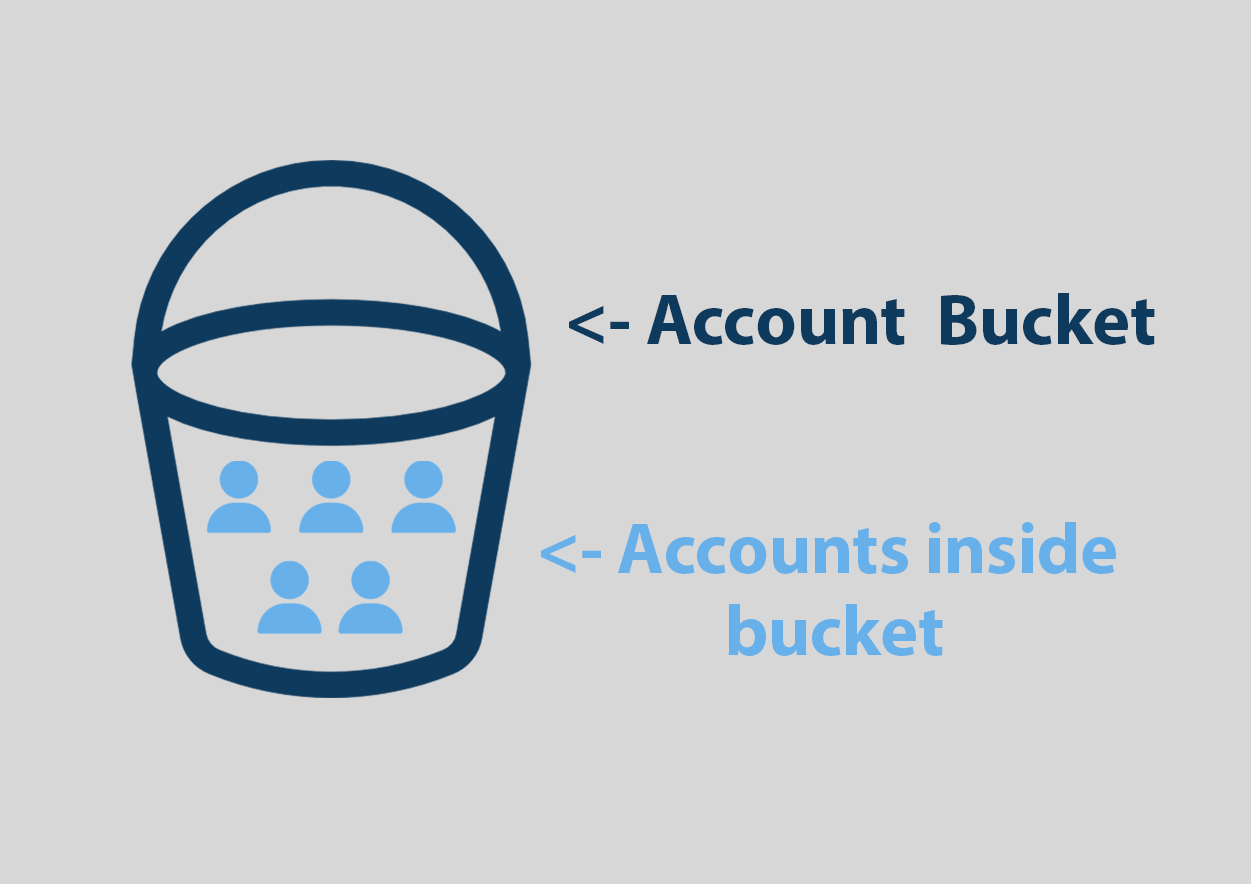
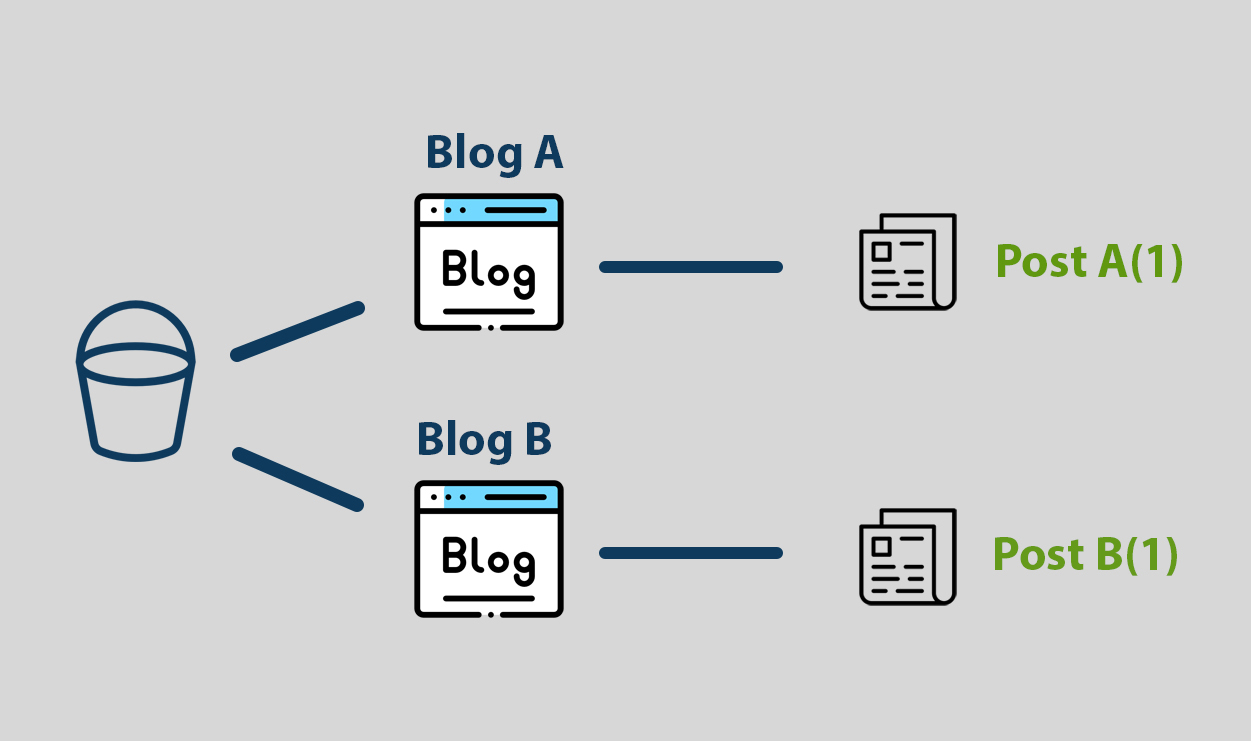
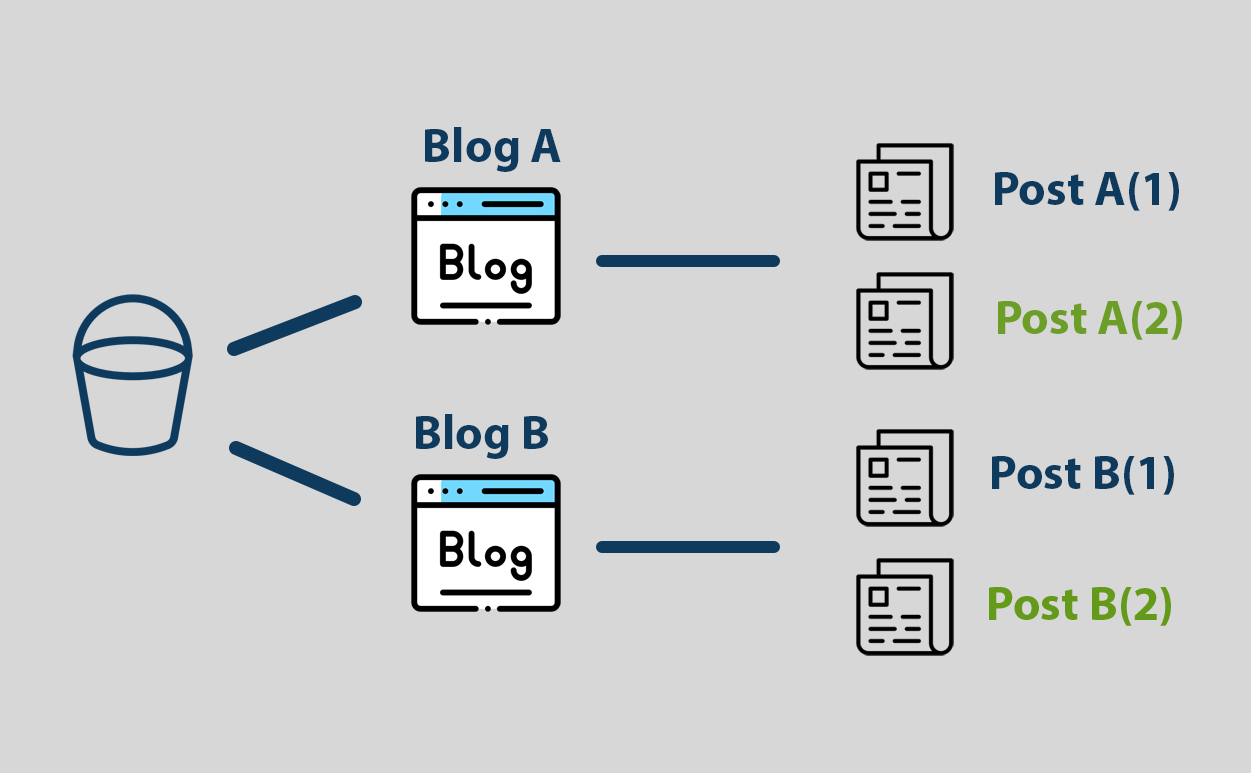
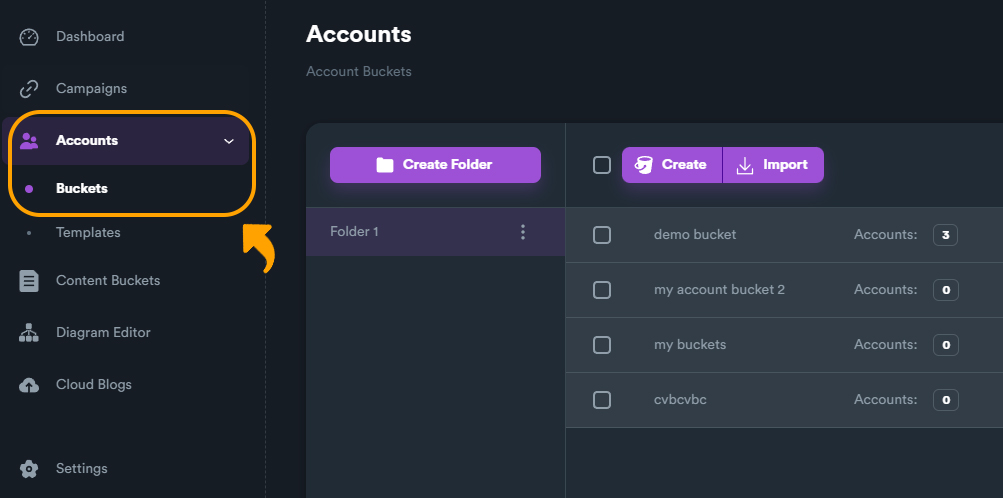
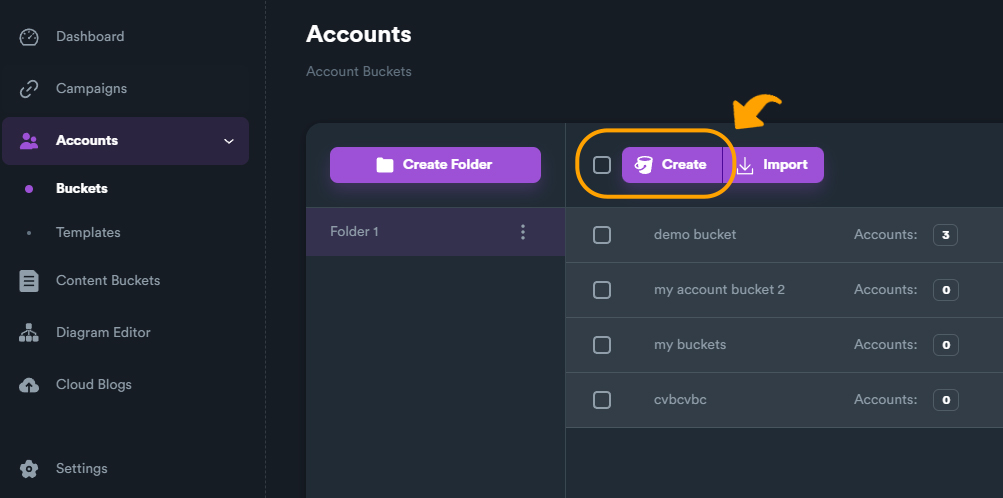
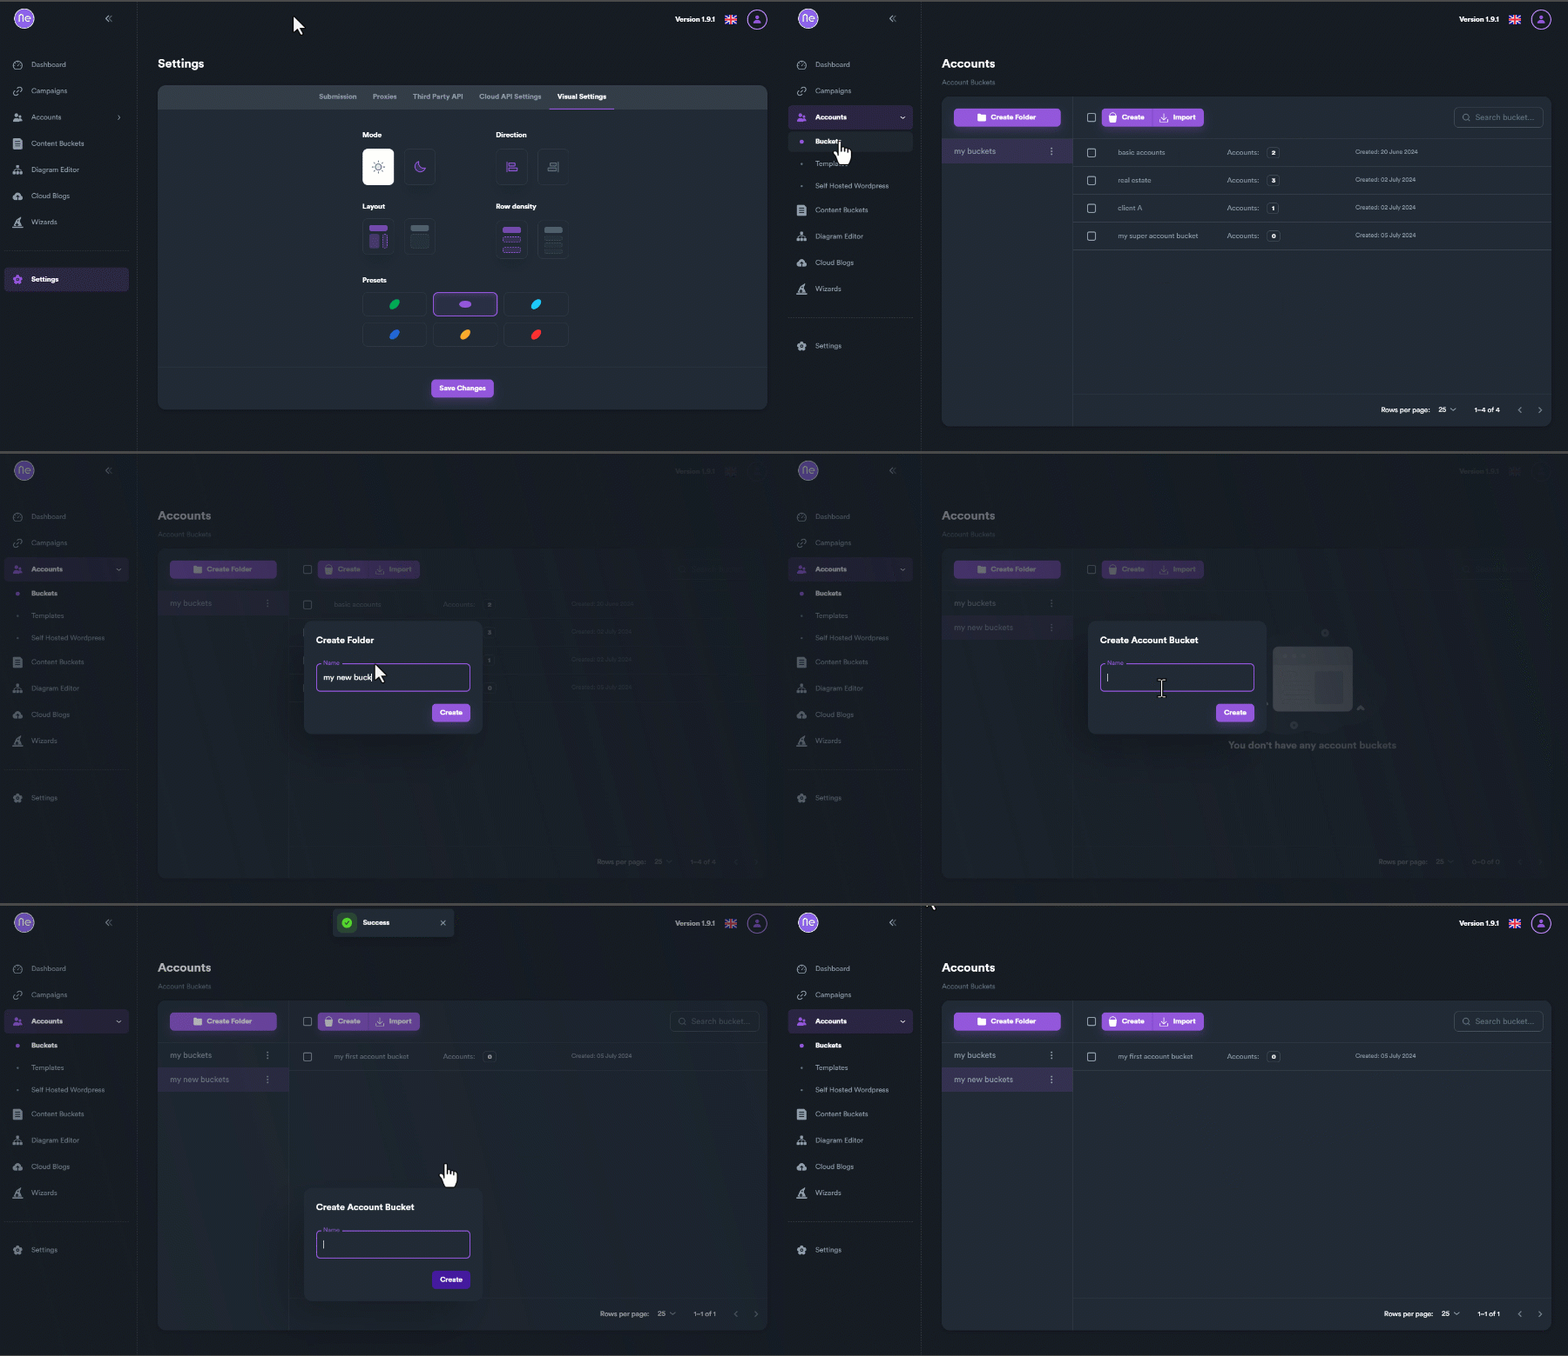


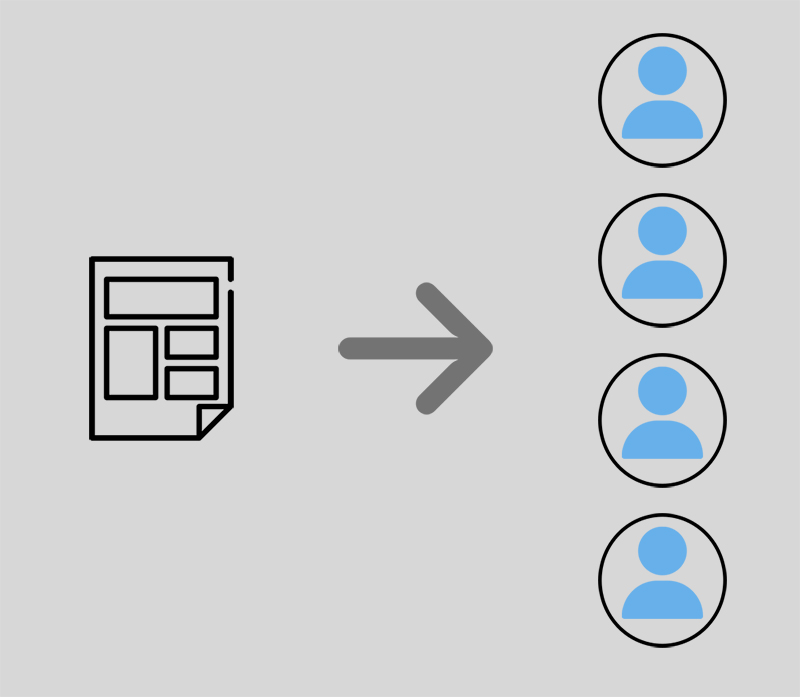
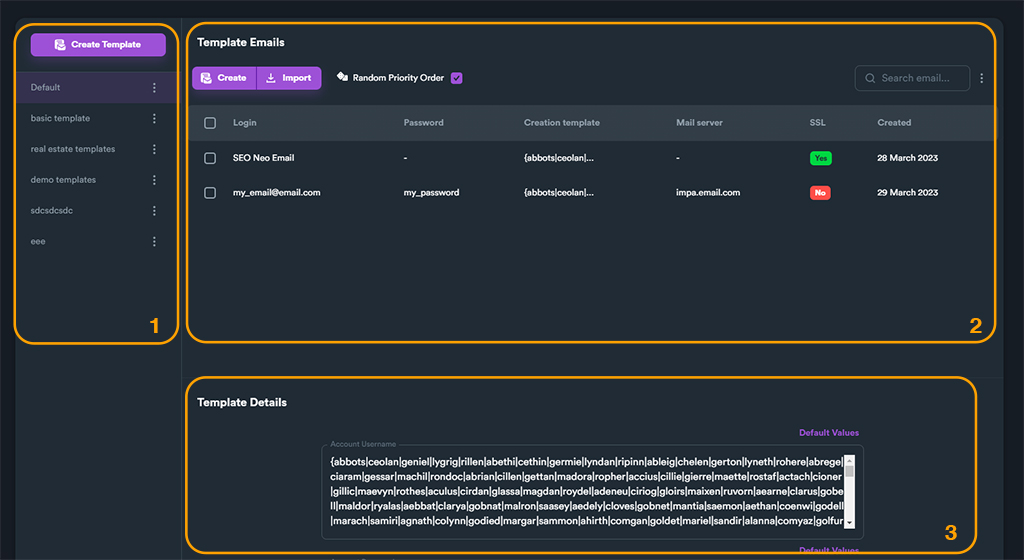
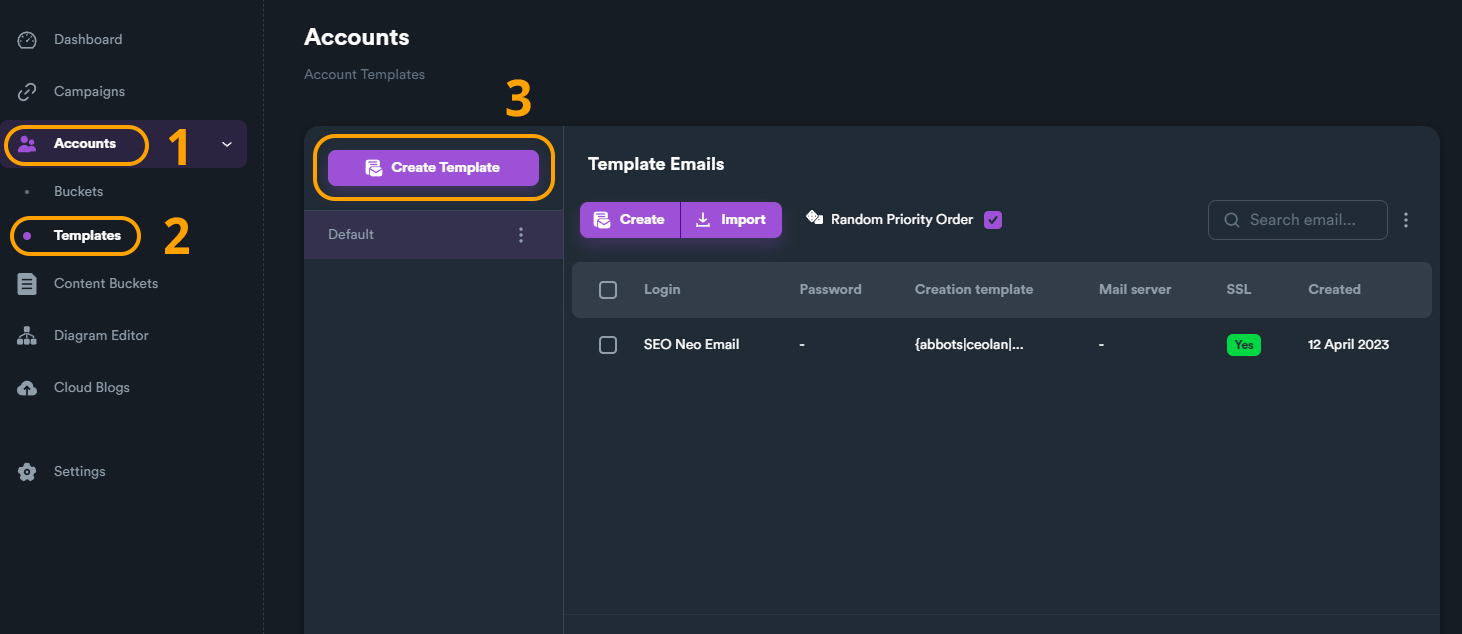
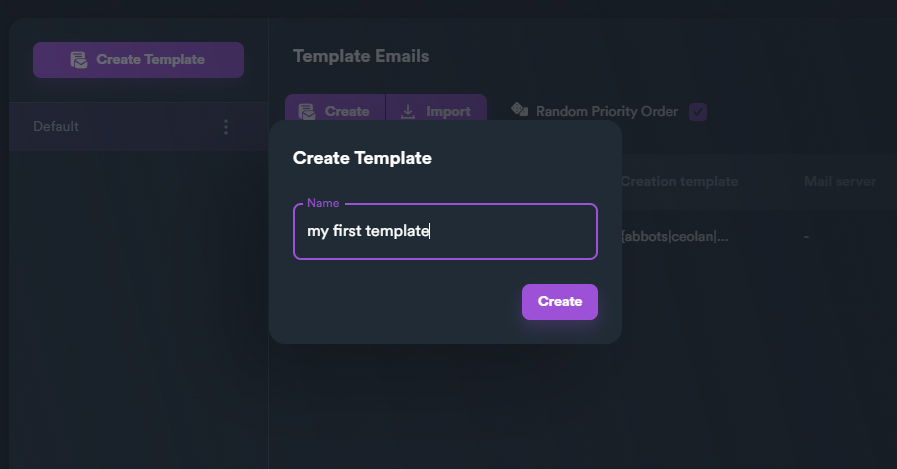
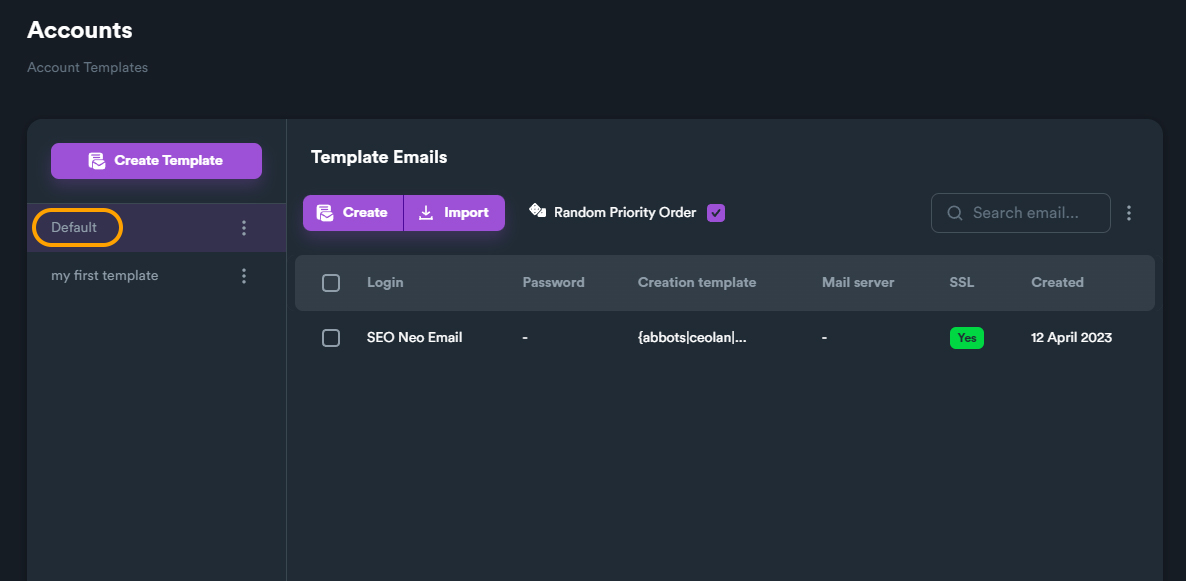


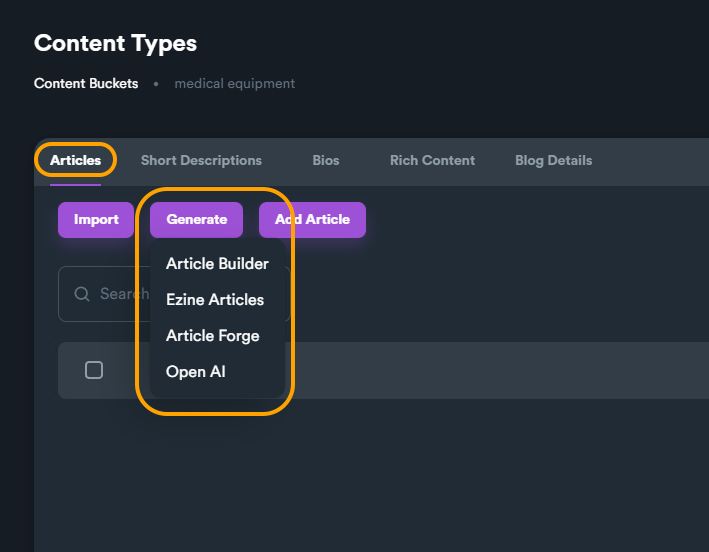


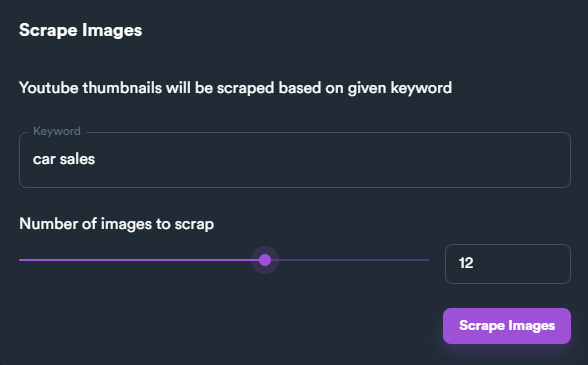


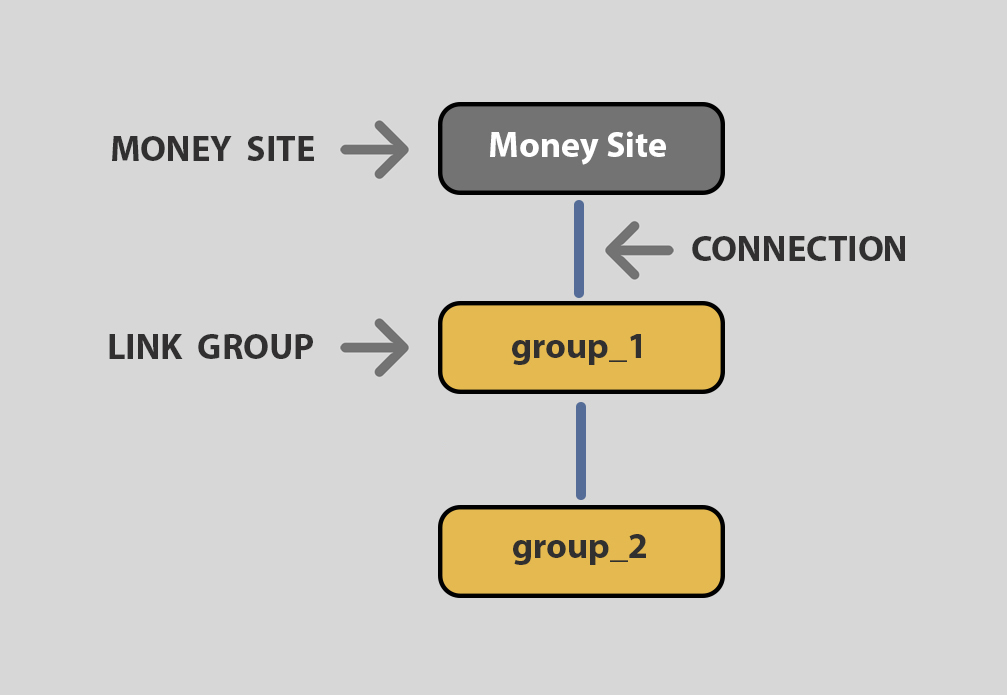
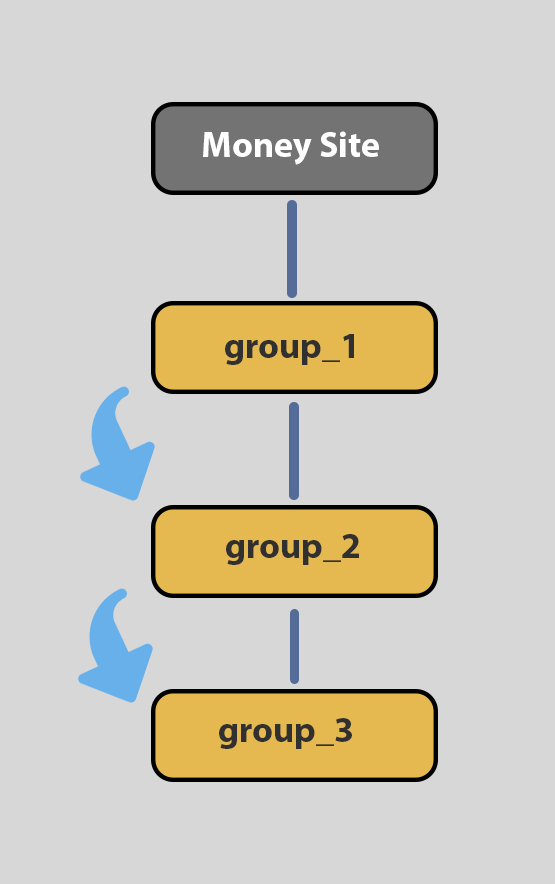

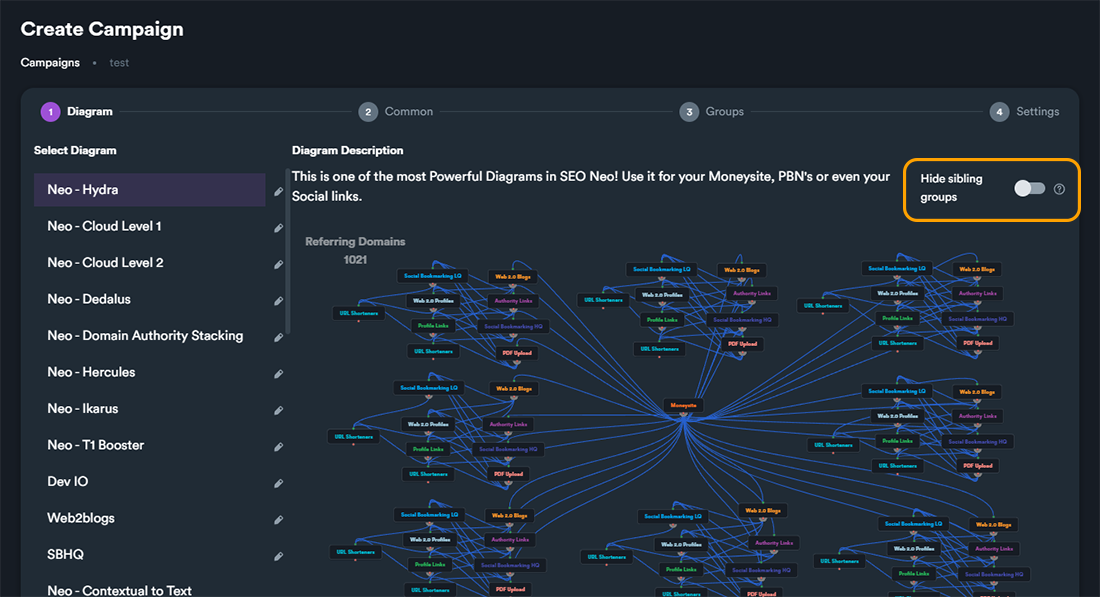


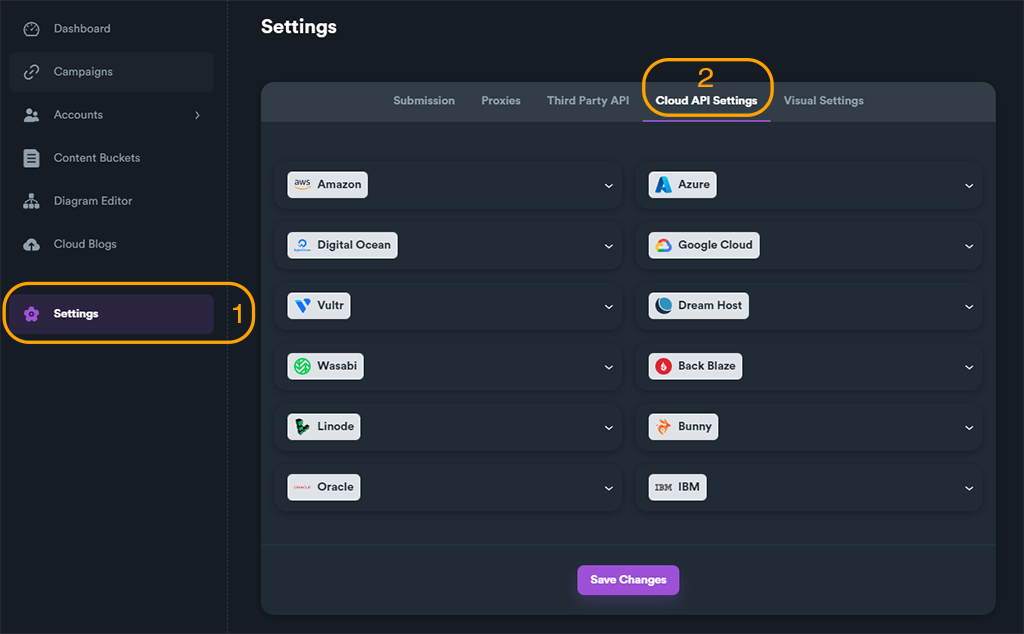

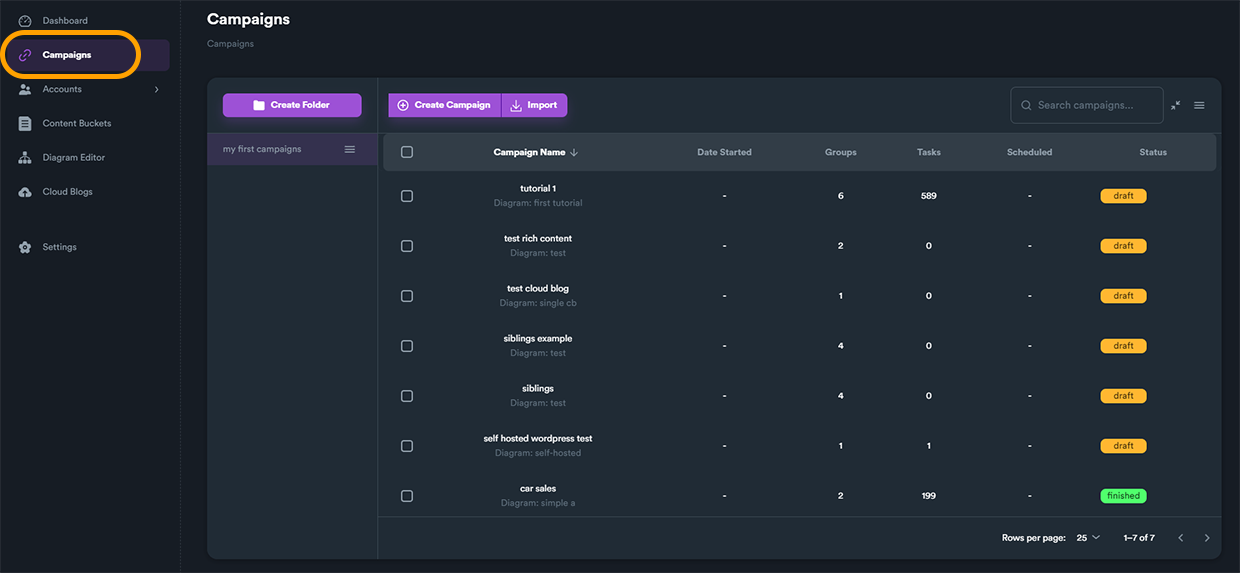
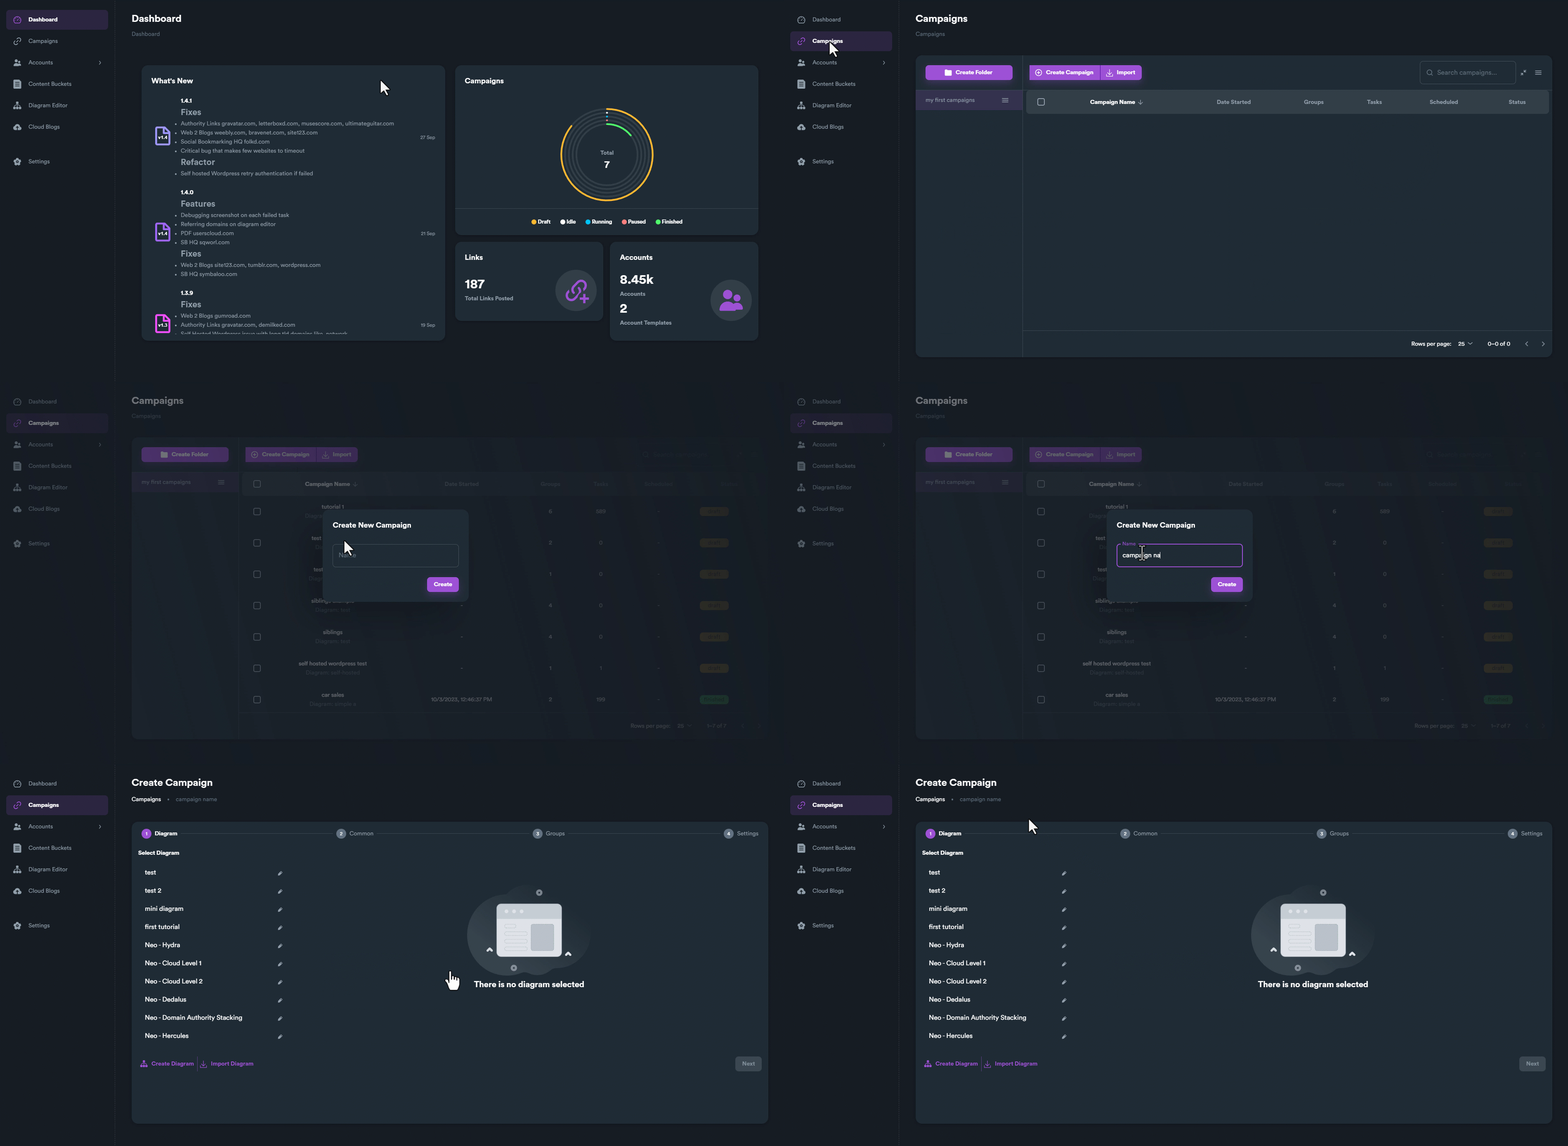


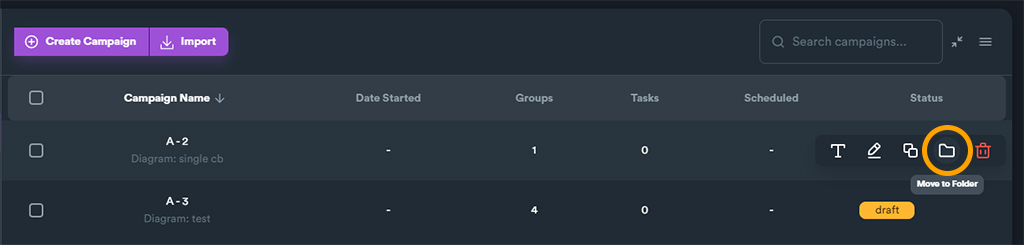

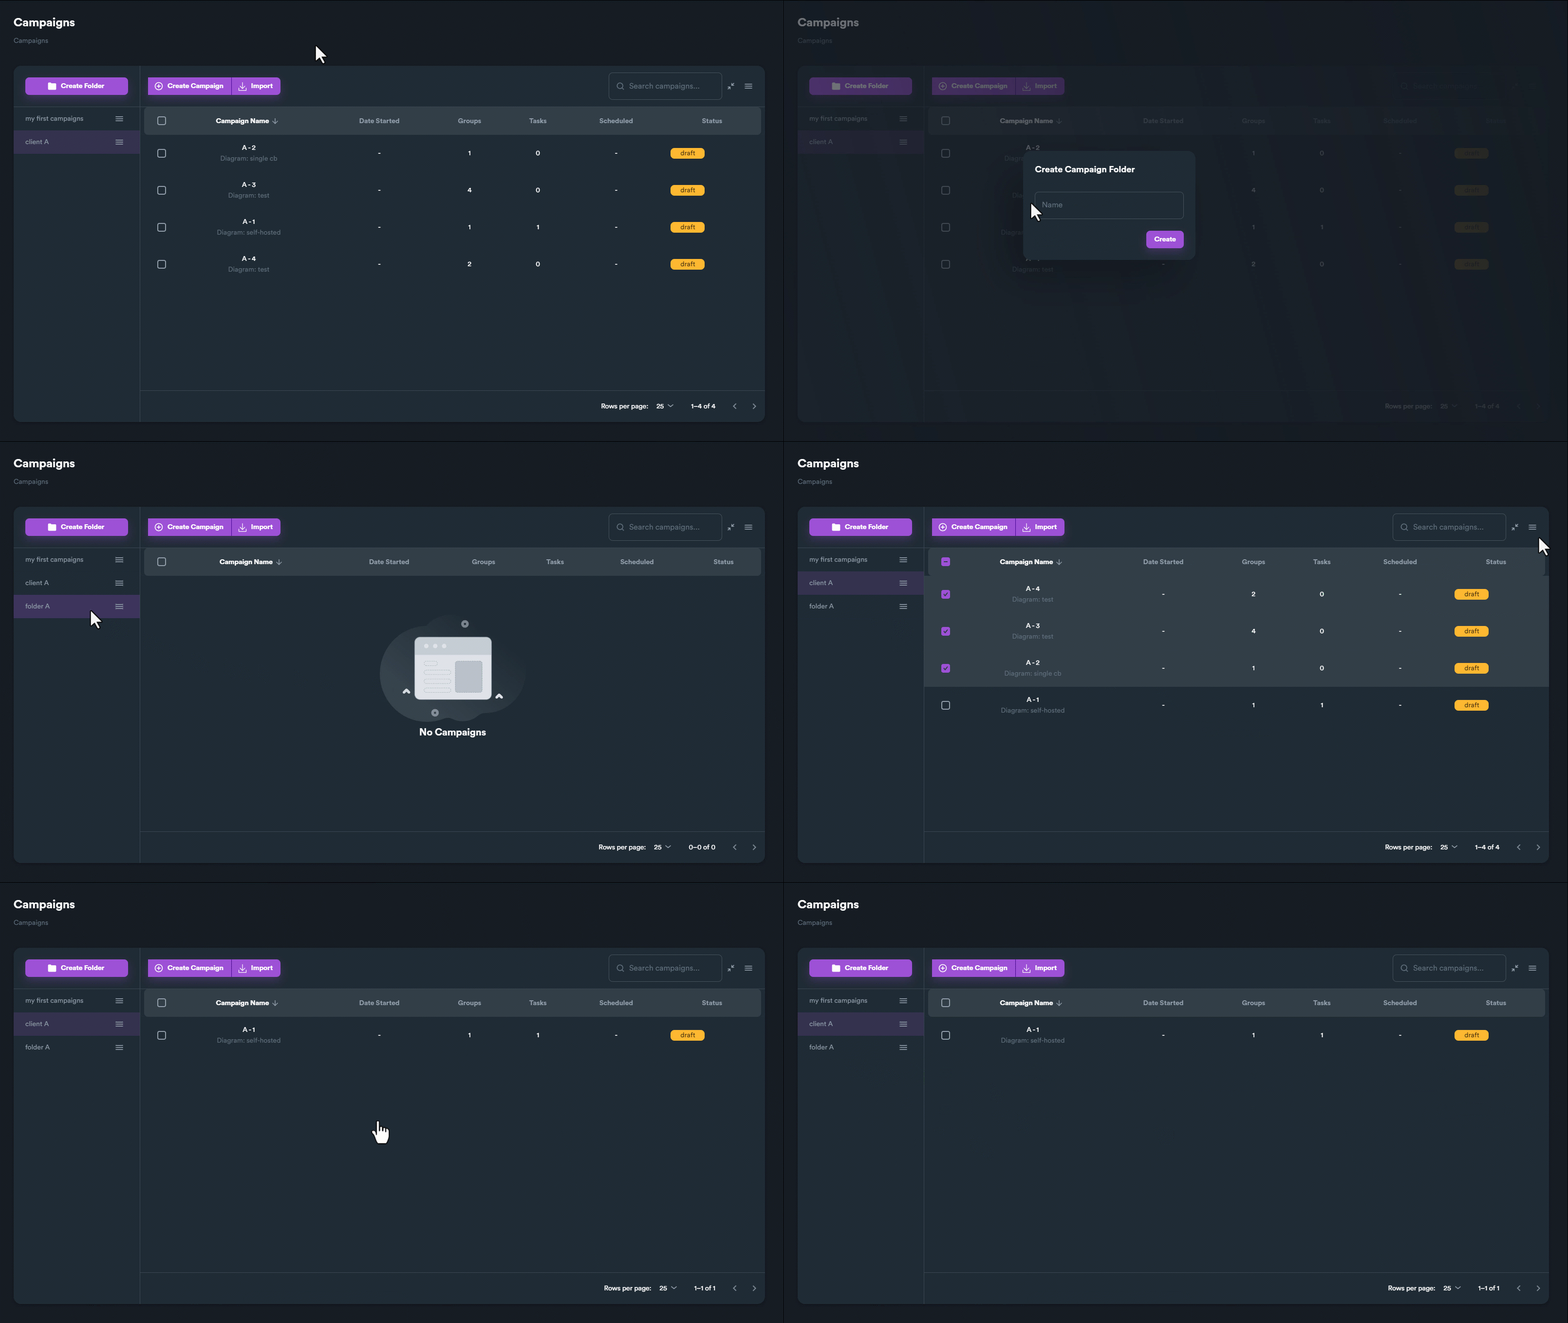



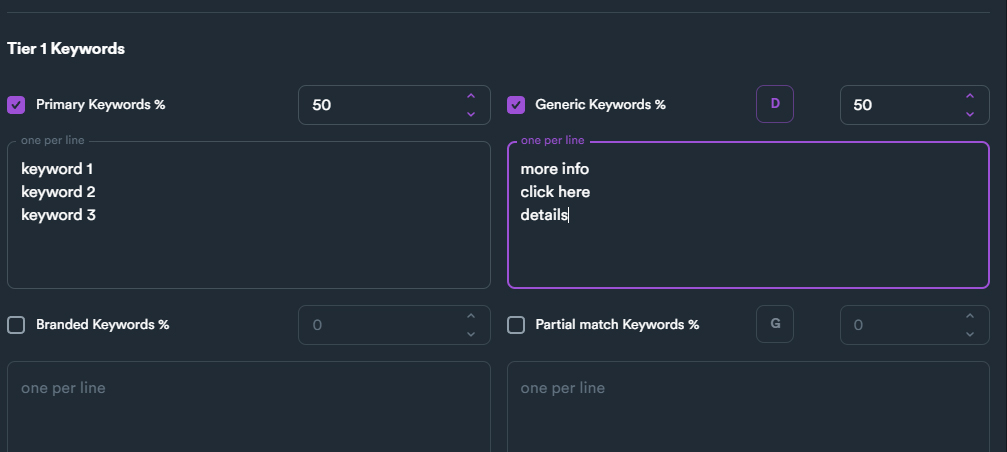


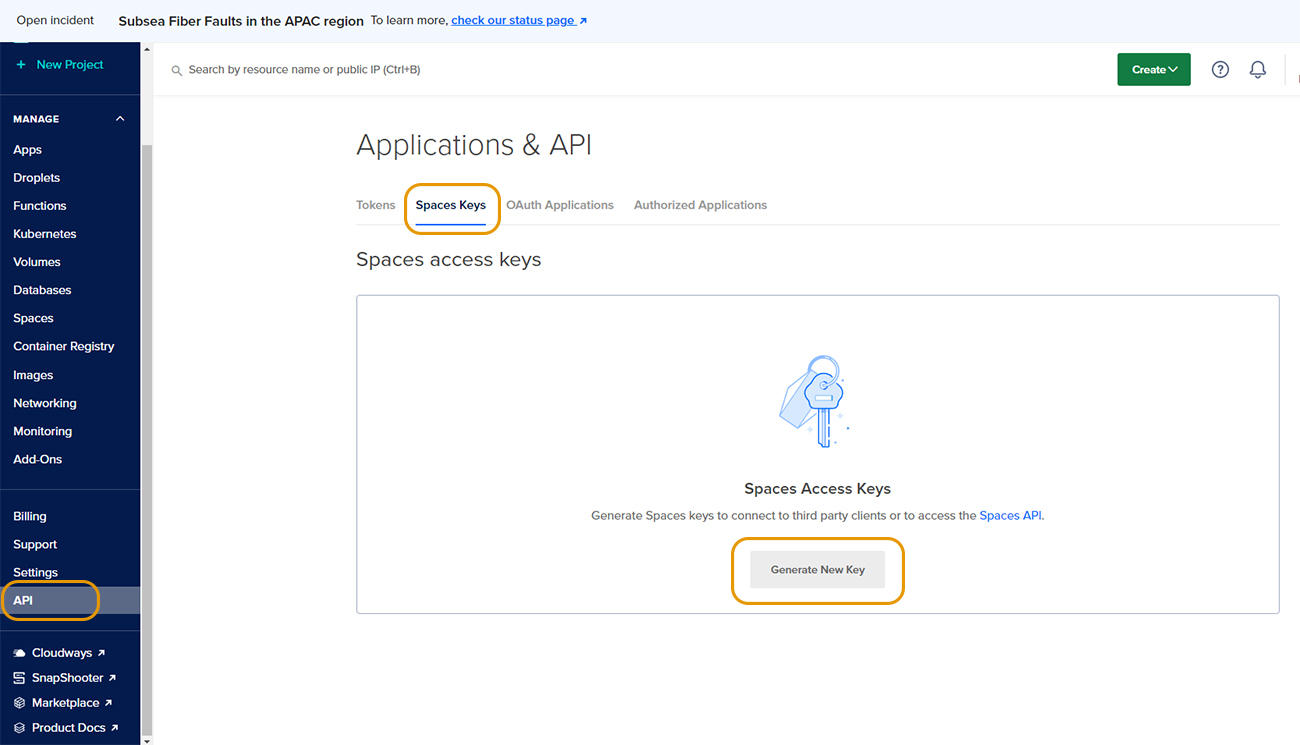


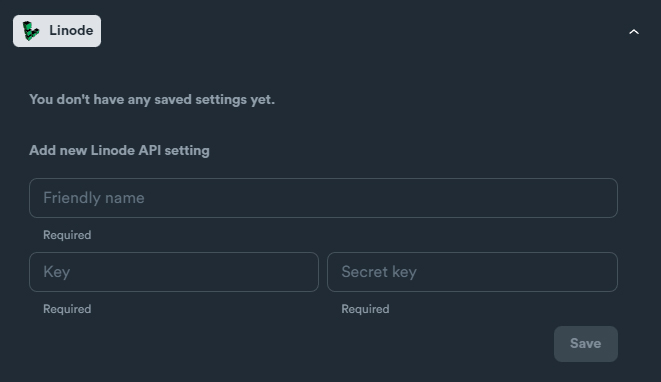

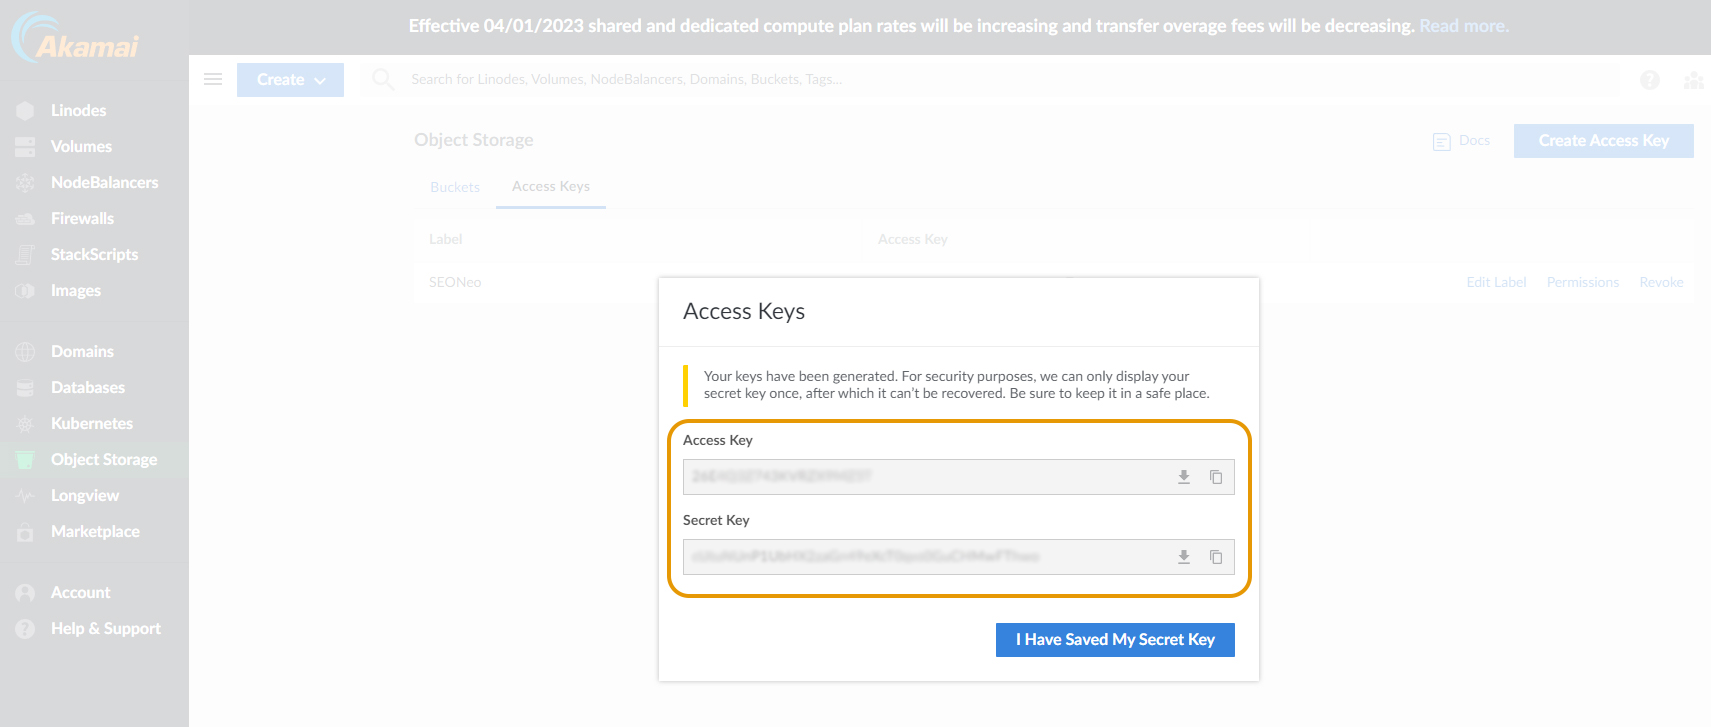
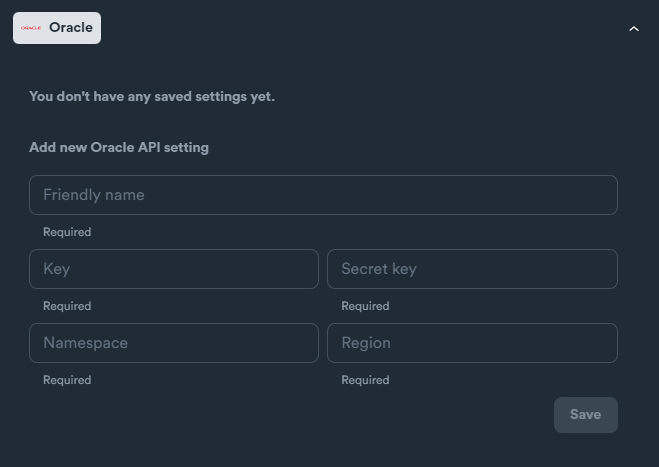

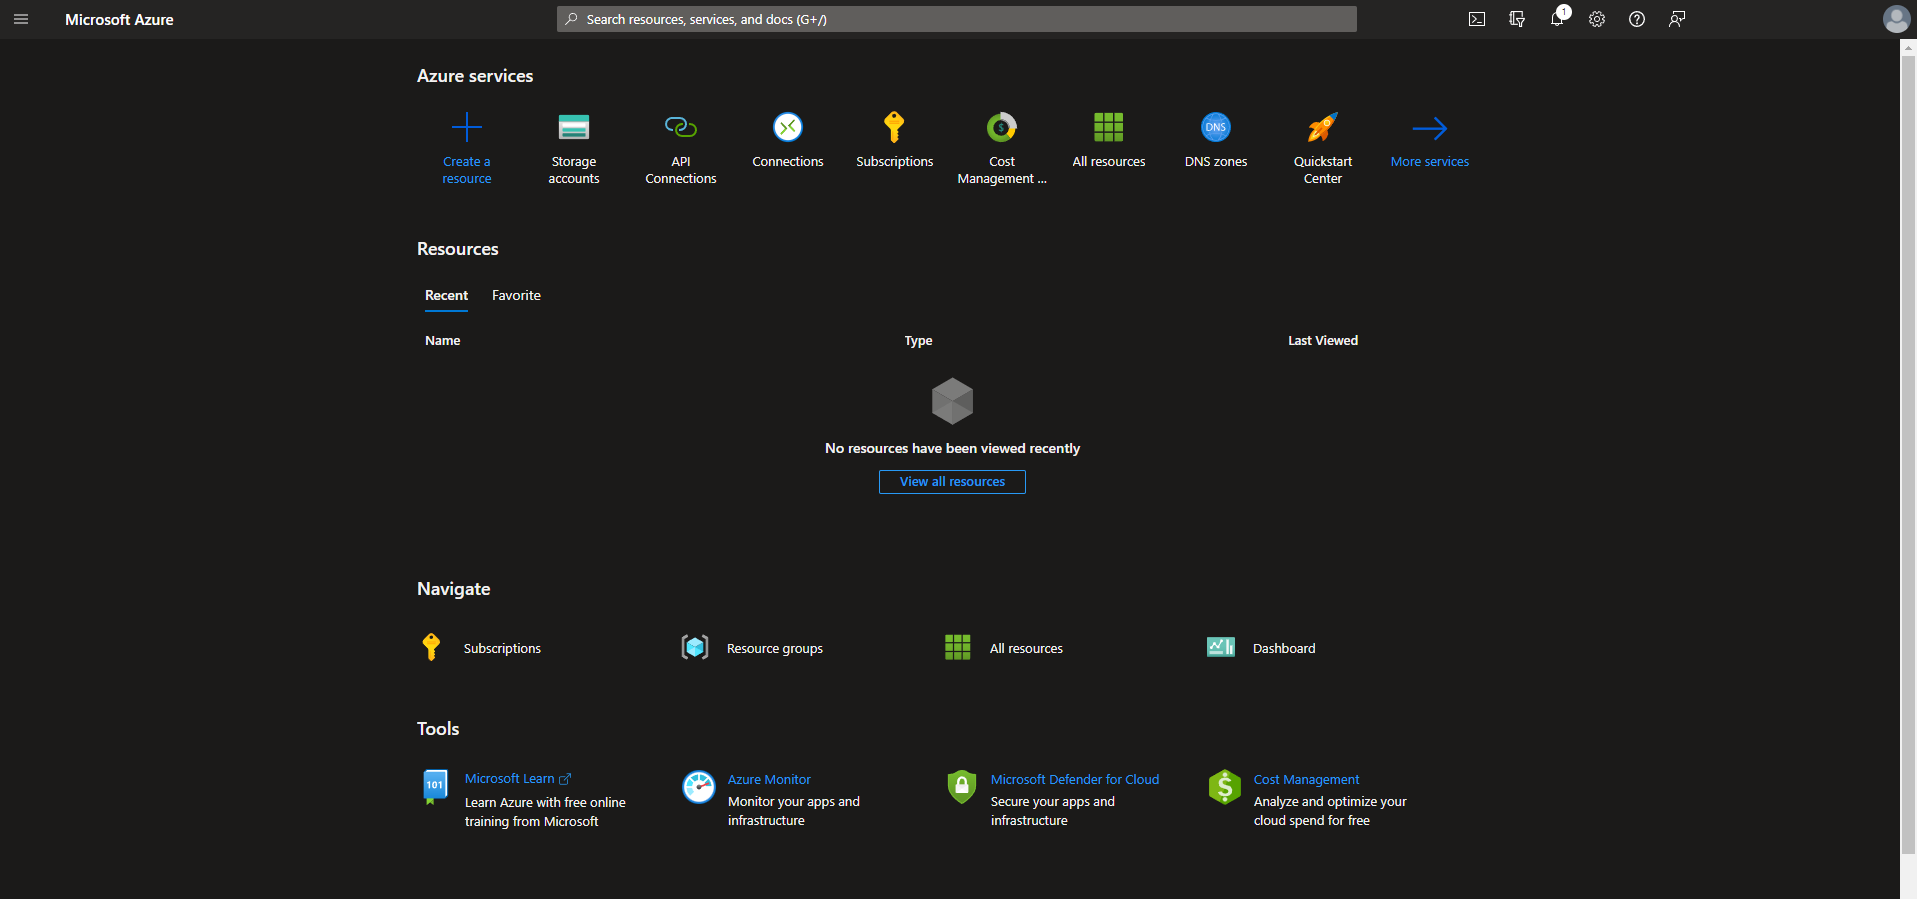

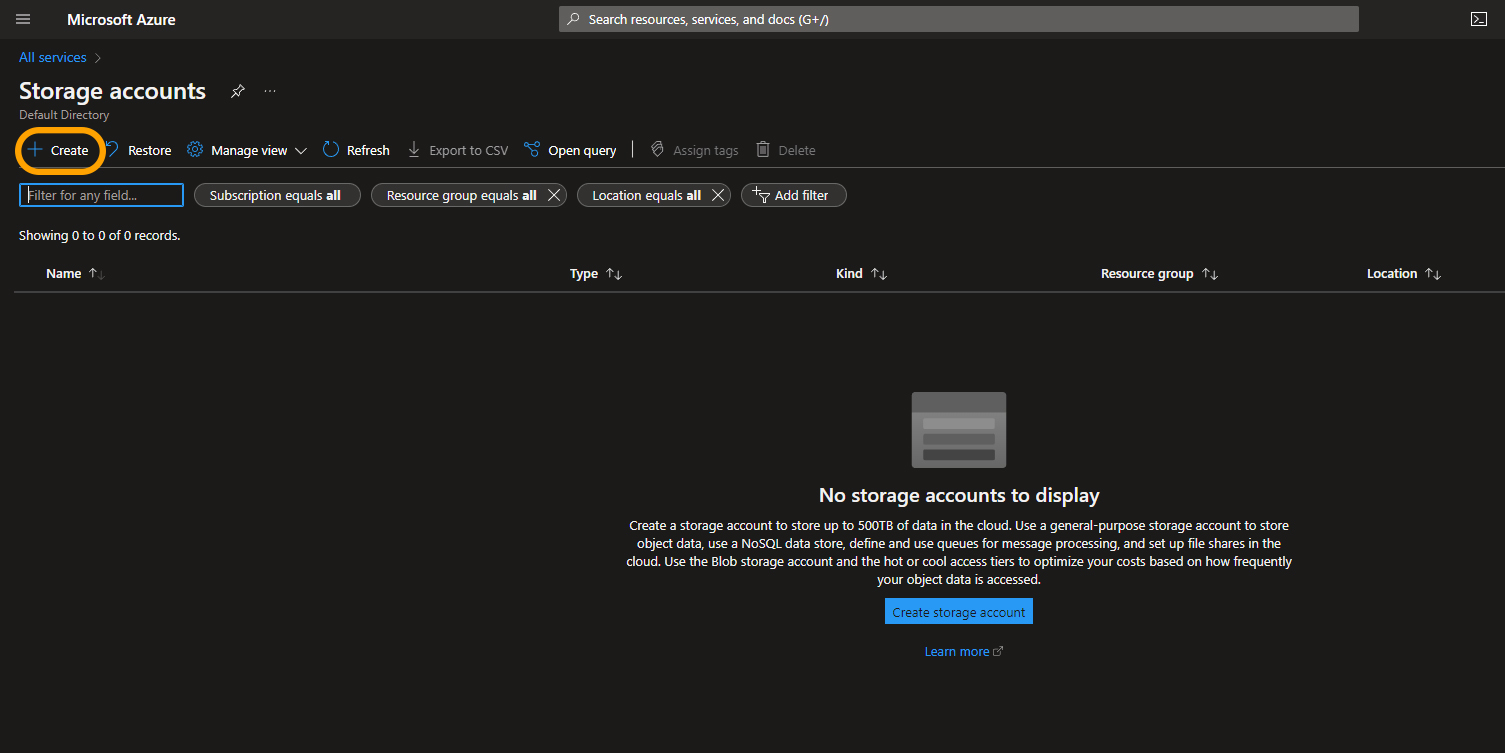
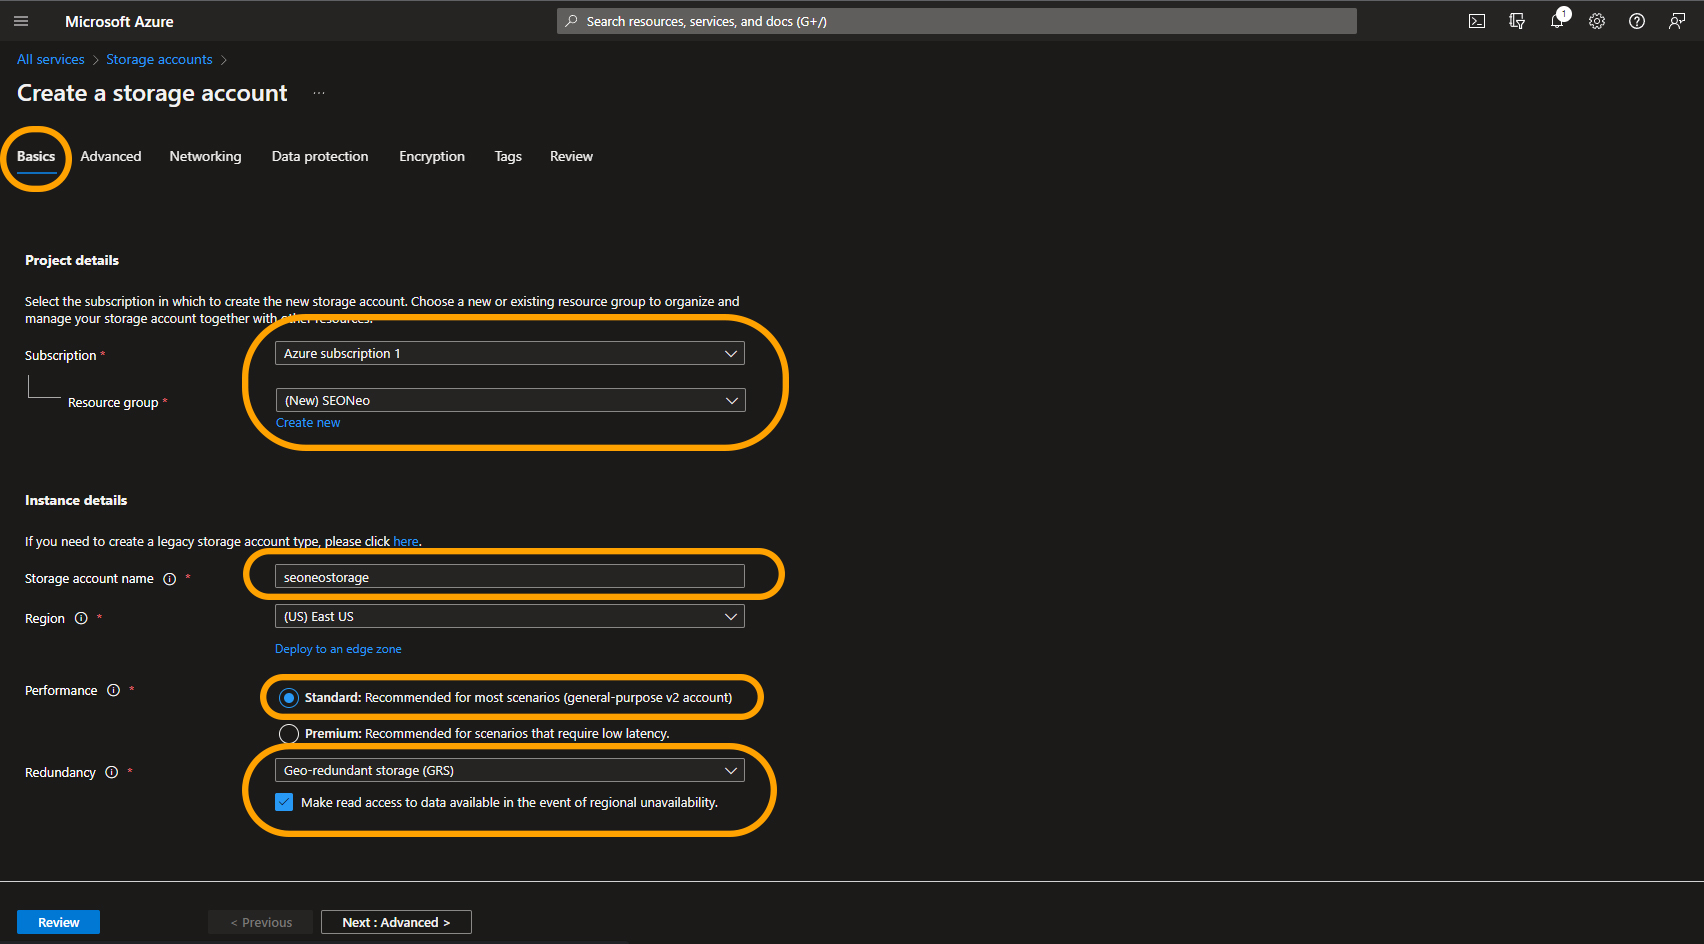
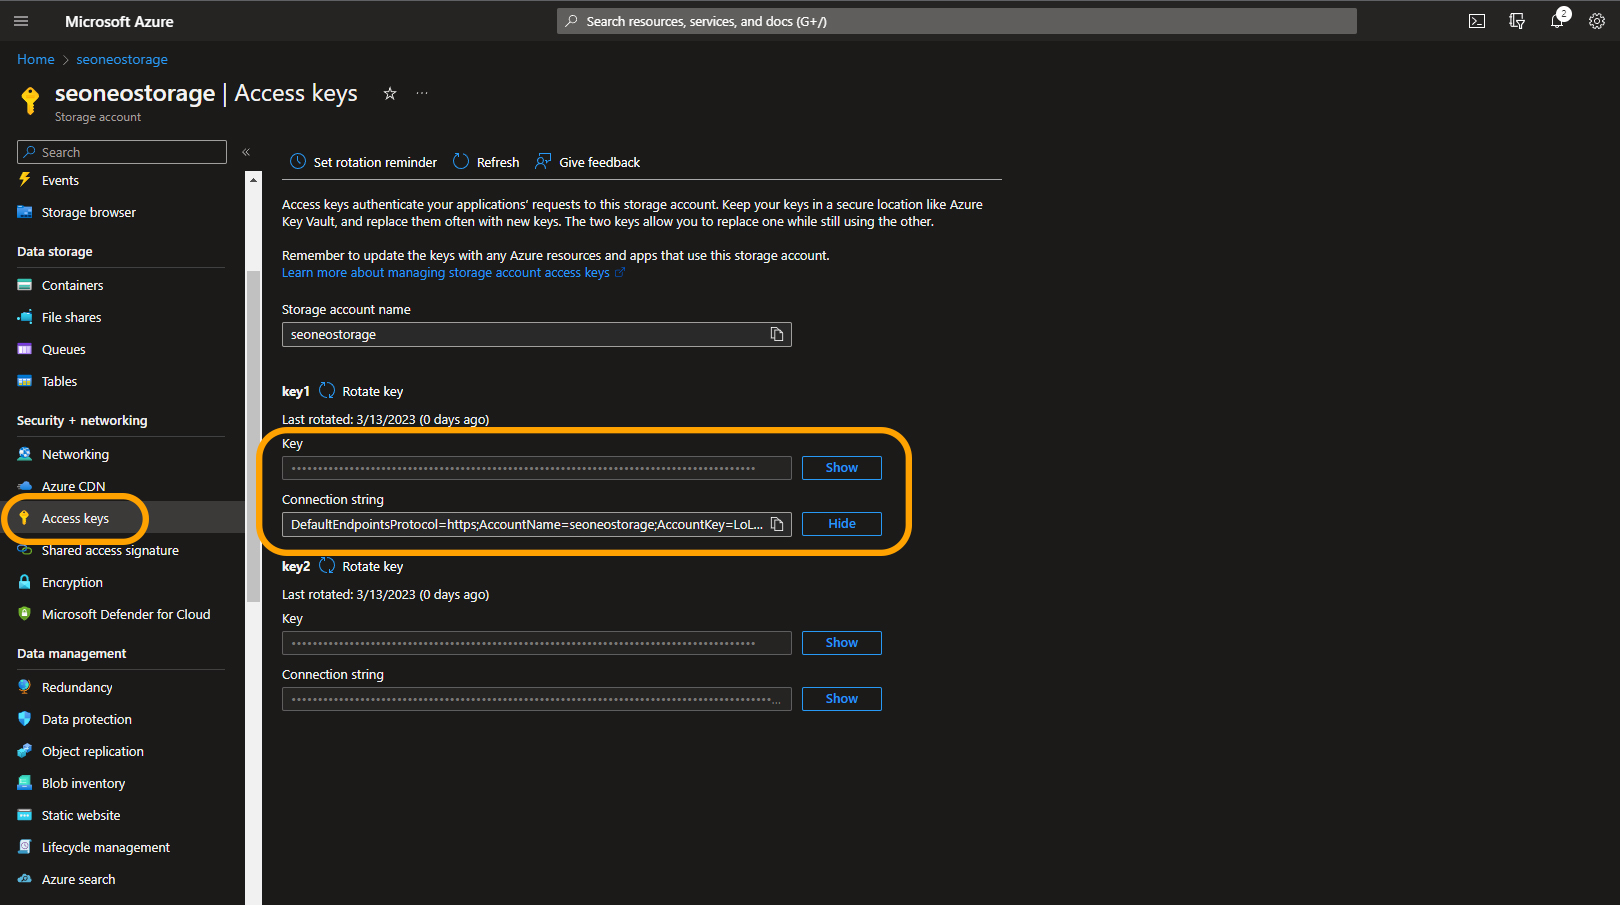
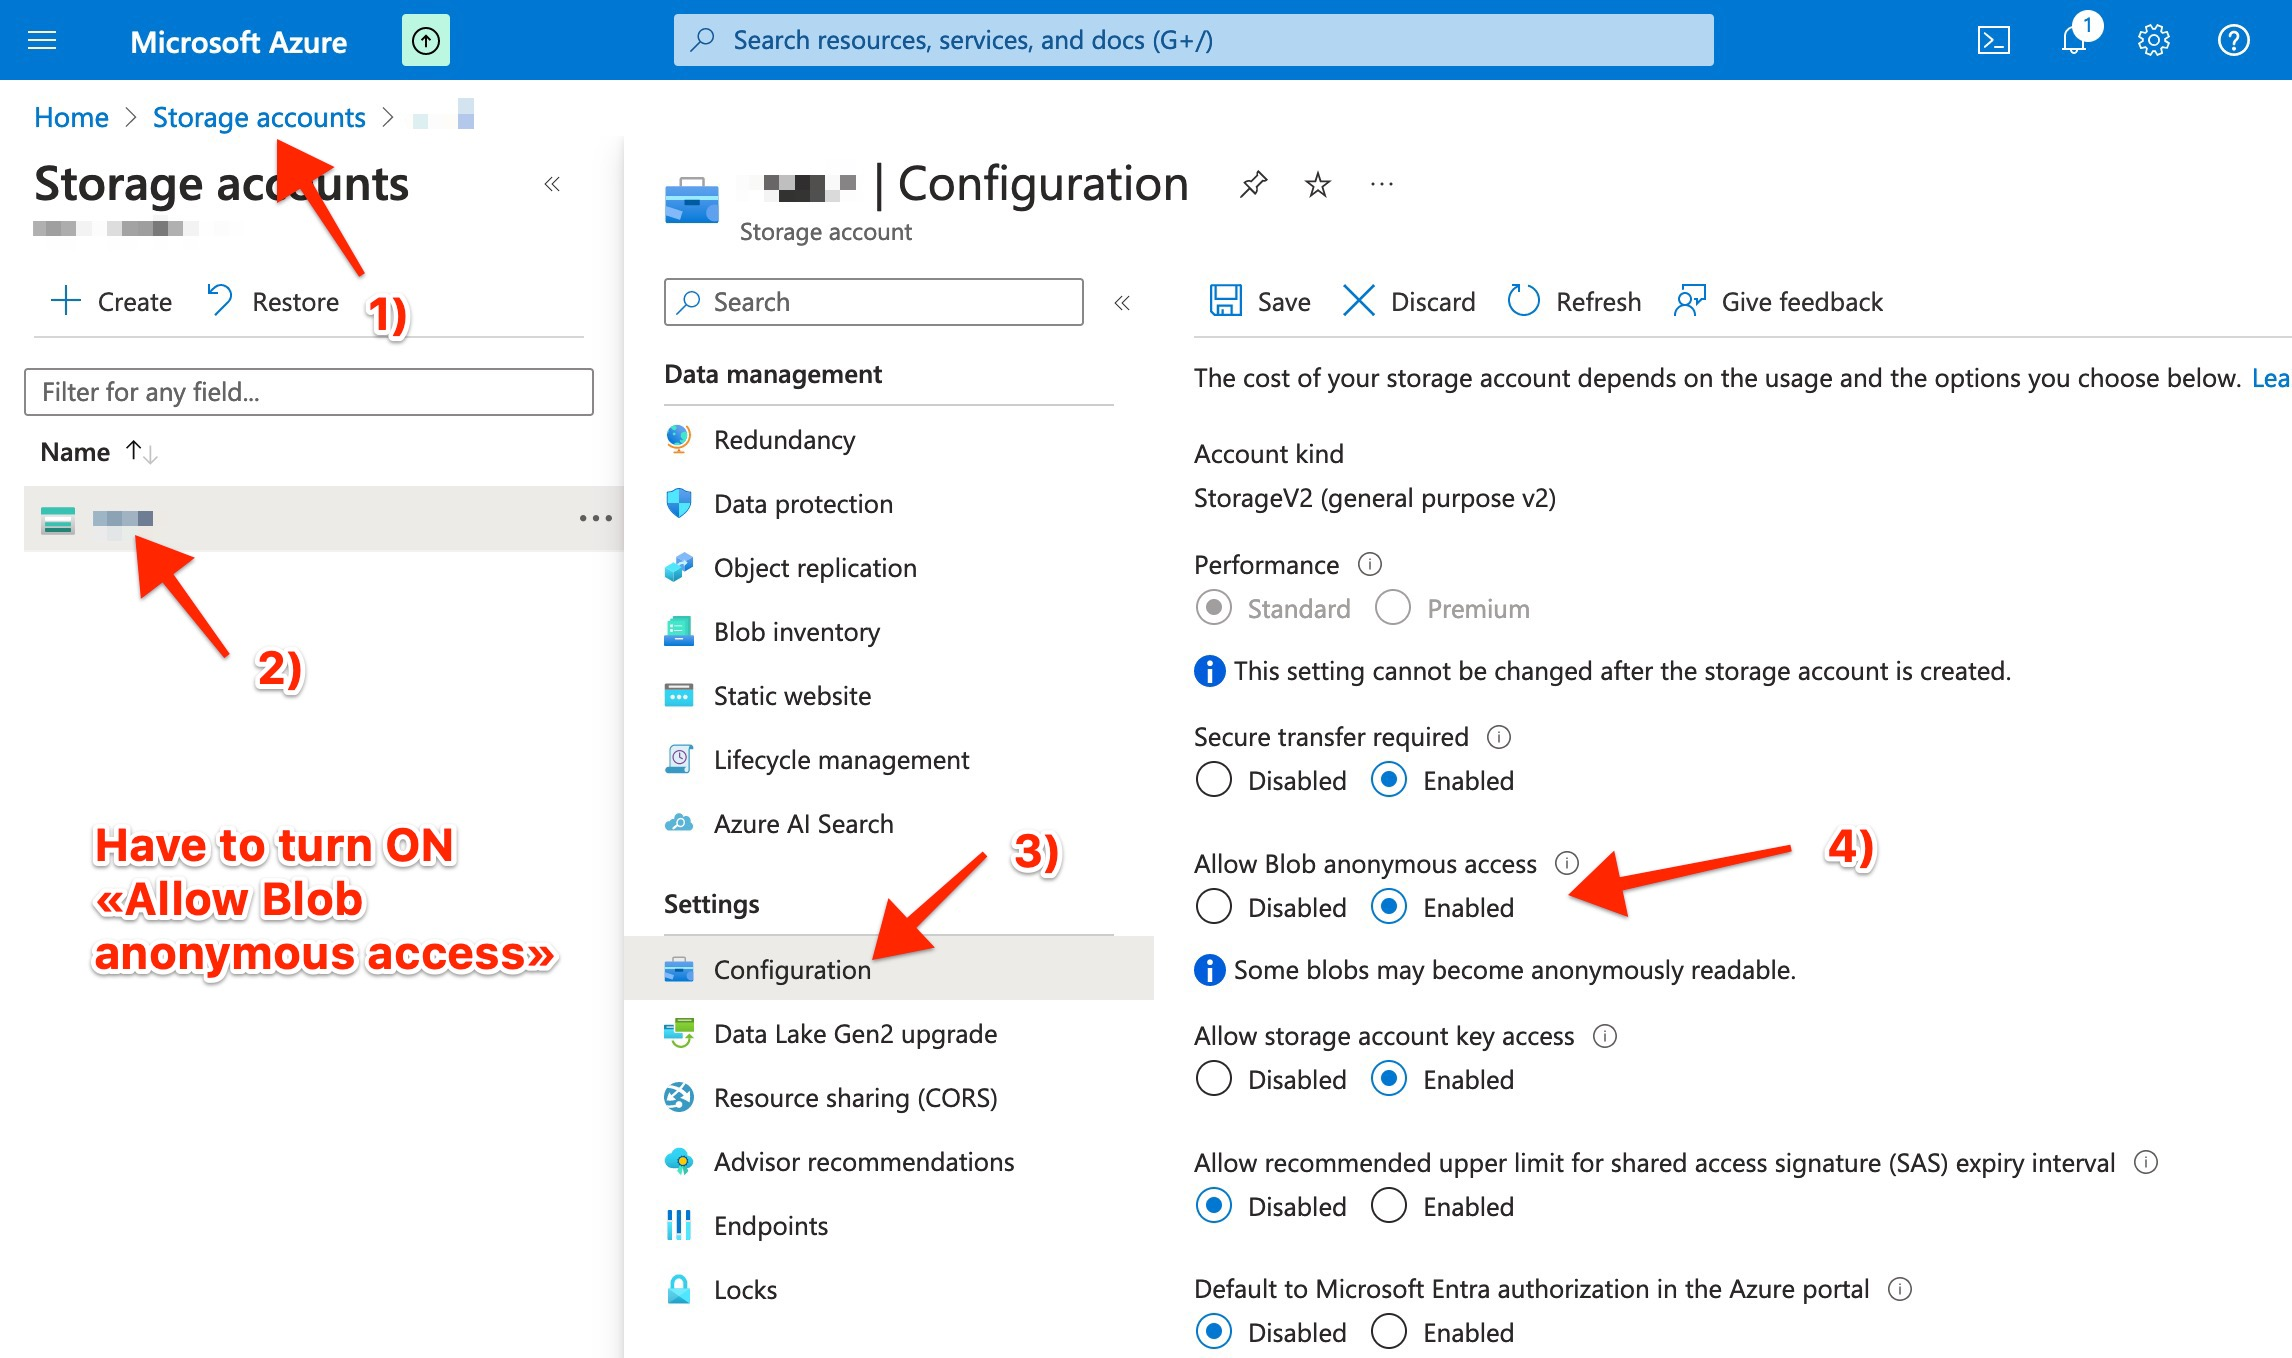


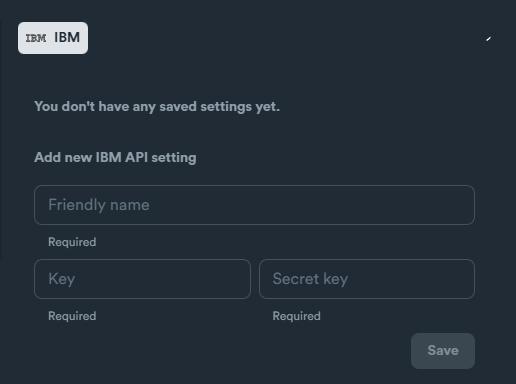


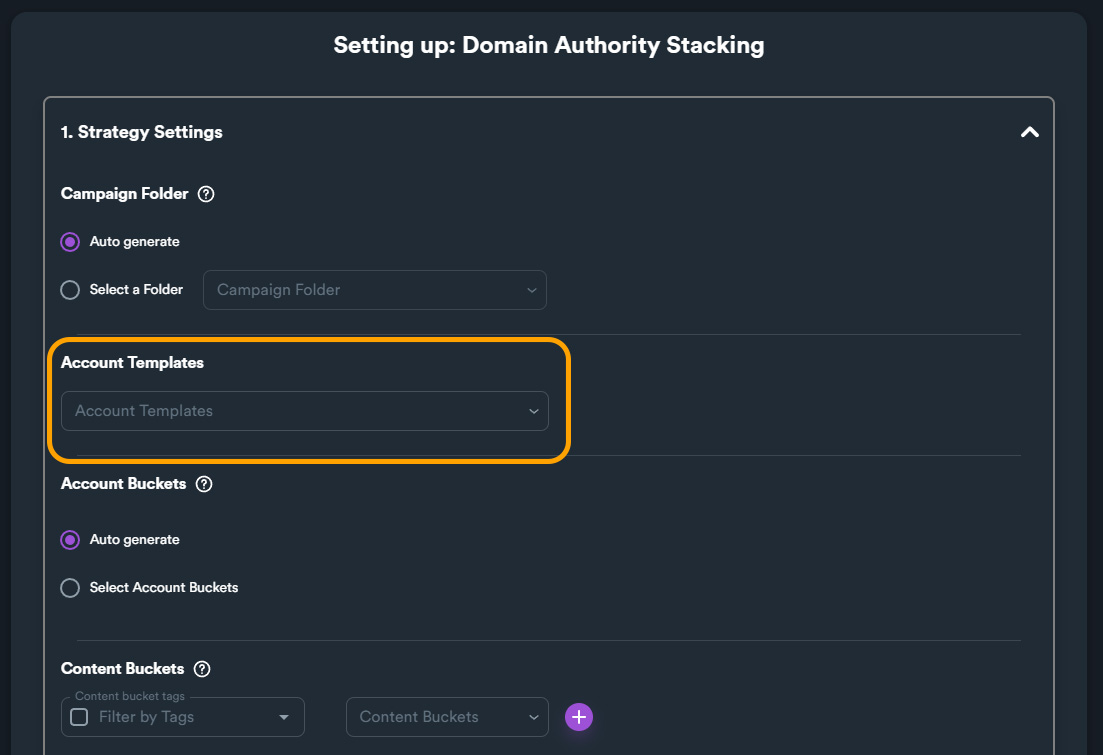

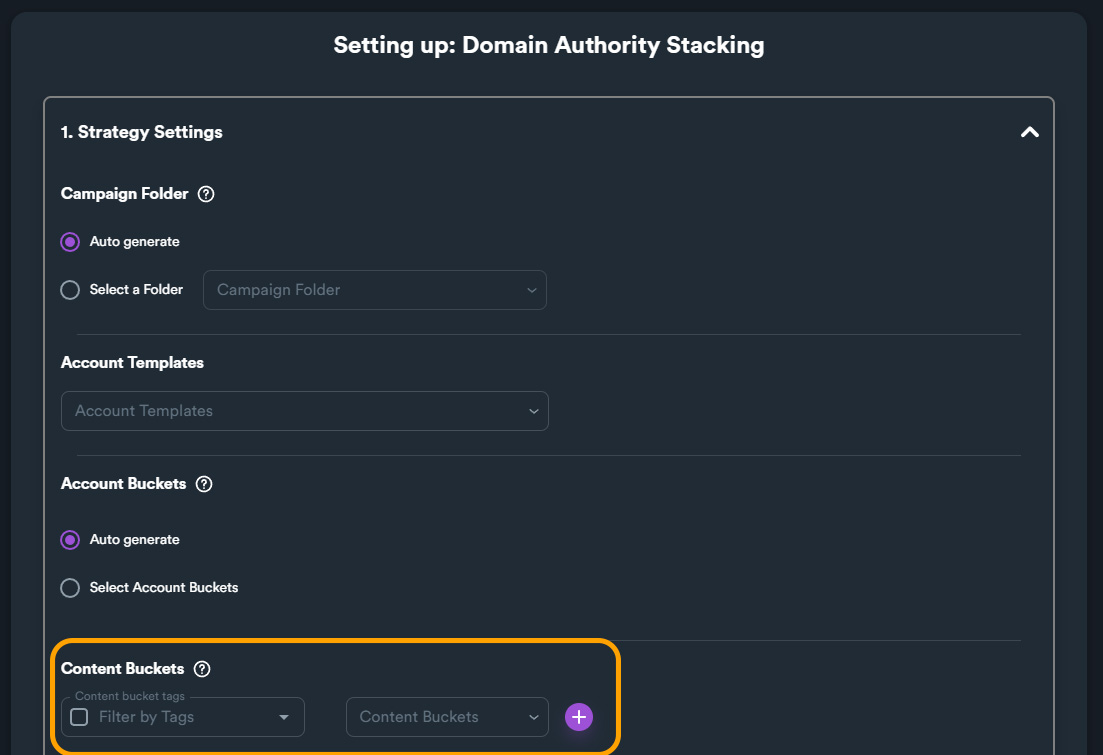

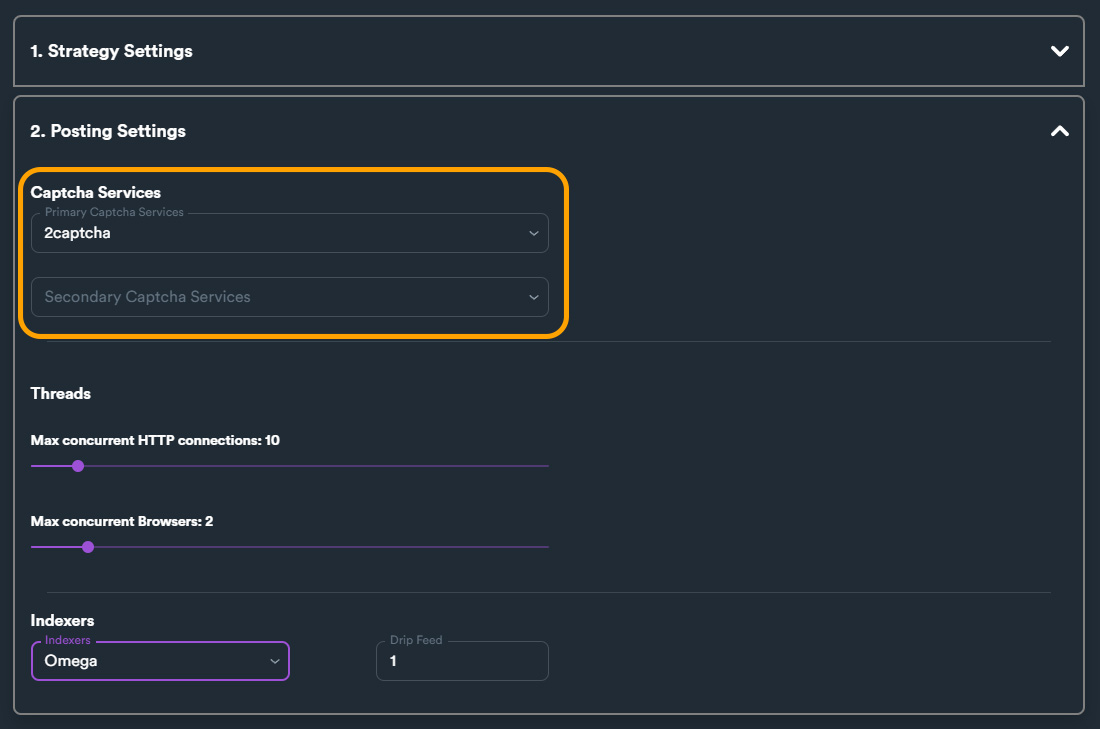

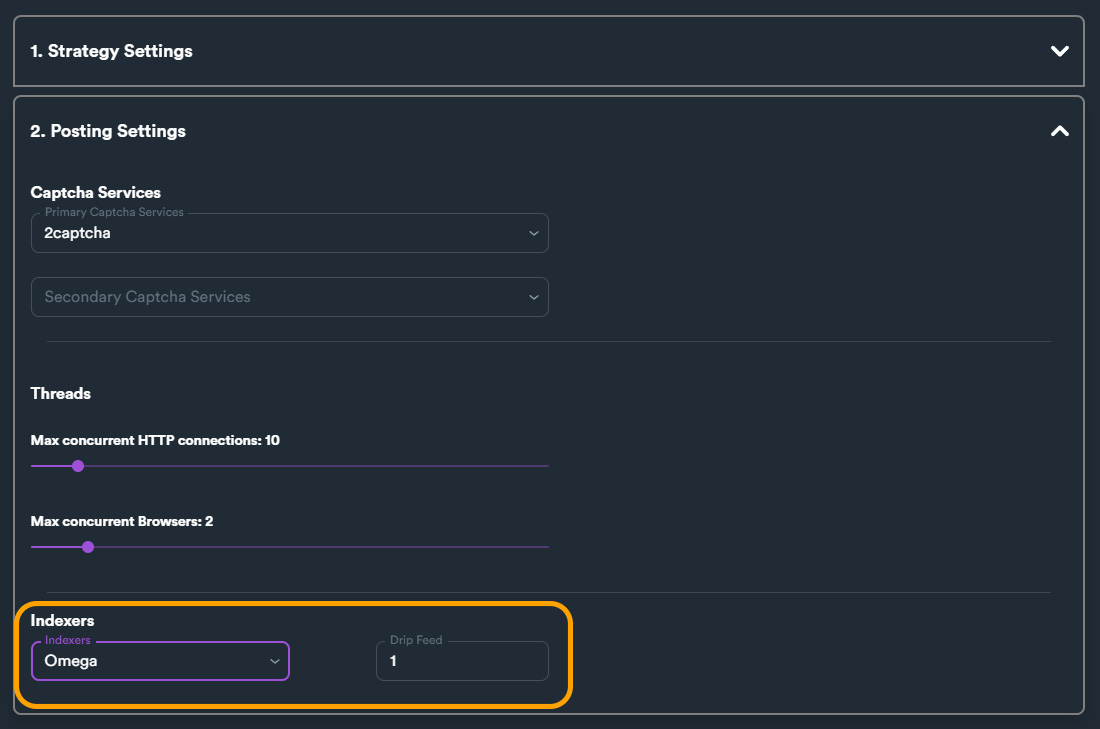


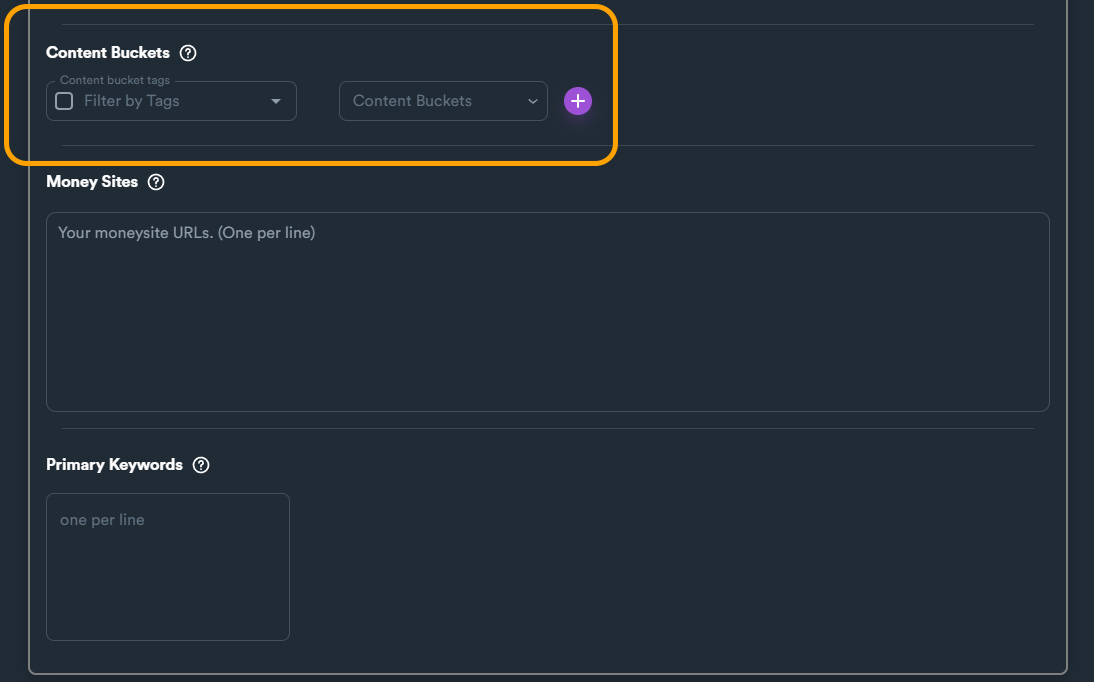


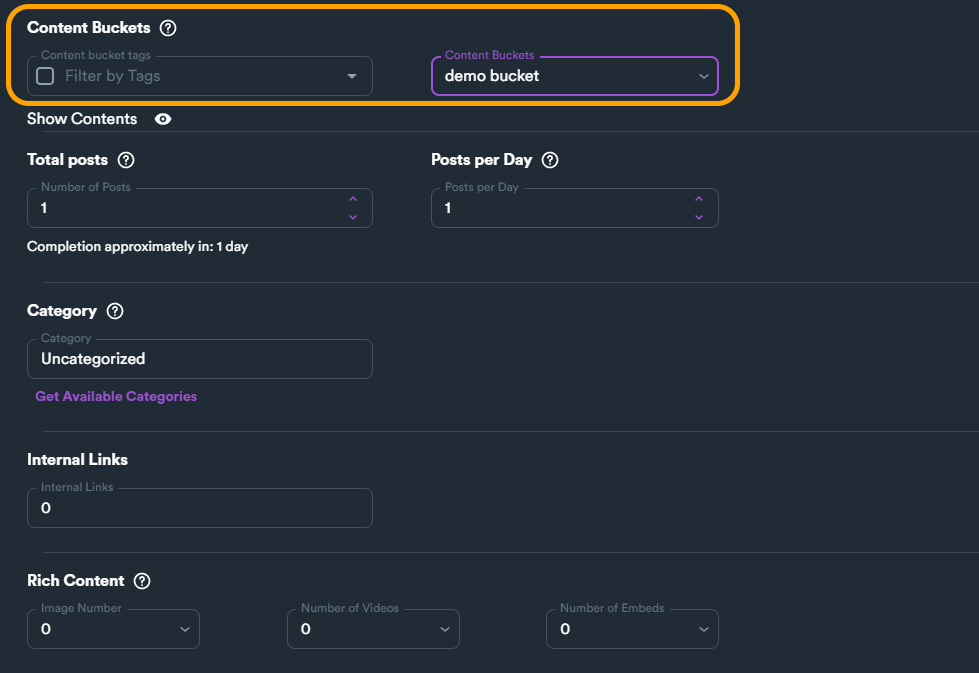


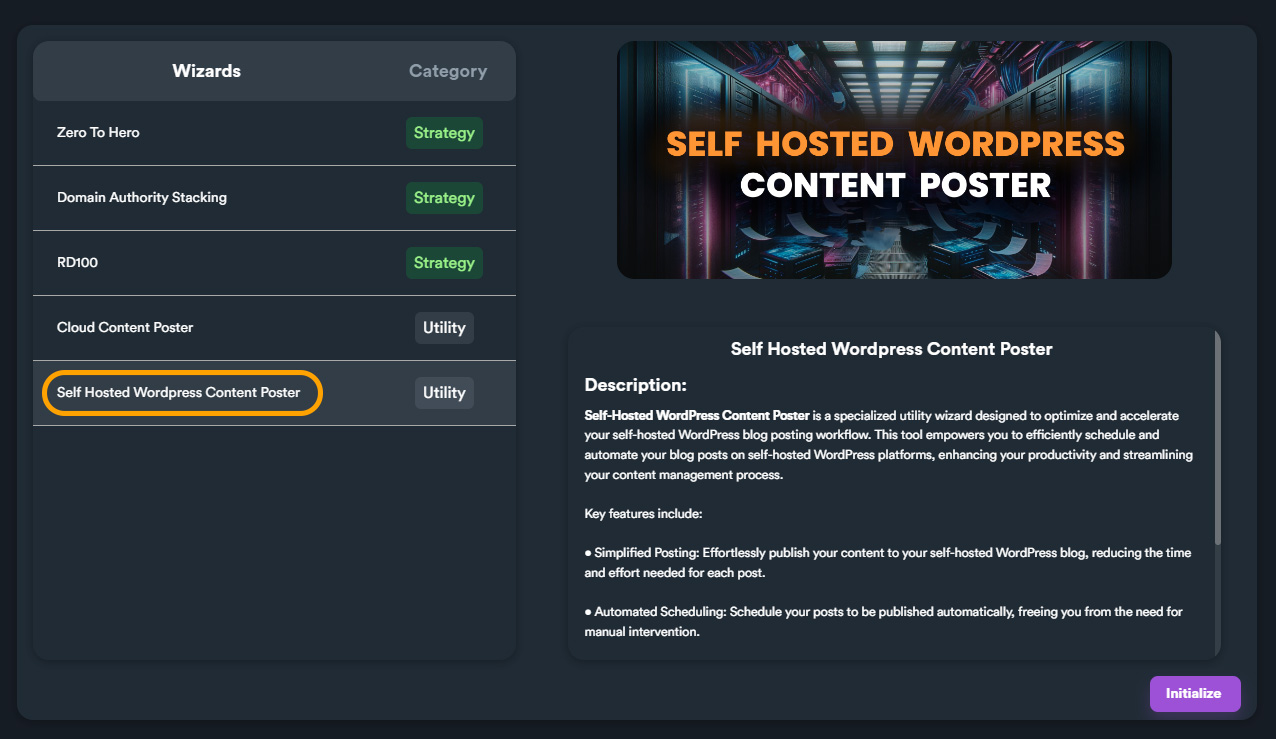
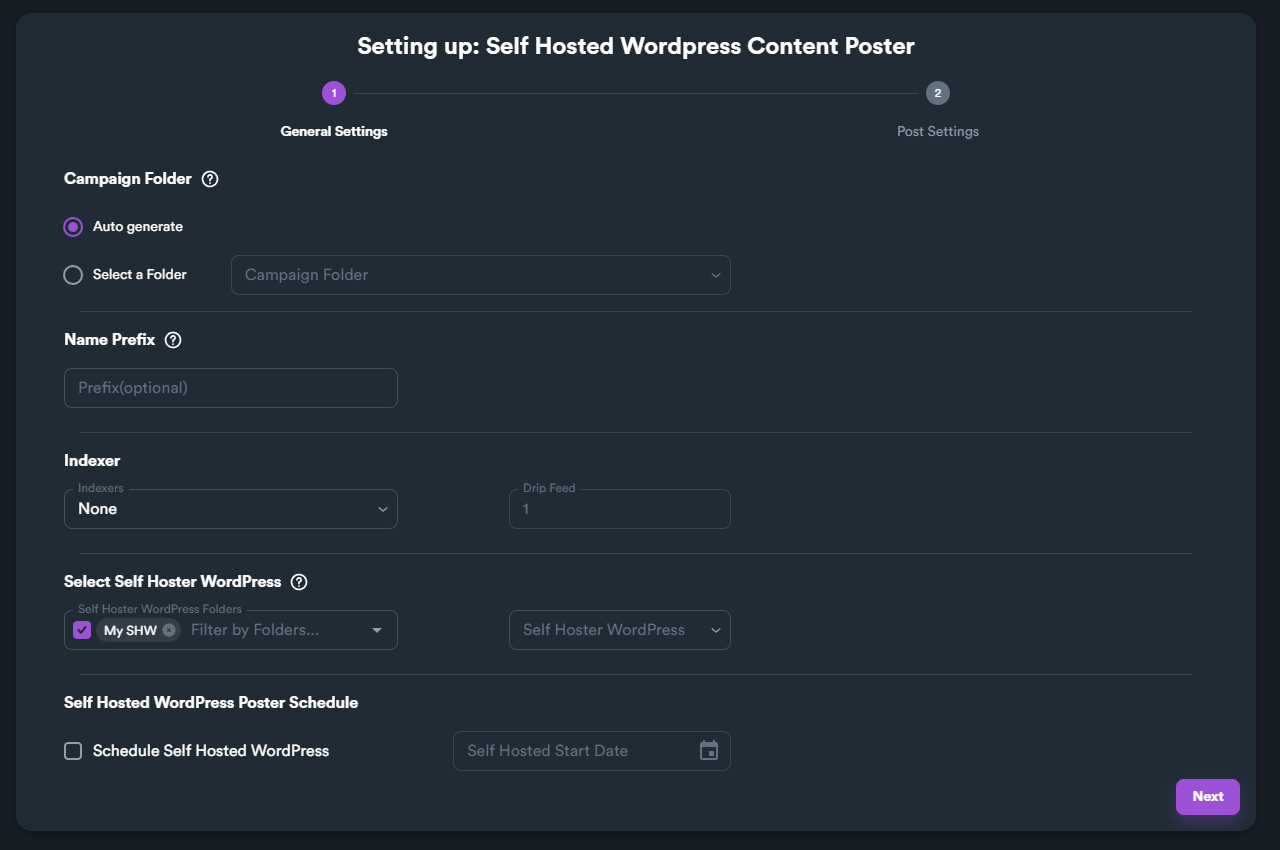
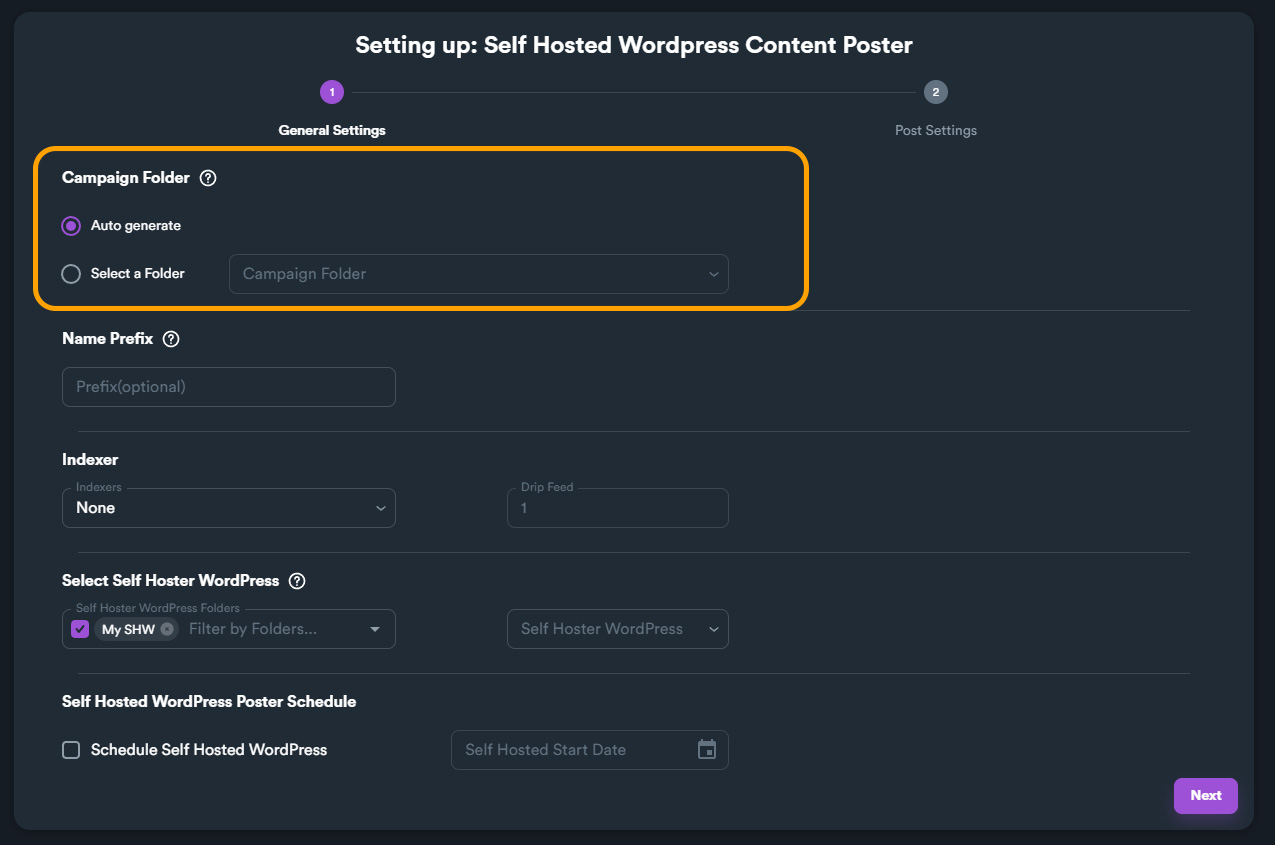

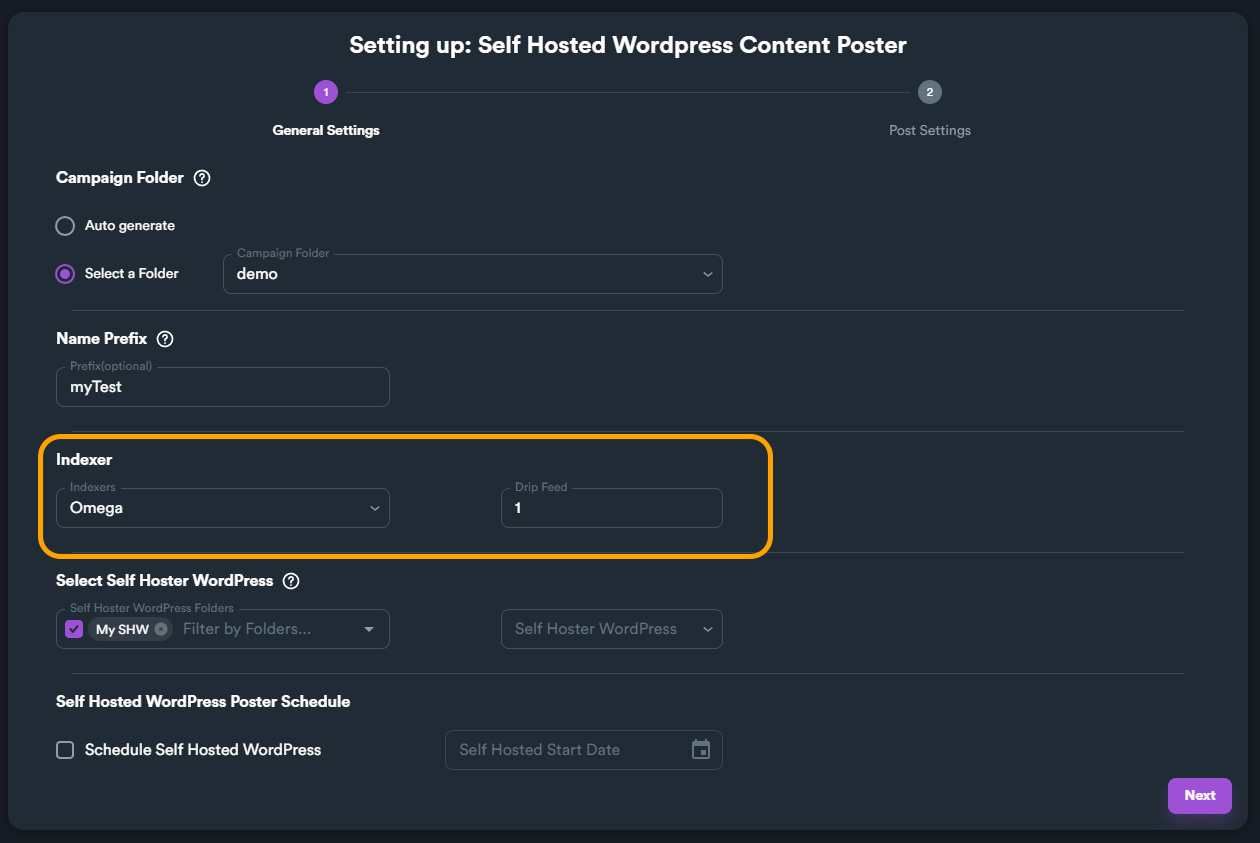
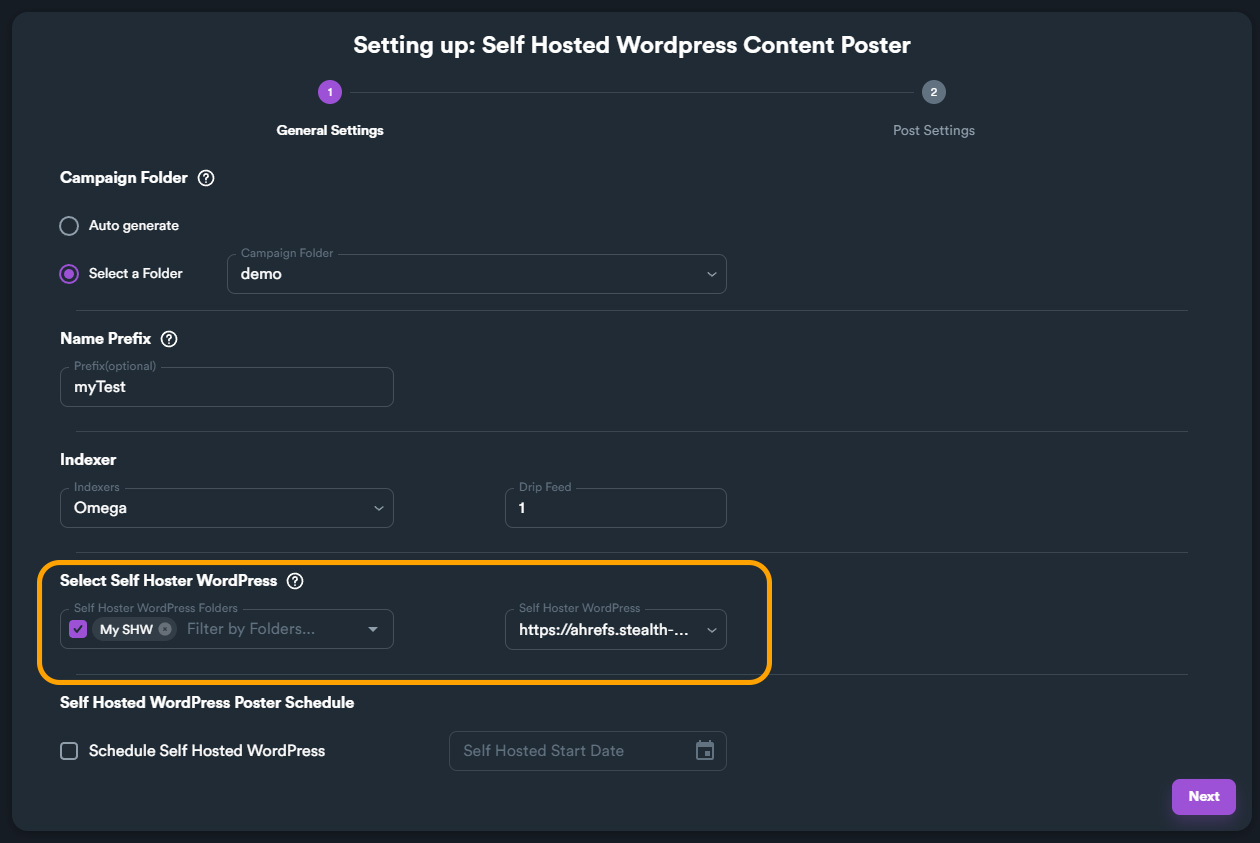
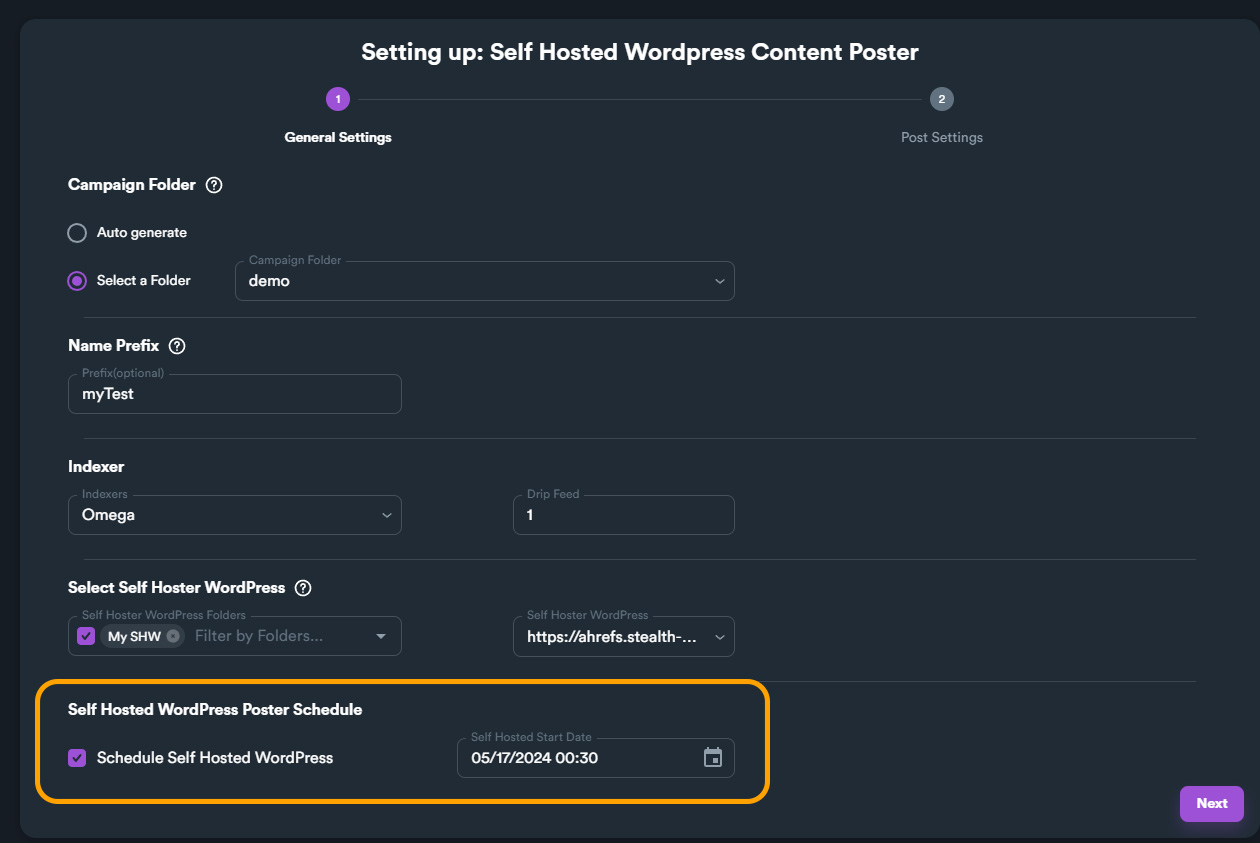
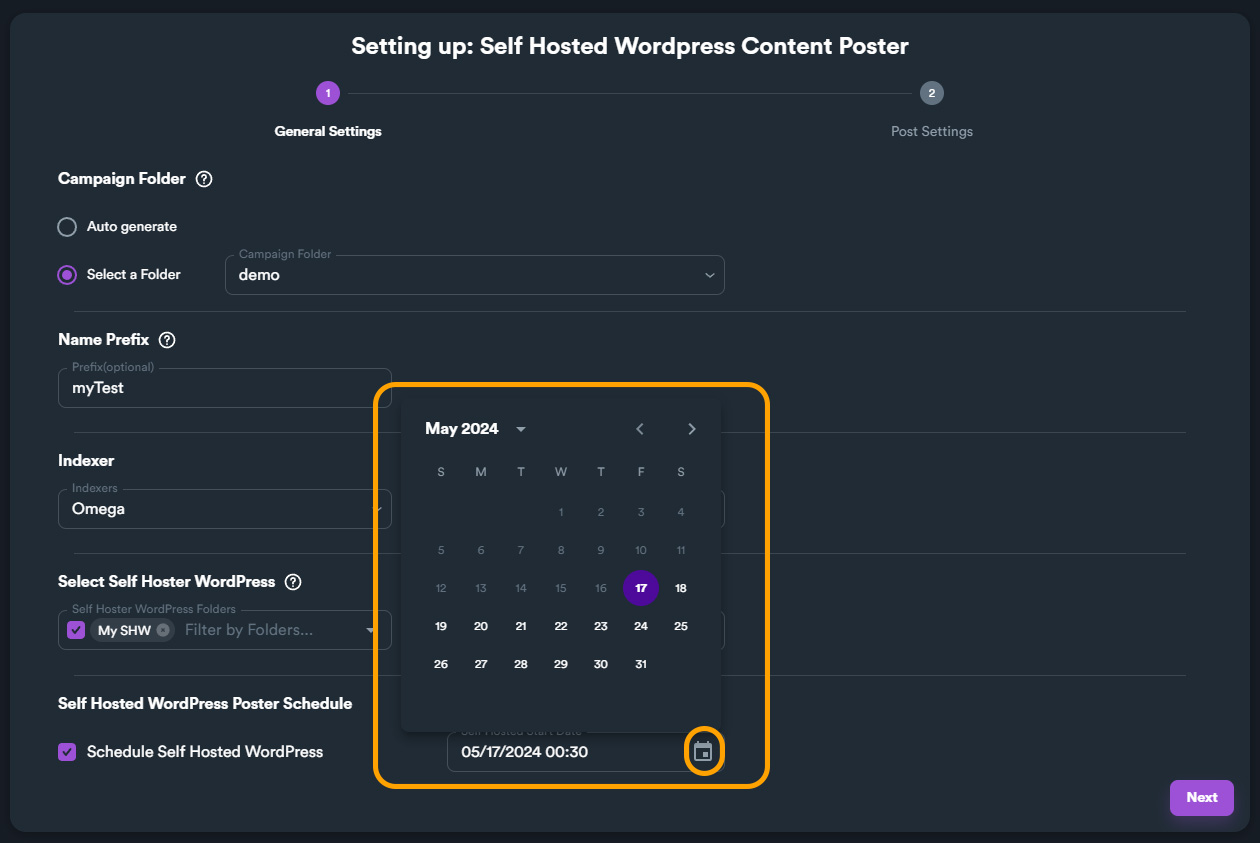

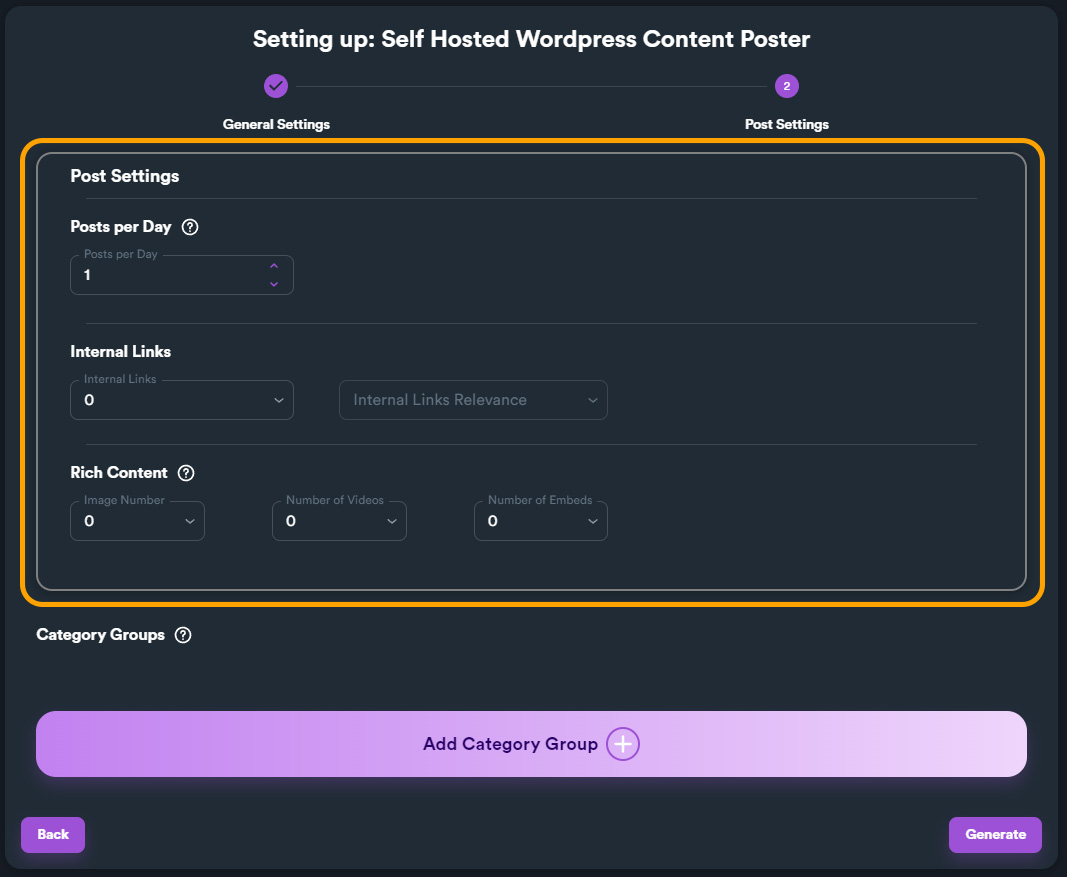

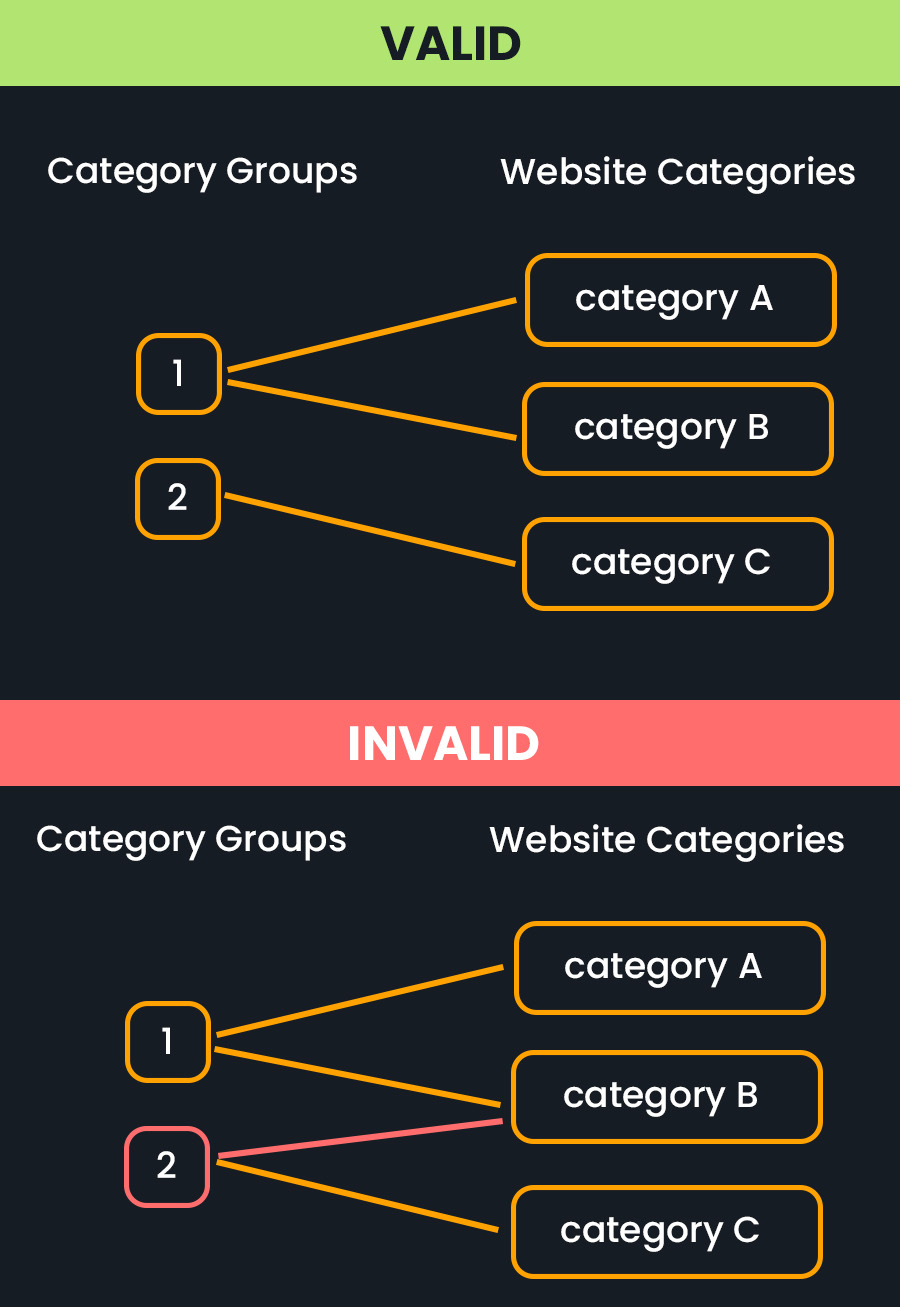


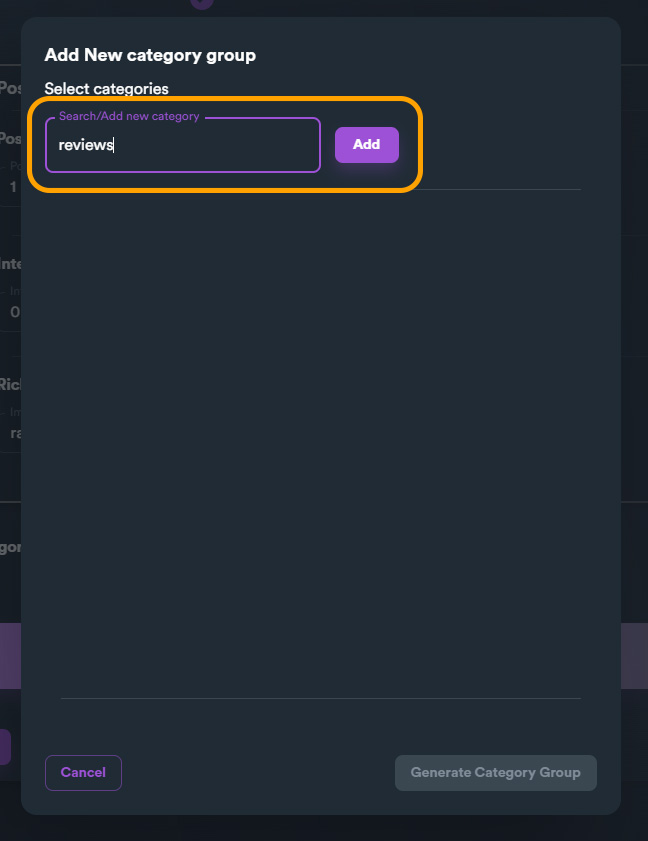
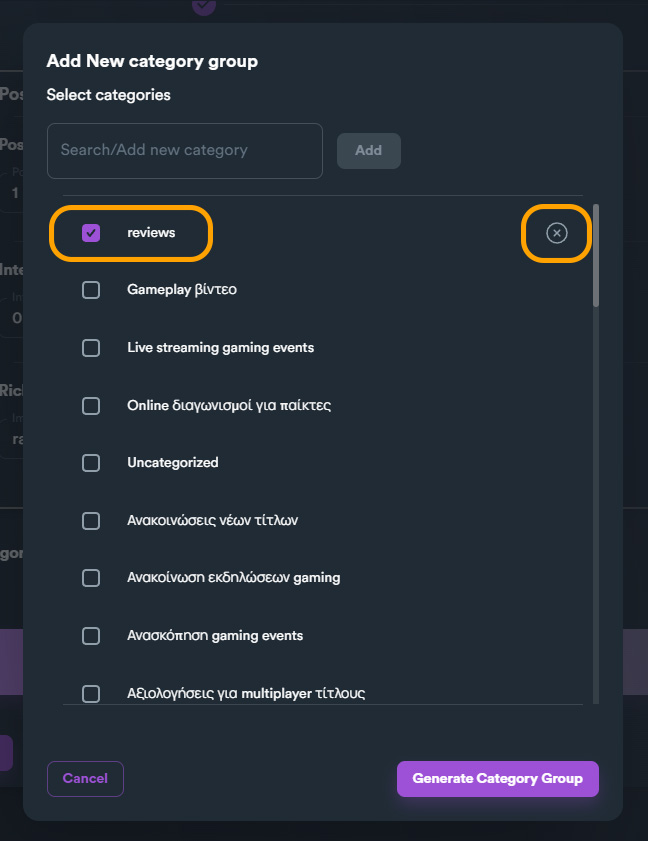

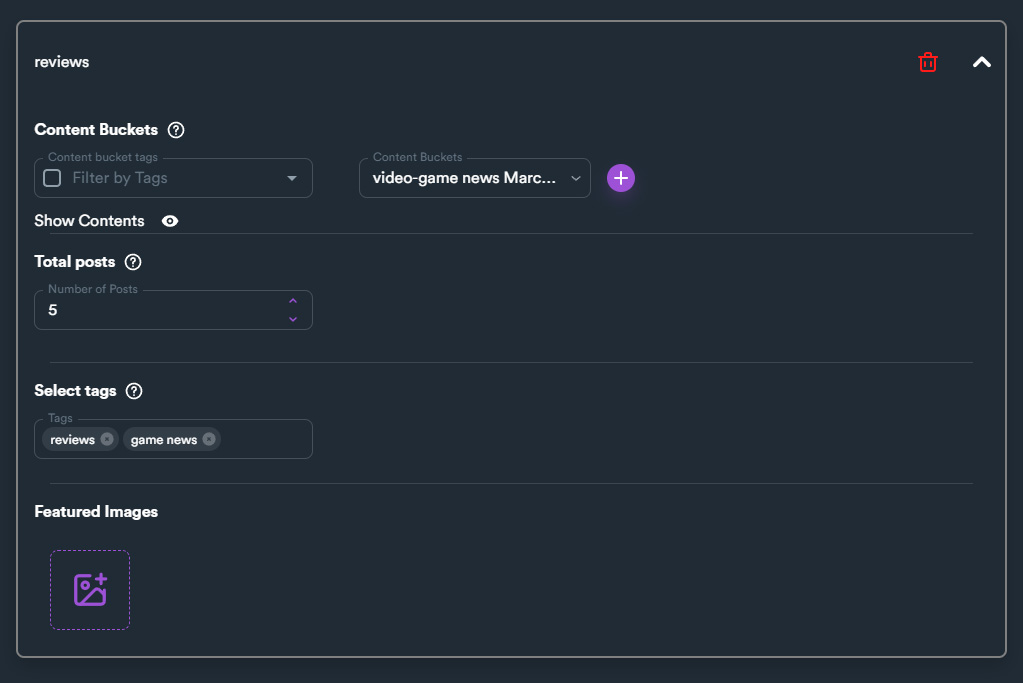

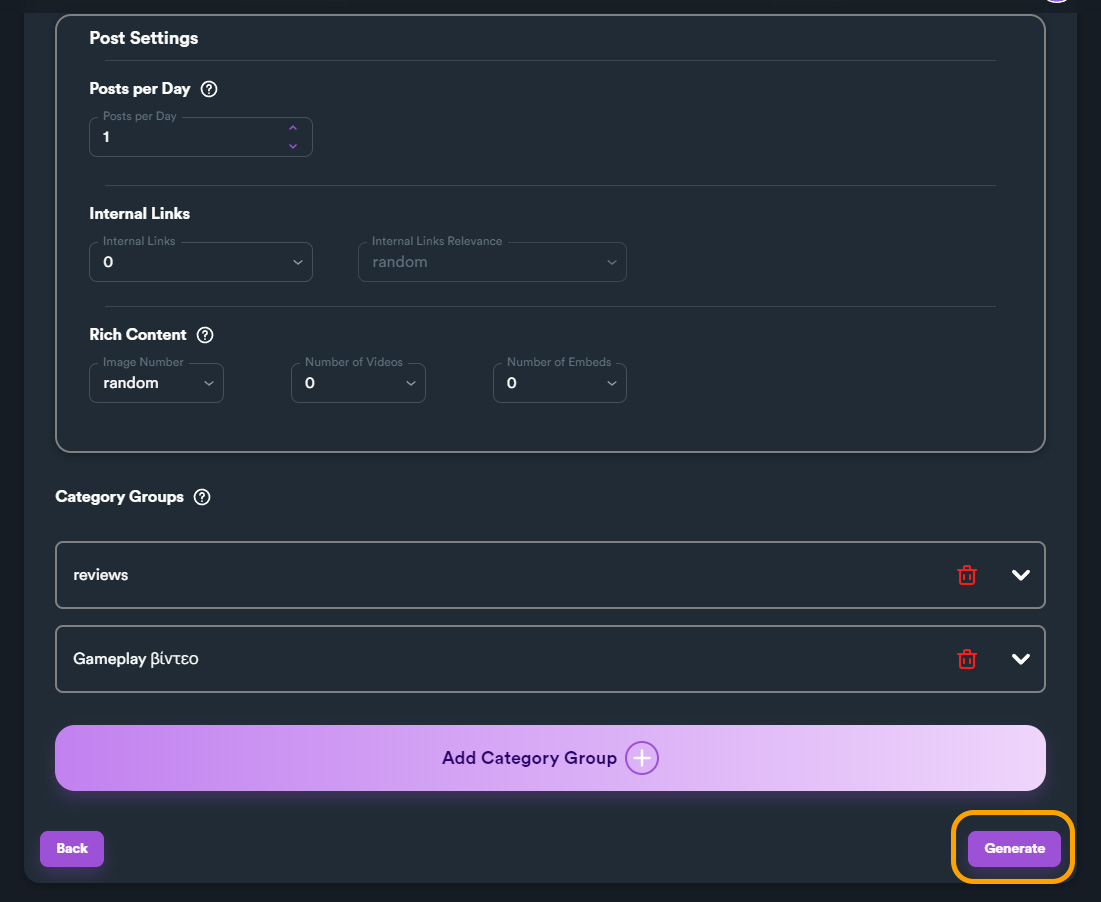


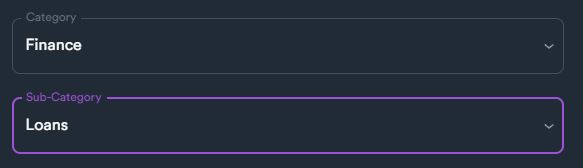






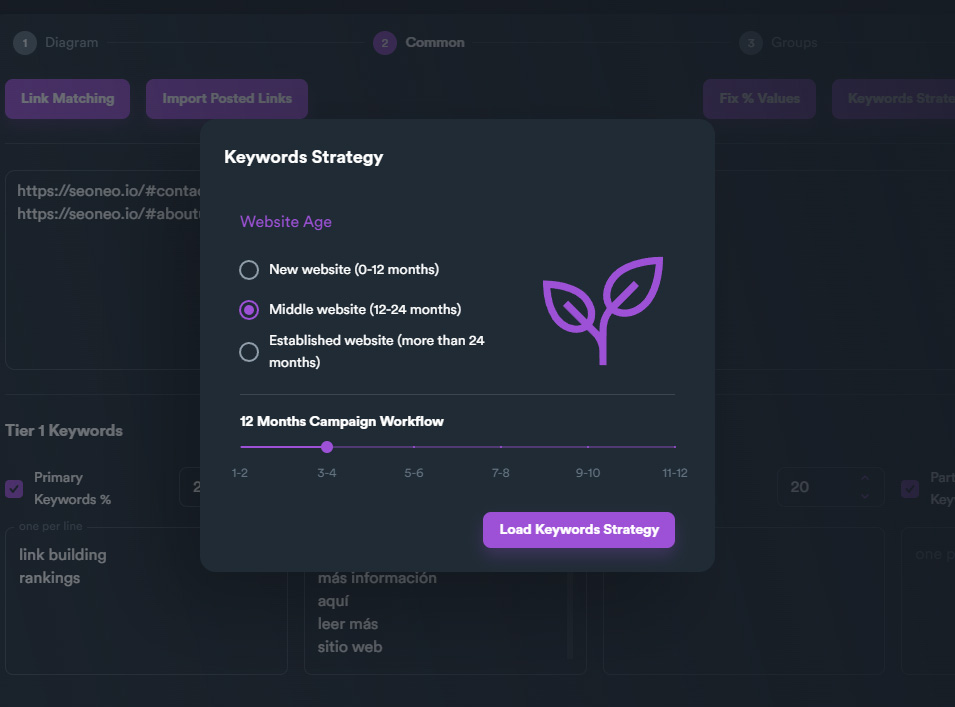


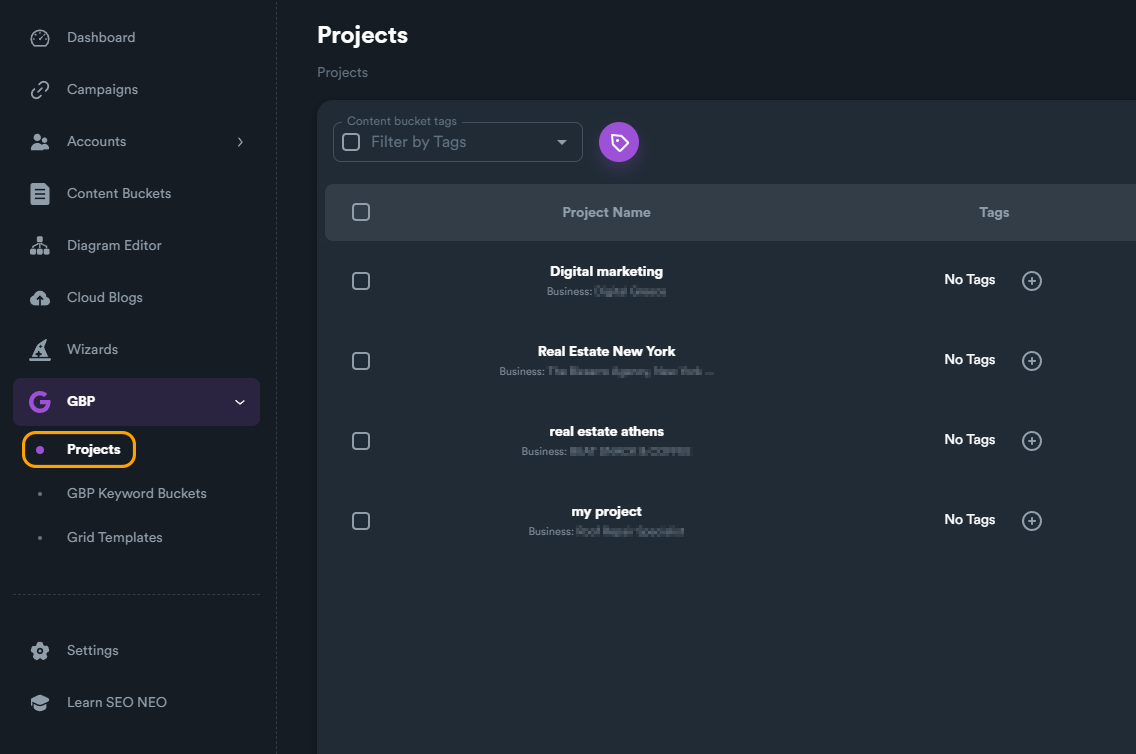
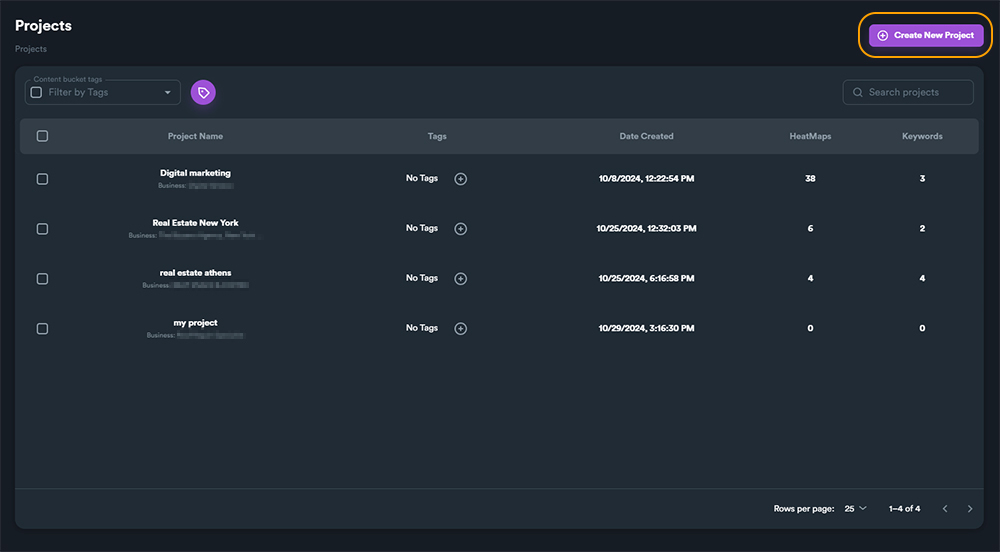
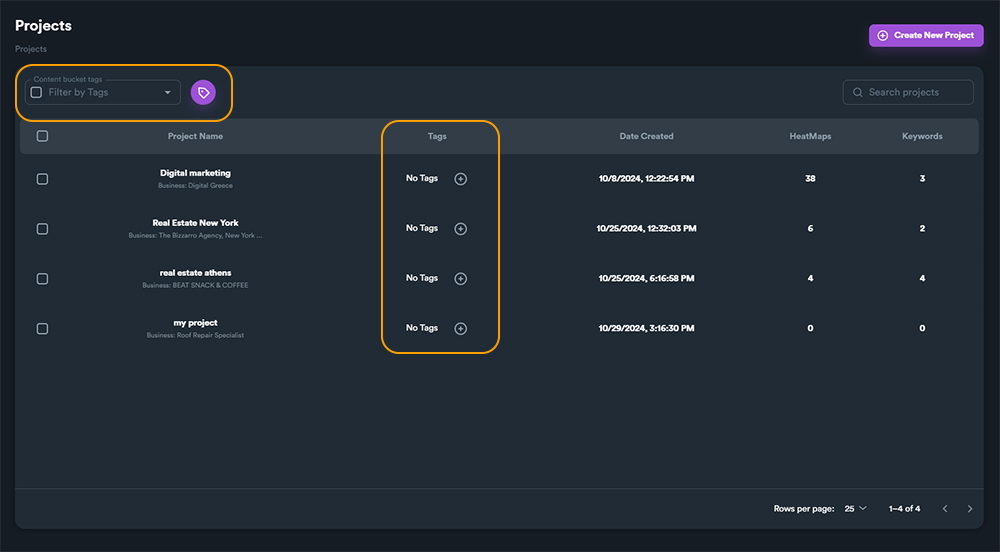 {% endhint %}
After clicking "**Create New Project**" button a new window will load where you can enter all your project details.
{% endhint %}
After clicking "**Create New Project**" button a new window will load where you can enter all your project details.